We've already captured
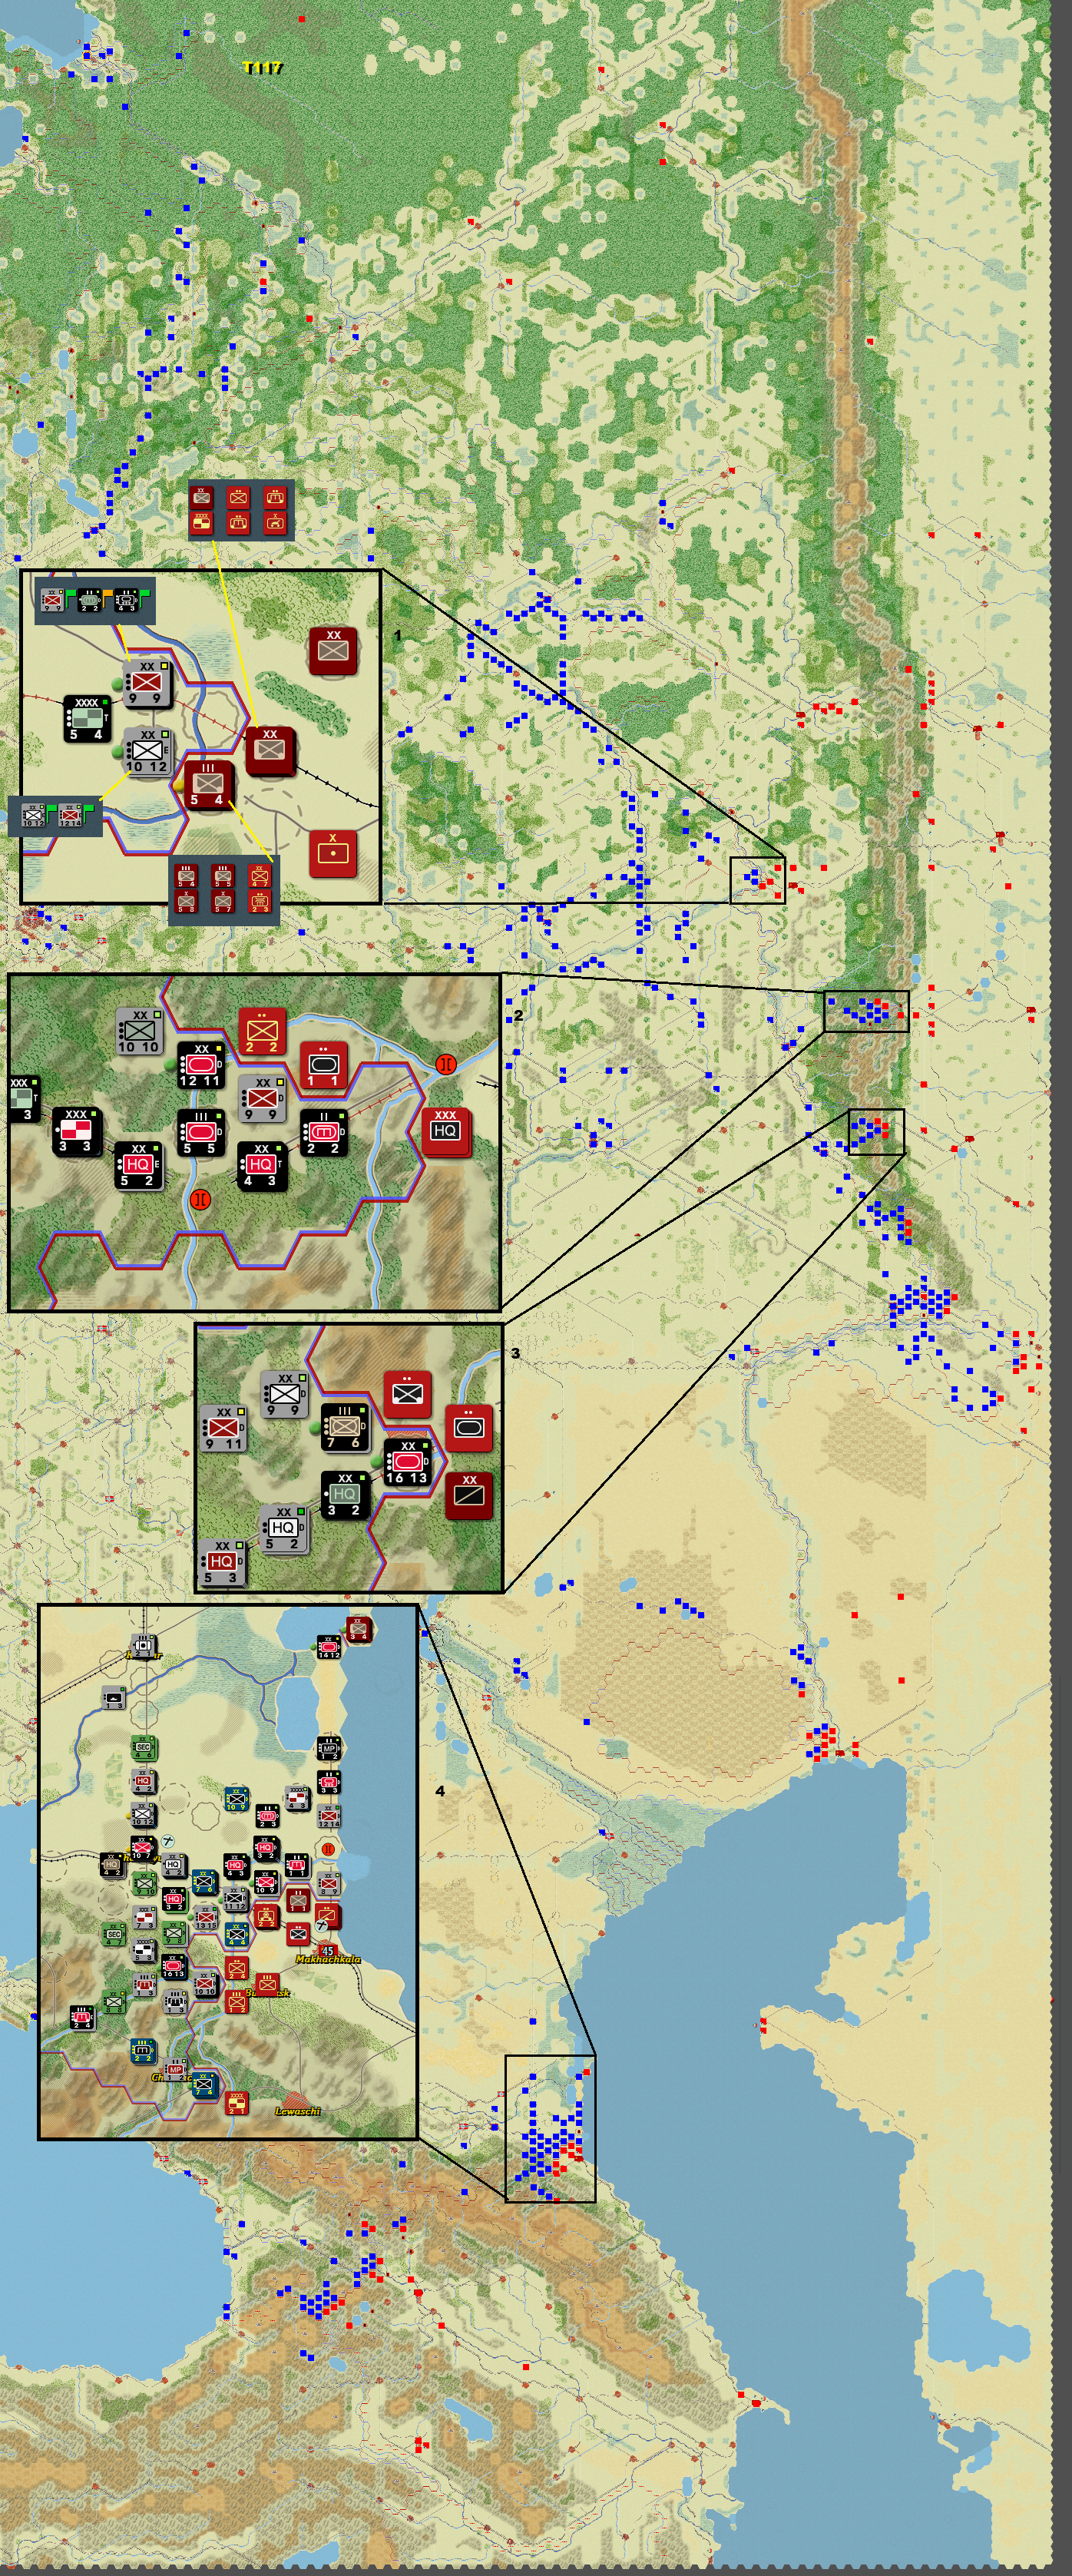
Archangel so I'll just include the part of the map that has action going on to save space.
Inset 1 shows a huge stack of Soviet units trying to force the river crossing and I think I'm going to use the engineer unit and the recon unit combination to break the bridge to my 5 o'clock, between the Soviet units. Of course the trick is then to back out of there without losing anybody. So you retreat with the engineer unit first and then the recon unit because the recon unit has a better recon ability and probably won't get fired upon when leaving an enemy
LOC. The hex that has the
yellow-crowded Soviet stack is a broken bridge already. No need to break it. Unfortunately there's a
pontoon unit in the stack so I'm guessing he's going to try to repair it. I've got no way to attack
just the pontoon unit so I guess there's no way to stop him from fixing it. But I can try to drop it from the air by bombardment. The problem with that is that
all the Soviet equipment that has an
AA ability will be used to defend the bridge. D'oh.
Inset 2 shows where I shoved some enemy units off the road just to drop both bridges and now that I'm trying to just walk away I feel like I need to disengage first, possibly by killing them or at least making him back up.
Inset 3 shows where I'm trying to back out of the hex without losing anybody so I railed in some
arty to help in that endeavor. I plan to try some attacks that will make them back up so I can just walk away.
Inset 4 shows me in the '
before' shot because I plan on whipping out a can of kick ass and eliminate all the red stuff you see in this image.
This is all before I have moved anybody on the map.
- temp.png (7.82 MiB) Viewed 32 times