


In preparation of the upcoming rematch against Ed a.k.a. IdahoNYer with roles reversed, I hereby start the preliminaries for a new AAR.
Since Ed seems to have selected for the title of his AAR the "famous last words" of a Japanese Admiral, it seems fitting to reply in kind with a title citing the last order given by Rear-Admiral "Fighting Dan" Callaghan during the First Naval Battle of Guadalcanal (November 12-13, 1942), just before he was killed: "We want the big ones! Get the big ones first!" The "big ones" were of course the Japanese BBs, but here also refer to the fact that we will use the "DaBigBabes" mod again for this game.
Alternative titles I have been contemplating were "You'll be sor-ree!" (directed at Ed for having selected the Japanese side) and the famous quote "Send us more Japs!" - both discarded because it might backfire if getting steam-rollered by Ed into a Japanese auto-victory. For the same reason "Making America great again" didn't make it, and it's too political as well. Then there was the book title "Blue sea - red blood" - too poetic - and "We want Sapporo - and Kirin, Suntory and Asahi as well" - too cryptic if you are not into Japanese beer (and it may hint strategic plans).
So, this is a big first for me since I have never played the Allied side in any of my PBEMs I have done with good ol' PacWar, Uncommon Valor, WitP classic and AE. Worse yet, I have never played the Allies in AE past February 1942, and then only against the AI. I fully expect to receive a terrible spanking by Ed. He is a thorough planer and will most likely prepare himself religiously, using Tracker and whatever. I expect his Japanese economy will be run much more efficiently than I did and he will surely try to hurt the Allies badly wherever he can and for as long as possible. I on the other side don't use Tracker and whatever and for me planning is optional, I tend to launch operations on the spur of the moment. If I can avoid a Japanese auto-victory, I will be happy!
Re: "We want the big ones!" DBB-C vs IdahoNYer (J): Darwin recaptured [closed]
Moderators: wdolson, MOD_War-in-the-Pacific-Admirals-Edition
-
LargeSlowTarget

- Posts: 4901
- Joined: Sat Sep 23, 2000 8:00 am
- Location: Hessen, Germany - now living in France
Re: "We want the big ones!" DBB-C vs IdahoNYer (J): Darwin recaptured [closed]
Last edited by LargeSlowTarget on Tue Mar 05, 2024 7:09 am, edited 14 times in total.

-
LargeSlowTarget
- Posts: 4901
- Joined: Sat Sep 23, 2000 8:00 am
- Location: Hessen, Germany - now living in France
RE:
reserved for pic uploads
- Attachments
-
- china411216.jpg (258.1 KiB) Viewed 2353 times
Last edited by LargeSlowTarget on Sat May 14, 2022 1:46 pm, edited 1 time in total.

RE: "We want the big ones!" DBB-C vs IdahoNYer (J)
LST,
Looking forward to you having your revenge. Having just played the IJ for 6 years, you are well versed. So you know the mantra from this side: patience. Start your prep's now for your thrusts, be patient, train tons of pilots, be patient, when you attack, bring the hammer, be patient.
I really think Karachi and continental USA are the only 2 places that you cannot afford to lose. Everything else is negotiable.
Figure out which assets are expendable (PI, DEI, CHI, etc), and then get a plan together to use them to the best possible result.
Good Luck!!
Pax

RE: "We want the big ones!" DBB-C vs IdahoNYer (J)
Just remember, why use a little hammer if you have a big one.
Sieg Heil! Viel Spaß mit dem Spiel!
Sieg Heil! Viel Spaß mit dem Spiel!
Seek peace but keep your gun handy.
I'm not a complete idiot, some parts are missing!
“Illegitemus non carborundum est (“Don’t let the bastards grind you down”).”
 ; Julia Child

I'm not a complete idiot, some parts are missing!
“Illegitemus non carborundum est (“Don’t let the bastards grind you down”).”
RE: "We want the big ones!" DBB-C vs IdahoNYer (J)
When I saw the title, I thought it was a Mae West quote ...[:D]
Good luck with this one! Be wary of Allied inexperience and many poor leaders scattered throughout randomly, by the starting algorithm. Key ships do have good historic leaders though. Your strategy will dictate whether you use precious PP to buy out reinforcements, change leaders or change the type of aircraft a unit upgrades to.
Allied ship withdrawals require certain ports. Make a list of the units that withdraw and their dates and start them to their withdrawal place early. Nothing worse than having a carrier you are withdrawing get torpedoed just before port, and be unable to withdraw it because of damage.
That's all the starting advice that comes to mind.
No matter how bad a situation is, you can always make it worse. - Chris Hadfield : An Astronaut's Guide To Life On Earth
-
GetAssista
- Posts: 2835
- Joined: Sat Sep 19, 2009 6:13 am
RE: "We want the big ones!" DBB-C vs IdahoNYer (J)
Great you are starting a new one!
There is freedom in playing Allies for the first time. So much material coming, you can do anything with enough concentration, you can scoff at almost any initial losses. And your knowledge of Japan will be critically important in the later game, if you just get there with no loss of enthusiasm. Good luck!
There is freedom in playing Allies for the first time. So much material coming, you can do anything with enough concentration, you can scoff at almost any initial losses. And your knowledge of Japan will be critically important in the later game, if you just get there with no loss of enthusiasm. Good luck!
RE: "We want the big ones!" DBB-C vs IdahoNYer (J)
Do you have HRs, if so can you share them with the peanut gallery? Looking forward to you being the other side for a change. always an eye opener to be the one who soaks up the early blows and deals with the dog days of 41 and early 42. Knowing things will get better but will they be too worse to be able to dig your way out?
-
soulsilver

- Posts: 316
- Joined: Tue Mar 24, 2020 9:42 pm
RE: "We want the big ones!" DBB-C vs IdahoNYer (J)
As long as your not too impatient with your carriers, you should be fine. Hell even If you lose 3 of them like my opponent did you'll still have parity with the Japanese by mid-late 43. All your other ships are fairly expendable early, especially the ships you have on station in the SRA.
We are all worms, but I believe that I am a glow worm.
-Winston Churchill
-Winston Churchill
-
LargeSlowTarget
- Posts: 4901
- Joined: Sat Sep 23, 2000 8:00 am
- Location: Hessen, Germany - now living in France
RE:
Thanks for the encouragments and advice, guys! I'll keep in mind that "Success is advancing from failure to failure without losing enthusiasm.” [:D].
Still no turn from Ed, but his mails indicate that he is preparing himself like his life depends on the outcome of this rematch - reading AARs and taking notes, planing and schemeing and probably playtesting opening moves.
I don't need all this - America is so great that I simply cannot lose, right?
Here are the house rules:
* No 4e naval bombing below 10k
* No non-base hex invasions
* no scattered sub-unit paradrops / sub-invasions, only entire units
* Restricted units must pay PPs to cross national borders, except Thai units which are allowed in Burma
* Sweeps at 2nd best maneuver band (but no limit to CAP altitudes)
* Night Bombing: Per base, AF or Port attack, by year. 41/42: 1 unit, 43: 2 units, 44: 3 units, 45: 4 units. No restrictions on manpower or industry.
* No strategic bombing into or out of China until 1945.
* No Panzer stack Blitzkrieg: one Tank unit in a hex attacking alone is ok, multiple tank units in a hex must be accompanied by infantry
Last edited by LargeSlowTarget on Sat May 14, 2022 1:47 pm, edited 1 time in total.
RE: "We want the big ones!" DBB-C vs IdahoNYer (J)
If I were him, I would be picking up tips from Lowpe on how to attack the Allies. Lowpe has great imagination and strategic vision. If you have time you should read Lowpe's AARs too. He has one for each side going on ATM, and the Allied one has some very unusual strategies to slow down/mess up the crucial first few months of the Japanese game.
No matter how bad a situation is, you can always make it worse. - Chris Hadfield : An Astronaut's Guide To Life On Earth
RE: "We want the big ones!" DBB-C vs IdahoNYer (J)
Thanks for the HRs, always like to see what other's have for them.
RE: "We want the big ones!" DBB-C vs IdahoNYer (J)
The main reason why Lowpe as Allies can do what he is doing in the Central Pacific was because there as no Pearl Harbor raid so the KB was not around.
Seek peace but keep your gun handy.
I'm not a complete idiot, some parts are missing!
“Illegitemus non carborundum est (“Don’t let the bastards grind you down”).”
; Julia Child
I'm not a complete idiot, some parts are missing!
“Illegitemus non carborundum est (“Don’t let the bastards grind you down”).”
-
LargeSlowTarget
- Posts: 4901
- Joined: Sat Sep 23, 2000 8:00 am
- Location: Hessen, Germany - now living in France
RE: "We want the big ones!" DBB-C vs IdahoNYer (J)
I have check for Lowpe AAR but what I have found seem to concern stock Scen.2 or Ironman scenarios, so not readily compatible with the DBB-29C PDU off Ed and I are playing and which actually starts on Dec 8th with PH and Clark Field etc. already gone up in smoke and KB hovering to the North of PH.
Btw, by accident due to a hardware change / database hickup, Ed has prepared and sent his first turn using the older version of the DBB scenario - the same we have used for our first game - instead of the latest "vo15" version available on the DaBabes site we had agreed to use.
Main differences seem to concern the OOBs of the PI, Australia and NZ, with biggest change being that Aussie CMF units no longer able to combine into divisions in the latest version, and according to the DaBabes website there are also unspecified "Error Corrections/Cleanups".
After some hectic diplomatic consultations and exchange of the old scenario files we have agreed to continue our new war with the old files.
We have not found any gamestopping database errors in the old files during our first match and we agreed that the OOB changes are not important enough for a redo of the monster turn 1.
I have just returned my orders and am now awaiting the first replay with impatience. I'm sure Ed has picked up lots of tips from AARs to cause major mischief all over the map. Movement arrows I see in China seem to indicate very agressive Japanese opening moves. Will there be a second PH strike as well? A Mersing Gambit? Deep invasions or at least deep KB Raids? I'm bracing for impact!
RE: "We want the big ones!" DBB-C vs IdahoNYer (J)
Some of the errors can be pretty subtle. I just found in Stock Scenario 1 that when several of the US APAs get SG radar, the facing is set to 04 Left Side instead of 05 All Sides. Imagine having a radar pointed just to port side!
Similarly, there were CMc minelayers or ACMs that had their mine ammo capacity number placed in the "Armor" column of the devices instead of in the Ammo column. I forget whether it was Japanese or Allied mine vessels, but the effect would be to render the ship unable to load mines since the slot for mine capacity would be undefined.
Similarly, there were CMc minelayers or ACMs that had their mine ammo capacity number placed in the "Armor" column of the devices instead of in the Ammo column. I forget whether it was Japanese or Allied mine vessels, but the effect would be to render the ship unable to load mines since the slot for mine capacity would be undefined.
No matter how bad a situation is, you can always make it worse. - Chris Hadfield : An Astronaut's Guide To Life On Earth
-
LargeSlowTarget
- Posts: 4901
- Joined: Sat Sep 23, 2000 8:00 am
- Location: Hessen, Germany - now living in France
RE: "We want the big ones!" DBB-C vs IdahoNYer (J)
"Nothing would please me better than if they would give me three months and then attack here."
Gen. Douglas MacArthur on the defense of the Philippine Islands, 1940
"No matter what happens, the U.S. Navy is not going to be caught napping."
Frank Knox, 4 December 1941
Dec 08-09, 1941
Be careful what you wish for - you may get it! And the Navy has not been caught napping - it has been caught with pants down...
Guess it is up to me to rally the Allied Forces and prepare for the Japanes onslaught!
First replay and sync bug straight away: B-17s sinking several ships in a port strike on Babeldaop and CA Louisville eating two sub torps near the Gilberts - didn't happen.
Summary:
Relatively good opening turn - no second PH strike, no Mersing gambit, Boise savaging an amphib TF, several Allied pilots gaining multiple kills in the PI.
On the down side, Boise being sunk by late-coming but vengeful covering force, several minelayers sunk en route to destination, small enemy SAGs sinking fleeing Allied ships around the PI, Clark Field runway damage = 70, Luzon, Mindanao, NW Borneo invaded.
Bases invaded:
Amphibious TF 90 offshore of Kuching > Sasebo 1st SNLF, 24th JAAF AF Bn
Amphibious TF 98 offshore of Singkawang > 91st Nav Gd
Amphibious TF 13 offshore of Cotabato > Kure 1st SNLF, Kimura Det, 1st JNAF Coy
Amphibious TF 88 offshore of Laoag > Kanno Det
Amphibious TF 118 offshore of Aparri > 14th Army, 3rd Const Bn, others
Bases lost:
Japanese forces CAPTURE Kota Bharu !!!
Ship losses:
DD Shirakumo is reported to have been sunk by Boise near Tawi Tawi
xAK Meiyo Maru is reported to have been sunk by Boise near Tawi Tawi
xAKL Hidaka Maru is reported to have been sunk by Boise near Tawi Tawi
xAKL Raizan Maru is reported to have been sunk by Boise near Tawi Tawi
xAP Manzyu Maru is reported to have been sunk by Dutch sub near Singora
AVD William B. Preston sinks near Zamboanga > by DD Minegumo, DD Asagumo, DD Ikazuchi, DD Inazuma
MTB 11 sinks at sea > mine hit at Canton
CM Willem v d Zaan sinks near Kuching > by CL Natori, DD Satsuki, DD Minazuki, DD Fumizuki, DD Nagatsuki
Loss of CL Boise is admitted > see combat report below
Loss of DD Scout is admitted > by DD Minazuki near San Fernando
Loss of AG Gold Star is admitted > by DD Ikazuchi near Dumaguete
Loss of CM Kung Wo is admitted > with 3 torps by Nells, near Mersing
Loss of AVP Arend is admitted > ??
Loss of xAKL Dai Tung is admitted > by SS I-157 near Kuantan
Loss of xAKL Dai Lee is admitted > by CL Natori near Laoag
Loss of xAKL Don Jose is admitted > by CA Maya near Busuanga
Loss of xAKL Sagoland is admitted > by CA Ashigara near Busuanga
Loss of xAKL Dona Nati is admitted > by CA Ashigara near Busuanga
Loss of xAK James Lykes is admitted > by DD Asagumo near Lucena
Loss of xAK John Lykes is admitted > by DD Ikazuchi near San Jose
Loss of xAKL Compagnia Filipinas is admitted > by DD Asagumo near Calapan
Loss of xAKL Dos Hermanos is admitted > by SS I-124 near Lubang
Loss of CMc Pro Patria is admitted > by SS I-122 near Singkawang
Loss of AG Albatros is admitted > by CA Ashigara near Tandjoengselor
Loss of HDML P 1 is admitted > by CA Maya near Tandjoengselor
Loss of HDML P 2 is admitted > by DD Hatakaze near Tandjoengselor
Loss of HDML P 3 is admitted > by CA Maya near Tandjoengselor
Boise and Houston had orders to flee full-speed for Balikpapan, hugging the Borneo coast. Houston evaded all contacts and made it. Boise opted for the more glorious way to go.
Too bad, Gold Star and the two Lykes brothers were full of supplies heading for Manila.
Air losses:

1LT Ellis, H.S. of 24th PG/20th PS is credited with kill number 2
1LT Ellis, H.S. of 24th PG/20th PS is credited with kill number 3
COL Grover, O.L of 24th PG/17th PS is credited with kill number 2
1LT Putnam, W.B. of 24th PG/17th PS is credited with kill number 2
MAJ Lynch, T.J. of 24th PG/3rd PS is credited with kill number 2
1LT Cummings, W. of 24th PG/17th PS is credited with kill number 2
1LT Cummings, W. of 24th PG/17th PS is credited with kill number 3
MAJ Lynch, T.J. of 24th PG/3rd PS is credited with kill number 3
COL Grover, O.L of 24th PG/17th PS is credited with kill number 3
1LT Ellis, H.S. of 24th PG/20th PS is credited with kill number 4
Intel:
- 2/9th Infantry Regiment is loaded on a Takasago Maru class xAP moving to Butuan.
- 2/9th Infantry Regiment is loaded on a Buenos Aires Maru class xAP moving to Butuan.
- 3/9th Infantry Regiment is planning for an attack on Lingayen.
> What? 9th Inf Rgt split between Luzon and Mindanao?!?
- a Type KD4 class SS is moving to 117,184
> deep-water hex off Auckland, NZ
- 4/55th Infantry Regiment is loaded on a Japanese TK moving to Kota Bharu
> on a TK? The Japanese shipping shortage must be worse that I thought!
- TBD-1 Devastator sighting report: 7 Japanese ships at 179,110 near Pearl Harbor, speed 19, Moving Southeast
- TBD-1 Devastator sighting report: 6 Japanese ships at 180,108 near Pearl Harbor, speed 12, Moving Southeast
> 3 resp. 1 hex south of PH - Can only be US ships fleeing from PH to hide at Kona and Hilo
- PBY-5 Catalina sighting report: 9 Japanese ships at 167,103 near French Frigate Shoal , Speed 17 , Moving West
> must be KB retiring - good to see!
- Seagull V sighting report: 2 Japanese ships at 99,157 near Maryborough, speed 18, Moving Northwest
> Yeah, sure! Bunbaberg isn't far away, that may explain a lot...
- CA Pensacola sights H6K4 Mavis at 136,128 near Tarawa
> Lying in ambush, no indication she has been spotted herself. I'll keep her on station for another turn.
Combat Report Highlights:
Gen. Douglas MacArthur on the defense of the Philippine Islands, 1940
"No matter what happens, the U.S. Navy is not going to be caught napping."
Frank Knox, 4 December 1941
Dec 08-09, 1941
Be careful what you wish for - you may get it! And the Navy has not been caught napping - it has been caught with pants down...
Guess it is up to me to rally the Allied Forces and prepare for the Japanes onslaught!
First replay and sync bug straight away: B-17s sinking several ships in a port strike on Babeldaop and CA Louisville eating two sub torps near the Gilberts - didn't happen.
Summary:
Relatively good opening turn - no second PH strike, no Mersing gambit, Boise savaging an amphib TF, several Allied pilots gaining multiple kills in the PI.
On the down side, Boise being sunk by late-coming but vengeful covering force, several minelayers sunk en route to destination, small enemy SAGs sinking fleeing Allied ships around the PI, Clark Field runway damage = 70, Luzon, Mindanao, NW Borneo invaded.
Bases invaded:
Amphibious TF 90 offshore of Kuching > Sasebo 1st SNLF, 24th JAAF AF Bn
Amphibious TF 98 offshore of Singkawang > 91st Nav Gd
Amphibious TF 13 offshore of Cotabato > Kure 1st SNLF, Kimura Det, 1st JNAF Coy
Amphibious TF 88 offshore of Laoag > Kanno Det
Amphibious TF 118 offshore of Aparri > 14th Army, 3rd Const Bn, others
Bases lost:
Japanese forces CAPTURE Kota Bharu !!!
Ship losses:
DD Shirakumo is reported to have been sunk by Boise near Tawi Tawi
xAK Meiyo Maru is reported to have been sunk by Boise near Tawi Tawi
xAKL Hidaka Maru is reported to have been sunk by Boise near Tawi Tawi
xAKL Raizan Maru is reported to have been sunk by Boise near Tawi Tawi
xAP Manzyu Maru is reported to have been sunk by Dutch sub near Singora
AVD William B. Preston sinks near Zamboanga > by DD Minegumo, DD Asagumo, DD Ikazuchi, DD Inazuma
MTB 11 sinks at sea > mine hit at Canton
CM Willem v d Zaan sinks near Kuching > by CL Natori, DD Satsuki, DD Minazuki, DD Fumizuki, DD Nagatsuki
Loss of CL Boise is admitted > see combat report below
Loss of DD Scout is admitted > by DD Minazuki near San Fernando
Loss of AG Gold Star is admitted > by DD Ikazuchi near Dumaguete
Loss of CM Kung Wo is admitted > with 3 torps by Nells, near Mersing
Loss of AVP Arend is admitted > ??
Loss of xAKL Dai Tung is admitted > by SS I-157 near Kuantan
Loss of xAKL Dai Lee is admitted > by CL Natori near Laoag
Loss of xAKL Don Jose is admitted > by CA Maya near Busuanga
Loss of xAKL Sagoland is admitted > by CA Ashigara near Busuanga
Loss of xAKL Dona Nati is admitted > by CA Ashigara near Busuanga
Loss of xAK James Lykes is admitted > by DD Asagumo near Lucena
Loss of xAK John Lykes is admitted > by DD Ikazuchi near San Jose
Loss of xAKL Compagnia Filipinas is admitted > by DD Asagumo near Calapan
Loss of xAKL Dos Hermanos is admitted > by SS I-124 near Lubang
Loss of CMc Pro Patria is admitted > by SS I-122 near Singkawang
Loss of AG Albatros is admitted > by CA Ashigara near Tandjoengselor
Loss of HDML P 1 is admitted > by CA Maya near Tandjoengselor
Loss of HDML P 2 is admitted > by DD Hatakaze near Tandjoengselor
Loss of HDML P 3 is admitted > by CA Maya near Tandjoengselor
Boise and Houston had orders to flee full-speed for Balikpapan, hugging the Borneo coast. Houston evaded all contacts and made it. Boise opted for the more glorious way to go.
Too bad, Gold Star and the two Lykes brothers were full of supplies heading for Manila.
Air losses:
1LT Ellis, H.S. of 24th PG/20th PS is credited with kill number 2
1LT Ellis, H.S. of 24th PG/20th PS is credited with kill number 3
COL Grover, O.L of 24th PG/17th PS is credited with kill number 2
1LT Putnam, W.B. of 24th PG/17th PS is credited with kill number 2
MAJ Lynch, T.J. of 24th PG/3rd PS is credited with kill number 2
1LT Cummings, W. of 24th PG/17th PS is credited with kill number 2
1LT Cummings, W. of 24th PG/17th PS is credited with kill number 3
MAJ Lynch, T.J. of 24th PG/3rd PS is credited with kill number 3
COL Grover, O.L of 24th PG/17th PS is credited with kill number 3
1LT Ellis, H.S. of 24th PG/20th PS is credited with kill number 4
Intel:
- 2/9th Infantry Regiment is loaded on a Takasago Maru class xAP moving to Butuan.
- 2/9th Infantry Regiment is loaded on a Buenos Aires Maru class xAP moving to Butuan.
- 3/9th Infantry Regiment is planning for an attack on Lingayen.
> What? 9th Inf Rgt split between Luzon and Mindanao?!?
- a Type KD4 class SS is moving to 117,184
> deep-water hex off Auckland, NZ
- 4/55th Infantry Regiment is loaded on a Japanese TK moving to Kota Bharu
> on a TK? The Japanese shipping shortage must be worse that I thought!
- TBD-1 Devastator sighting report: 7 Japanese ships at 179,110 near Pearl Harbor, speed 19, Moving Southeast
- TBD-1 Devastator sighting report: 6 Japanese ships at 180,108 near Pearl Harbor, speed 12, Moving Southeast
> 3 resp. 1 hex south of PH - Can only be US ships fleeing from PH to hide at Kona and Hilo
- PBY-5 Catalina sighting report: 9 Japanese ships at 167,103 near French Frigate Shoal , Speed 17 , Moving West
> must be KB retiring - good to see!
- Seagull V sighting report: 2 Japanese ships at 99,157 near Maryborough, speed 18, Moving Northwest
> Yeah, sure! Bunbaberg isn't far away, that may explain a lot...
- CA Pensacola sights H6K4 Mavis at 136,128 near Tarawa
> Lying in ambush, no indication she has been spotted herself. I'll keep her on station for another turn.
Combat Report Highlights:
Day Time Surface Combat, near Tawi Tawi at 72,89, Range 24,000 Yards
Japanese Ships
DD Shinonome, Shell hits 1, heavy fires
DD Shirakumo, Shell hits 22, and is sunk
APD Fuji
APD Hagi
TB Hayabusa
AK Hirokawa Maru
AK Tosan Maru
xAK Syoka Maru, Shell hits 4, heavy fires
xAK Rokko Maru, Shell hits 6, heavy fires, heavy damage
xAK Atago Maru, Shell hits 7, heavy fires
xAK Meiyo Maru, Shell hits 17, and is sunk
xAK Santos Maru, Shell hits 6, heavy fires, heavy damage
xAK Igasa Maru, Shell hits 3, on fire
xAKL Ryoyu Maru #21, Shell hits 5, heavy fires, heavy damage
xAKL Sasago Maru, Shell hits 1
xAK Zyuyo Maru
xAKL Hidaka Maru, Shell hits 12, and is sunk
xAKL Raizan Maru, Shell hits 9, and is sunk
Allied Ships
CL Boise, Shell hits 7
Japanese ground losses:
2746 casualties reported
Squads: 36 destroyed, 68 disabled
Non Combat: 74 destroyed, 85 disabled
Engineers: 6 destroyed, 3 disabled
Guns lost 28 (16 destroyed, 12 disabled)
----------------------------------------------------------------------
Day Time Surface Combat, near Tawi Tawi at 72,90, Range 22,000 Yards
Japanese Ships
CA Maya
CA Ashigara, Shell hits 1
DD Yamagumo
DD Asakaze
DD Harukaze
DD Hatakaze
Allied Ships
CL Boise, Shell hits 36, Torpedo hits 1, and is sunk
-----------------------------------------------------
Morning Air attack on Clark Field , at 79,76
Weather in hex: Clear sky
Raid spotted at 40 NM, estimated altitude 16,000 feet.
Estimated time to target is 14 minutes
Japanese aircraft
A6M2 Zero x 18
G3M2 Nell x 36
G4M1 Betty x 25
Allied aircraft
P-35A x 3
P-40B Warhawk x 6
Japanese aircraft losses
A6M2 Zero: 1 destroyed
G3M2 Nell: 1 damaged
G4M1 Betty: 1 damaged
Allied aircraft losses
P-35A: 3 damaged
P-40B Warhawk: 5 damaged
P-40E Warhawk: 4 destroyed on ground
Allied ground losses:
10 casualties reported
Squads: 0 destroyed, 0 disabled
Non Combat: 0 destroyed, 1 disabled
Engineers: 0 destroyed, 0 disabled
Airbase hits 10
Airbase supply hits 1
Runway hits 52
----------------------------------------------
Morning Air attack on Clark Field , at 79,76
Weather in hex: Overcast
Raid spotted at 32 NM, estimated altitude 16,000 feet.
Estimated time to target is 11 minutes
Japanese aircraft
A6M2 Zero x 18
G3M2 Nell x 36
G4M1 Betty x 25
Allied aircraft
P-26A x 5
P-35A x 8
P-40B Warhawk x 5
P-40E Warhawk x 19
Japanese aircraft losses
A6M2 Zero: 1 destroyed
G3M2 Nell: 4 destroyed, 1 damaged
G4M1 Betty: 4 destroyed
Allied aircraft losses
P-26A: 1 damaged
P-35A: 1 damaged
P-40B Warhawk: 1 destroyed on ground
P-40E Warhawk: 5 damaged
Airbase hits 4
Runway hits 29
--------------------------------------------
Morning Air attack on Babeldaob , at 90,97
Weather in hex: Overcast
Raid spotted at 34 NM, estimated altitude 7,000 feet.
Estimated time to target is 9 minutes
Allied aircraft
B-17D Fortress x 10
Allied aircraft losses
B-17D Fortress: 1 damaged
Japanese Ships
xAKL Kosho Maru, Bomb hits 1, on fire
Aircraft Attacking:
5 x B-17D Fortress bombing from 2000 feet *
Port Attack: 4 x 500 lb GP Bomb
5 x B-17D Fortress bombing from 2000 feet *
Port Attack: 4 x 500 lb GP Bomb
- Attachments
-
- air411210.jpg (70.45 KiB) Viewed 2347 times
-
NigelKentarus

- Posts: 207
- Joined: Fri Mar 27, 2015 8:54 pm
- Location: OH, USN 20 yrs, & FL
RE: "We want the big ones!" DBB-C vs IdahoNYer (J)
Ahhh....Suntory. Suntory Borbon, Suntory Vodka, Suntory Gin, Suntory Scotch, Suntory Etc. Suntory makes it all.
Fight like you're the 3rd monkey on the plank to Noah's ark. And brother, it's starting to rain.
RE: "We want the big ones!" DBB-C vs IdahoNYer (J)
Only Scotland can claim the label "Scotch Whiskey". Santory whiskey is just called Whiskey, I think.ORIGINAL: NigelKentarus
Ahhh....Suntory. Suntory Borbon, Suntory Vodka, Suntory Gin, Suntory Scotch, Suntory Etc. Suntory makes it all.
No matter how bad a situation is, you can always make it worse. - Chris Hadfield : An Astronaut's Guide To Life On Earth
-
LargeSlowTarget
- Posts: 4901
- Joined: Sat Sep 23, 2000 8:00 am
- Location: Hessen, Germany - now living in France
RE: "We want the big ones!" DBB-C vs IdahoNYer (J)
Dec 10-11, 1941
Summary:
Mersing invaded, Force Z annihilated, Allied air strikes ineffective, enemy ashore at Mersing in division strength, paradrops block LOCs in Central Malaya and trap III Corps units north of Kuala Lumpur. More landings in the PI, more merchant ships being hunted down by SAGs and subs.
Ships lost:
DMS W-2 is reported to have been sunk by SS KXI near Singora on Dec 10, 1941
DMS W-5 is reported to have been sunk by Force Z near Mersing on Dec 10, 1941
Loss of BB Prince of Wales on Dec 10, 1941 is admitted
Loss of BC Repulse on Dec 10, 1941 is admitted
Loss of CL Danae on Dec 10, 1941 is admitted
Loss of CL Durban on Dec 10, 1941 is admitted
Loss of DD Vampire on Dec 10, 1941 is admitted
Loss of DD Tenedos on Dec 10, 1941 is admitted
Loss of DD Electra on Dec 10, 1941 is admitted
Loss of DD Encounter on Dec 10, 1941 is admitted
Loss of DD Express on Dec 10, 1941 is admitted
Loss of DD Isis on Dec 10, 1941 is admitted
Loss of xAP Etolin on Dec 10, 1941 is admitted > ??
Loss of xAP Legaspi on Dec 10, 1941 is admitted > by CA Ashigara near Tawi Tawi
Loss of xAP Candioa on Dec 10, 1941 is admitted > by DD Asakaze near Tawi Tawi
Loss of xAKL Circe on Dec 10, 1941 is admitted > by SS I-154 near Palembang
Loss of xAK Ravnaas on Dec 10, 1941 is admitted > by CA Chokai near Davao
Loss of TK Anastasia on Dec 11, 1941 is admitted > by SS I-164 near Oosthaven
Loss of xAKL Isla Filipinas on Dec 11, 1941 is admitted > by DD Harusame near Bataan
PG Asheville sinks at sea > by TB Hayabusa near Balabac
PG Tulsa sinks sinks at sea > by TB Hayabusa near Balabac
xAKL Mauban sinks at sea > ??
Bases lost:
Alor Star is occupied by the Japanese
Japanese forces CAPTURE Laoag !!!
Japanese forces CAPTURE Cotabato !!!
Japanese forces CAPTURE Singkawang !!!
Japanese forces CAPTURE Kuching !!!
Bases invaded:
Amphibious TF 97 unloading at Mersing
Amphibious TF 88 unloading at Laoag
Amphibious TF 105 unloading at Jesselton
Amphibious TF 138 unloading at Balabac
Amphibious TF 174 offshore of Digos
Amphibious TF 13 offshore of Davao
Amphibious TF 113 offshore of Ternate
Amphibious TF 130 unloading at Sorong
Amphibious TF 114 offshore of Guam
Intel:
Nothing useful
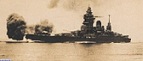
As stated before, the two things I have feared most in the opening days was a second PH strike and a Mersing Gambit. I have kept the reinforced Force Z to the south of Singers just outside Nettie torpedo range from Saigon but within 4 hexes of Mersing, as long as the ground forces in Northern Malaya have not retreated to Singers. The plan was to patrol Mersing at night and spend the day in relative safety further south. I was tempted to send Force Z to Kuching, but decided against it, figuring that the invasion force would not stay around with Force Z still at large.
Well, one of my greatest fear has become true, and everything that could go wrong did go wrong. Leaving Tom Phillips in command of Force Z probably didn't help. Force Z arrived at Mersing at daylight, got bested by the covering force, then savaged by Netties, then finished off by the covering forces.
The counter-attacks by the Royal Airforce had not much luck either:
Enemy paratroopers have landed in Central Malaya and successfully blocked the strat-moving brigades from Alor Star just north of Kuala Lumpur. The sacrifice of their paras may turn the Mersing Gambit in to a resounding success for the Japanese.
Off Balabac, PGs Tulsa and Asheville were escorting merchies from Manila to Batavia when float planes operating from Puerto Princesa reported an enemy TF nearby. Leaving their charges to continue their way, the two PGs were ordered to investigate the contact - to their regret.
Summary:
Mersing invaded, Force Z annihilated, Allied air strikes ineffective, enemy ashore at Mersing in division strength, paradrops block LOCs in Central Malaya and trap III Corps units north of Kuala Lumpur. More landings in the PI, more merchant ships being hunted down by SAGs and subs.
Ships lost:
DMS W-2 is reported to have been sunk by SS KXI near Singora on Dec 10, 1941
DMS W-5 is reported to have been sunk by Force Z near Mersing on Dec 10, 1941
Loss of BB Prince of Wales on Dec 10, 1941 is admitted
Loss of BC Repulse on Dec 10, 1941 is admitted
Loss of CL Danae on Dec 10, 1941 is admitted
Loss of CL Durban on Dec 10, 1941 is admitted
Loss of DD Vampire on Dec 10, 1941 is admitted
Loss of DD Tenedos on Dec 10, 1941 is admitted
Loss of DD Electra on Dec 10, 1941 is admitted
Loss of DD Encounter on Dec 10, 1941 is admitted
Loss of DD Express on Dec 10, 1941 is admitted
Loss of DD Isis on Dec 10, 1941 is admitted
Loss of xAP Etolin on Dec 10, 1941 is admitted > ??
Loss of xAP Legaspi on Dec 10, 1941 is admitted > by CA Ashigara near Tawi Tawi
Loss of xAP Candioa on Dec 10, 1941 is admitted > by DD Asakaze near Tawi Tawi
Loss of xAKL Circe on Dec 10, 1941 is admitted > by SS I-154 near Palembang
Loss of xAK Ravnaas on Dec 10, 1941 is admitted > by CA Chokai near Davao
Loss of TK Anastasia on Dec 11, 1941 is admitted > by SS I-164 near Oosthaven
Loss of xAKL Isla Filipinas on Dec 11, 1941 is admitted > by DD Harusame near Bataan
PG Asheville sinks at sea > by TB Hayabusa near Balabac
PG Tulsa sinks sinks at sea > by TB Hayabusa near Balabac
xAKL Mauban sinks at sea > ??
Bases lost:
Alor Star is occupied by the Japanese
Japanese forces CAPTURE Laoag !!!
Japanese forces CAPTURE Cotabato !!!
Japanese forces CAPTURE Singkawang !!!
Japanese forces CAPTURE Kuching !!!
Bases invaded:
Amphibious TF 97 unloading at Mersing
Amphibious TF 88 unloading at Laoag
Amphibious TF 105 unloading at Jesselton
Amphibious TF 138 unloading at Balabac
Amphibious TF 174 offshore of Digos
Amphibious TF 13 offshore of Davao
Amphibious TF 113 offshore of Ternate
Amphibious TF 130 unloading at Sorong
Amphibious TF 114 offshore of Guam
Intel:
Nothing useful
As stated before, the two things I have feared most in the opening days was a second PH strike and a Mersing Gambit. I have kept the reinforced Force Z to the south of Singers just outside Nettie torpedo range from Saigon but within 4 hexes of Mersing, as long as the ground forces in Northern Malaya have not retreated to Singers. The plan was to patrol Mersing at night and spend the day in relative safety further south. I was tempted to send Force Z to Kuching, but decided against it, figuring that the invasion force would not stay around with Force Z still at large.
Well, one of my greatest fear has become true, and everything that could go wrong did go wrong. Leaving Tom Phillips in command of Force Z probably didn't help. Force Z arrived at Mersing at daylight, got bested by the covering force, then savaged by Netties, then finished off by the covering forces.
Day Time Surface Combat, near Mersing at 51,82, Range 24,000 Yards
Japanese Ships
BB Kongo, Shell hits 3, on fire
BB Haruna, Shell hits 2
CA Takao, Shell hits 1
CA Atago, Shell hits 4
CL Jintsu, Shell hits 6
DD Oshio, Shell hits 1, on fire
DD Michishio
DD Arashio
DD Akatsuki, Shell hits 1, heavy fires
DD Hibiki
DD Shirayuki, Shell hits 1
DMS W-5, Shell hits 3, and is sunk
Allied Ships
BB Prince of Wales, Shell hits 7, on fire
BC Repulse, Shell hits 7, on fire
CL Danae, Shell hits 5, on fire
CL Dragon, Shell hits 2
CL Durban, Shell hits 3, on fire
CL Mauritius, Shell hits 3, on fire
DD Vampire, Shell hits 3, heavy fires, heavy damage
DD Vendetta, Shell hits 1
DD Tenedos
DD Electra
DD Encounter, Shell hits 3, on fire
DD Express
DD Isis
DD Jupiter, Shell hits 3, on fire
-------------------------------------------------------------------------------
Afternoon Air attack on TF, near Mersing at 51,82
Weather in hex: Clear sky
Raid detected at 79 NM, estimated altitude 26,000 feet.
Estimated time to target is 31 minutes
Japanese aircraft
F1M2 Pete x 4
G3M2 Nell x 36
Allied aircraft
Buffalo I x 16
Japanese aircraft losses
G3M2 Nell: 8 damaged
G3M2 Nell: 1 destroyed by flak
Allied aircraft losses
Buffalo I: 4 destroyed
Allied Ships
BC Repulse, Torpedo hits 2, on fire
BB Prince of Wales, Torpedo hits 3, heavy damage
-----------------------------------------------------------------------------------------
Afternoon Air attack on TF, near Mersing at 51,82
Weather in hex: Clear sky
Raid detected at 34 NM, estimated altitude 17,000 feet.
Estimated time to target is 13 minutes
Japanese aircraft
A6M2 Zero x 6
F1M2 Pete x 10
G3M2 Nell x 9
Ki-43-Ib Oscar x 19
No Japanese losses
Allied Ships
BC Repulse, Torpedo hits 3, on fire, heavy damage
BB Prince of Wales, Torpedo hits 2, on fire, heavy damage
-----------------------------------------------------------------------------------------------
Day Time Surface Combat, near Mersing at 51,82, Range 24,000 Yards
Allied aircraft
no flights
Allied aircraft losses
Walrus II: 1 destroyed
Japanese Ships
BB Kongo, Shell hits 3, heavy fires
BB Haruna, Shell hits 1
CA Takao, Shell hits 2
CA Atago
CL Jintsu
DD Oshio, Shell hits 1, on fire
DD Michishio
DD Arashio, Shell hits 2, heavy fires
DD Akatsuki, Shell hits 2, heavy fires, heavy damage
DD Hibiki, Shell hits 1
DD Shirayuki
Allied Ships
BB Prince of Wales, Shell hits 7, on fire, heavy damage
BC Repulse, Shell hits 6, and is sunk
CL Danae, Shell hits 7, Torpedo hits 1, and is sunk
CL Durban, Shell hits 16, heavy fires, heavy damage
DD Vampire, Shell hits 2, heavy fires, heavy damage
DD Tenedos, Shell hits 1, heavy fires
DD Electra, Shell hits 1
DD Encounter, Shell hits 3, on fire, heavy damage
DD Express, Shell hits 2, on fire
DD Isis, Shell hits 1, on fire
--------------------------------------------------------------------------------------------------
Day Time Surface Combat, near Mersing at 51,82, Range 23,000 Yards
Allied aircraft
no flights
Allied aircraft losses
Walrus II: 1 destroyed
Japanese Ships
CA Mogami, Shell hits 1
CA Mikuma
CA Suzuya, Shell hits 1
CA Kumano
DD Maikaze
DD Nowaki
DD Arashi, Shell hits 1
DD Hagikaze, Shell hits 1, on fire
DD Hatsuyuki, Shell hits 1
Allied Ships
BB Prince of Wales, Torpedo hits 1, and is sunk
CL Durban, Shell hits 7, and is sunk
DD Vampire, Shell hits 3, and is sunk
DD Tenedos, Shell hits 11, and is sunk
DD Electra, Shell hits 12, and is sunk
DD Encounter, Shell hits 19, and is sunk
DD Express, Shell hits 18, and is sunk
DD Isis, Shell hits 17, Torpedo hits 1, and is sunk
The counter-attacks by the Royal Airforce had not much luck either:
Morning Air attack on TF, near Mersing at 51,82
Weather in hex: Severe storms
Raid spotted at 20 NM, estimated altitude 2,000 feet.
Estimated time to target is 6 minutes
Japanese aircraft
A6M2 Zero x 13
F1M2 Pete x 16
Ki-43-Ia Oscar x 5
Ki-43-Ib Oscar x 5
Ki-43-Ic Oscar x 8
Allied aircraft
Blenheim I x 6
Blenheim IV x 9
Swordfish I x 8
Vildebeest III x 24
Hudson I x 18
No Japanese losses
Allied aircraft losses
Blenheim IV: 1 destroyed, 1 damaged
Swordfish I: 1 destroyed, 1 damaged
Swordfish I: 1 destroyed by flak
Vildebeest III: 6 damaged
Vildebeest III: 1 destroyed by flak
Hudson I: 1 damaged
Japanese Ships
BB Kongo, on fire
BB Haruna
AV Kamikawa Maru
xAK Tatumiya Maru
CA Suzuya
CA Kumano
CL Sendai
CA Atago
CA Takao
Aircraft Attacking:
9 x Hudson I bombing from 2000 feet
Naval Attack: 4 x 250 lb SAP Bomb
9 x Hudson I bombing from 2000 feet
Naval Attack: 4 x 250 lb SAP Bomb
3 x Blenheim IV bombing from 2000 feet
Naval Attack: 4 x 250 lb GP Bomb
10 x Vildebeest III launching torpedoes at 200 feet
Naval Attack: 1 x 18in Mk XII Torpedo
4 x Blenheim IV bombing from 2000 feet
Naval Attack: 4 x 250 lb SAP Bomb
6 x Blenheim I bombing from 2000 feet
Naval Attack: 4 x 250 lb SAP Bomb
12 x Vildebeest III launching torpedoes at 200 feet
Naval Attack: 1 x 18in Mk XII Torpedo
5 x Swordfish I launching torpedoes at 200 feet
Naval Attack: 1 x 18in Mk XII Torpedo
--------------------------------------------------------------------------------------
Morning Air attack on TF, near Mersing at 51,81
Weather in hex: Severe storms
Raid spotted at 12 NM, estimated altitude 5,000 feet.
Estimated time to target is 3 minutes
Allied aircraft
Blenheim I x 3
No Allied losses
Japanese Ships
xAK Yahiko Maru
Aircraft Attacking:
3 x Blenheim I bombing from 2000 feet
Naval Attack: 4 x 250 lb SAP Bomb
-----------------------------------------------------------------------------------
Morning Air attack on TF, near Mersing at 51,81
Weather in hex: Severe storms
Raid spotted at 8 NM, estimated altitude 4,000 feet.
Estimated time to target is 2 minutes
Allied aircraft
Blenheim I x 3
No Allied losses
Japanese Ships
xAK Tamaki Maru
Aircraft Attacking:
3 x Blenheim I bombing from 2000 feet
Naval Attack: 4 x 250 lb SAP Bomb
------------------------------------------------------------------------------------------------
Morning Air attack on TF, near Mersing at 51,82
Weather in hex: Severe storms
Raid spotted at 14 NM, estimated altitude 5,000 feet.
Estimated time to target is 4 minutes
Japanese aircraft
A6M2 Zero x 13
F1M2 Pete x 16
Ki-43-Ia Oscar x 3
Ki-43-Ib Oscar x 5
Ki-43-Ic Oscar x 6
Allied aircraft
Blenheim I x 3
No Japanese losses
Allied aircraft losses
Blenheim I: 2 destroyed
-------------------------------------------------------------------------------
Afternoon Air attack on TF, near Mersing at 51,82
Weather in hex: Severe storms
Raid spotted at 40 NM, estimated altitude 4,000 feet.
Estimated time to target is 13 minutes
Japanese aircraft
A6M2 Zero x 12
F1M2 Pete x 11
Ki-43-Ia Oscar x 5
Ki-43-Ib Oscar x 5
Ki-43-Ic Oscar x 7
Allied aircraft
Blenheim IV x 11
Swordfish I x 4
Vildebeest III x 4
Hudson I x 18
No Japanese losses
Allied aircraft losses
Blenheim IV: 1 destroyed, 1 damaged
Swordfish I: 3 destroyed
Vildebeest III: 1 destroyed, 1 damaged
Hudson I: 3 destroyed, 2 damaged
Hudson I: 1 destroyed by flak
Japanese Ships
xAK Teiyo Maru
CA Mikuma
CA Kumano
DD Shikinami
xAK Tamaki Maru, Torpedo hits 1
xAK Ayatosan Maru
xAK Kokai Maru
xAK Arima Maru, on fire
xAK Osaka Maru
-----------------------------------------------------------------------------
Afternoon Air attack on TF, near Mersing at 51,82
Weather in hex: Severe storms
Raid spotted at 20 NM, estimated altitude 2,000 feet.
Estimated time to target is 13 minutes
Japanese aircraft
A6M2 Zero x 9
F1M2 Pete x 10
Ki-43-Ia Oscar x 2
Ki-43-Ib Oscar x 5
Ki-43-Ic Oscar x 3
Allied aircraft
Blenheim I x 17
Vildebeest III x 20
No Japanese losses
Allied aircraft losses
Blenheim I: 2 destroyed
Vildebeest III: 4 destroyed, 8 damaged
Vildebeest III: 1 destroyed by flak
Japanese Ships
DD Isonami
xAK Kenyo Maru
xAK Osaka Maru
xAK Kokai Maru
xAK Asosan Maru, Bomb hits 1, on fire
DD Uranami
xAK Asakasan Maru
CL Sendai
Enemy paratroopers have landed in Central Malaya and successfully blocked the strat-moving brigades from Alor Star just north of Kuala Lumpur. The sacrifice of their paras may turn the Mersing Gambit in to a resounding success for the Japanese.
Ground combat at Port Dickson (49,80)
Japanese Shock attack
Attacking force 209 troops, 2 guns, 0 vehicles, Assault Value = 16
Defending force 1864 troops, 14 guns, 54 vehicles, Assault Value = 78
Japanese adjusted assault: 6
Allied adjusted defense: 6
Japanese assault odds: 1 to 1 (fort level 0)
Japanese Assault reduces fortifications to 0
Combat modifiers
Defender: op mode(-), preparation(-), morale(-), experience(-)
Attacker: shock(+), leaders(-)
Japanese ground losses:
65 casualties reported
Squads: 0 destroyed, 7 disabled
Non Combat: 0 destroyed, 0 disabled
Engineers: 0 destroyed, 0 disabled
Allied ground losses:
7 casualties reported
Squads: 0 destroyed, 0 disabled
Non Combat: 0 destroyed, 2 disabled
Engineers: 0 destroyed, 0 disabled
Assaulting units:
Yokosuka 3rd SNLF /2
Defending units:
2/17 Dogra Battalion
3rd Cavalry Regiment
5/2nd Punjab Battalion
2/215th Bty 80th AT Gun Regiment
--------------------------------------------------------------------------------------
Ground combat at Kuala Lumpur (49,79)
Japanese Shock attack
Attacking force 145 troops, 4 guns, 0 vehicles, Assault Value = 10
Defending force 4174 troops, 17 guns, 1 vehicles, Assault Value = 153
Japanese adjusted assault: 3
Allied adjusted defense: 25
Japanese assault odds: 1 to 8 (fort level 0)
Combat modifiers
Defender: terrain(+), op mode(-), leaders(-), preparation(-)
morale(-), experience(-)
Attacker: shock(+), leaders(-)
Allied ground losses:
47 casualties reported
Squads: 0 destroyed, 6 disabled
Non Combat: 0 destroyed, 0 disabled
Engineers: 0 destroyed, 0 disabled
Assaulting units:
Yokosuka 1st SNLF /2
Defending units:
2nd Malay Battalion
1st Malay Battalion
28th Gurkha Brigade
110th RAF Adv Base Force
Off Balabac, PGs Tulsa and Asheville were escorting merchies from Manila to Batavia when float planes operating from Puerto Princesa reported an enemy TF nearby. Leaving their charges to continue their way, the two PGs were ordered to investigate the contact - to their regret.
A division of four-pipers fleeing from Manila in direction of Balikpapan and diverted to investigate the invasion of Cotabato and then retire to Kendari had much more luck:Night Time Surface Combat, near Balabac at 70,83, Range 12,000 Yards
Japanese Ships
PB Nako Maru #2, Shell hits 1
xAK Kaiko Maru, Shell hits 3
xAP Kobe Maru, Shell hits 1
Allied Ships
PG Asheville
PG Tulsa, Shell hits 2
Japanese ground losses:
30 casualties reported
Squads: 0 destroyed, 1 disabled
Non Combat: 0 destroyed, 2 disabled
Engineers: 0 destroyed, 0 disabled
--------------------------------------------------------------------------------------------------
Day Time Surface Combat, near Balabac at 69,83, Range 17,000 Yards
Japanese Ships
TB Hayabusa, Shell hits 1
Allied Ships
PG Asheville, Shell hits 13, heavy fires
PG Tulsa, Shell hits 8, heavy fires, heavy damage
Day Time Surface Combat, near Sangi at 77,96, Range 18,000 Yards
Japanese Ships
PB Edo Maru
xAK Hasuna Maru
xAK Meigen Maru
xAK Yamafuku Maru
xAKL Kakyu Maru
xAKL Hitora Maru
xAKL Higari Maru
Allied Ships
DD John D. Ford
DD Peary
DD Pillsbury
DD Pope
Japanese Amphibious TF evades combat
--------------------------------------------------------------------------------
Day Time Surface Combat, near Manado at 76,98, Range 26,000 Yards
Japanese Ships
CVL Ryujo
CA Myoko
CA Haguro
DD Kuroshio
DD Oyashio
DD Hatsukaze
DD Natsushio
DD Hayashio
DD Amatsukaze
Allied Ships
DD John D. Ford
DD Peary
DD Pillsbury
DD Pope
Maximum visibility in Clear Conditions: 30,000 yards
CONTACT: Japanese lookouts spot Allied task force at 25,000 yards
Japanese TF attempts to evade combat
Range increases to 26,000 yards...
CONTACT: Allied lookouts spot Japanese task force at 26,000 yards
CVL Ryujo screened from combat
- escorted by DD Natsushio
Range increases to 28,000 yards
CVL Ryujo screened from combat
CA Myoko engages DD John D. Ford at 28,000 yards
Task forces break off...
-----------------------------------------------------------------------------------------
Morning Air attack on TF, near Manado at 75,99
Weather in hex: Overcast
Raid spotted at 20 NM, estimated altitude 8,000 feet.
Estimated time to target is 8 minutes
Japanese aircraft
A5M4 Claude x 5
B5N1 Kate x 10
No Japanese losses
Allied Ships
DD Pillsbury
DD Peary
DD Pope
DD John D. Ford
Aircraft Attacking:
10 x B5N1 Kate launching torpedoes at 200 feet
Naval Attack: 1 x 45cm Type 91 Torp
Night Time Surface Combat, near Ternate at 78,102, Range 2,000 Yards
Japanese Ships
DD Yamakaze
Allied Ships
DD John D. Ford
DD Peary
DD Pillsbury
DD Pope
Poor visibility due to Thunderstorms with 46% moonlight
Maximum visibility in Thunderstorms and 46% moonlight: 2,000 yards
Range closes to 10,000 yards...
Range closes to 8,000 yards...
Range closes to 6,000 yards...
Range closes to 4,000 yards...
Range closes to 2,000 yards...
CONTACT: Japanese lookouts spot Allied task force at 2,000 yards
CONTACT: Allied lookouts spot Japanese task force at 2,000 yards
DD John D. Ford engages DD Yamakaze at 2,000 yards
DD Yamakaze engages DD John D. Ford at 2,000 yards
Task forces break off...
RE: "We want the big ones!" DBB-C vs IdahoNYer (J)
looks like your aircraft counter-attacking the landing at Mersing went in unescorted and therefore suffered heavily losses for little return. It would have been interested if you could war game the Mersing landing with and admiral for TF-Z other than Tom Thumb at the helm.

RE: "We want the big ones!" DBB-C vs IdahoNYer (J)
No Buffalos available to escort those strikes at Mersing? That was likely decisive. Looks like you had all your Buffalos on LRCAP over Force Z.
You can get AVG down to Singapore by Dec 10th, by transiting via Victoria Point, Northern Malaya, etc. That might've really helped alot, though probably not enough to change the outcome
You can get AVG down to Singapore by Dec 10th, by transiting via Victoria Point, Northern Malaya, etc. That might've really helped alot, though probably not enough to change the outcome