A tale of two Marshals

Frank Hunter's Campaigns on the Danube is an operational study of the campaigns along the Danube in 1805 and 1809. Campaigns on the Danube's system focuses on trying to present the player with the same sort of decisions placed on their historical counterparts; how to feed an army and move that army according to a plan, all the while trying to fight a campaign. There is also an option to allow players to play out the battles with miniatures and input the results.
Post Reply
User avatar
Rasputitsa
Posts: 2902
Joined: Sat Jun 30, 2001 8:00 am
Location: Bedfordshire UK
Contact:

A tale of two Marshals

Post by Rasputitsa »

This has come from the AAR I am slowly working through ;

In the 'Invasion of Bavaria', against the AI Coalition/Austrians, the French Marshal LEFEBVRE has been holding back three Austrian corps on the Northern flank of NAPOLEON's front at STRAUBING. He has resolutely beaten off every attack and despite being ordered to retreat back to LANDSHUT, is still holding STRAUBING.


Image


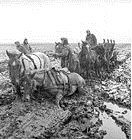
Here is LEFEBVRE VII Corps (Bavarians) and, although CotD is a simple game compared to many other titles, there is a lot of information on this screen. Frank Hunter games do not bury you in information and data, but if it's on the screen it's important and worth noting.

This is LEFEBVRE, nearly two weeks into the scenario, after several battles around CHAM and STRAUBING and having inflicted 42 strength points casualties on three Austrian corps.

Top left LEFEBVRE himself shows 'Steady' with good morale, no Fatigue, or Stress and adequate Supply, this after facing off superior forces for several days. LEFEBVRE has been helped by the Austrian inability to co-ordinate an overwhelming attack and a detached French cavalry division interdicting CHAM in the Austrian rear.

In the 'View Units', the forces are mostly 'Confident', or 'Steady' with only one unit 'Wavering', which is Wrede's infantry division, that was standing alone at one time against the Austrians coming from CHAM.

There are some 'Stragglers' and 'Wounded' showing in LEFEBVRE's info box and some of these should rejoin their units, except that Wrede shows that he needs 1 replacement, which indicates a permanent loss to be dealt with, when in range (about 5 hexes) of the LOC.

LEFEBVRE has been given the objective of the crossroads between LANDSHUT and LANDAU, with 'March urgency' at 'forced march', because there was a danger that the Austrian units on the South bank of the Danube may get behind him and cut off the corps. However, he has not yet left STRAUBING and continues to battle with the Austrians. LEFEBVRE has been set 'To the guns' so that any units not initially involved in a battle would march to the guns and join in.

The enlarged LEFEBVRE unit counter, top right, shows that he has good 'Administration' and 'Battle' skills, but no so good at 'Inspiration', although he has done quite well so far.

So there is a lot of relevant information on this screen, which shows a corps commander and his units in good condition, despite several hard battles and some losses. If the corps is not forced to move too quickly, too far, these losses in 'Stragglers' and 'Wounded' should be regained, but this corps is doing well in a vital position.

Next post, look at another corps.

Attachments
LEFEBVRE 2 reduced 2.jpg
LEFEBVRE 2 reduced 2.jpg (189.76 KiB) Viewed 237 times
"In politics stupidity is not a handicap" - Napoleon

“A people which is able to say everything becomes able to do everything” - Napoleon

“Among those who dislike oppression are many who like to oppress" - Napoleon
User avatar
Rasputitsa
Posts: 2902
Joined: Sat Jun 30, 2001 8:00 am
Location: Bedfordshire UK
Contact:

RE: A tale of two Marshals

Post by Rasputitsa »

Whilst LEFEBVRE was holding the Austrians back at STRAUBING, Marshal MASSENA with IV Corps was struggling along the muddy roads from ULM, through AUGSBURG, to join the rest of the army. On the way they had brush with HILLER's Austrian IV Corps, attempting to push through FREISING, driving the Austrians back and then onward by 'forced march' to help LANNES, who was suffering serious losses in holding LANDSHUT against multiple attack.

MASSENA was known to NAPOLEON as 'the Child of Victory' and one the Emperors best marshals, reaching LANDSHUT just in time to save LANNES from another attack, but the battle did not go as well as it should, leaving the child of victory reeling.

MASSENA won the battle at LANDSHUT, but at some cost :


Image


Look at the difference from LEFEBVRE's situation, with MASSENA having a brush with HILLER and one battle to save LANDSHUT, which leaves him 'Brittle', whilst the 'View Units' shows 2 infantry divisions 'Shattered', another 'Wavering' and the cavalry 'Brittle'. Off screen, only the artillery is OK. This corps is not fit for further combat, which would probably destroy its remaining strength.

MASSENA himself has 'Fatigue' and high 'Stress', with overall corps losses in 'Stragglers' and 'Wounded' (8/13), whilst the individual units show 5 strength points needed, indicating permanent losses, that can only be restored with replacements.

The MASSENA counter shows that he has good 'Administration' and 'Battle' skills, as confirmed in the battle screen of the last combat showed that MASSENA had 'good execution' of the battle plan, but there were still significant losses and the corps left badly damaged.

So what happened, maybe MASSENA entered the battle from a 'forced march' and that reduced the efficiency of the corps, or maybe MASSENA just had a bad day. I re-played that turn and MASSENA avoided battle and the resulting losses, so luck has some part. LEFEBVRE also had 'forced march' orders, although he was not actually moving, but stayed concentrated in STRAUBING and was able to inflict a defeat on CHARLES last attack on the town.

Looking back over earlier turns it did not look as though MASSENA's units built up much fatigue on the approach march, maybe his skills offset this, but LEFEBVRE's units suffered high fatigue, even exhaustion, in the battles for STRAUBING, but were still able to recover enough, to beat off the continued Austrian attacks. Maybe LEFEBVRE was just lucky that there was enough of a break between Austrian attacks to recover, because the situation became critical at some points.

MASSENA has better 'Inspiration' attributes than LEFEBVRE, which means that he is better able to raise the morale of his units, as is shown by the state of Tharreau infantry, reduced to strength 2 after the battle (normal strength 18) and very nearly destroyed. The enlarged inset counter shows that after a couple of days MASSENA has restored some of the strength of the Tharreau unit, with the remaining shortage (8) being wounded, which may return from the hospital later.

MASSENA has plenty of supply (155), which will help in restoring the 'Shattered' units, as corps in low, or no supply, cannot restore units so easily.

The LOC has been moved to FREISING to be closer, so that it will be easier for wounded to re-join and replacements become available (within about 5 hexes), whilst MASSENA is moved back slightly towards FREISING to avoid further damaging combat.

This all shows the amount of information which is presented in the deceptively simple game displays and all of it has some relevance on the way units will perform. It also demonstrates the realistic uncertainty, which is a part of warfare in all eras.

Many games these days have extensive databases and information sheets, as the game designers exploit the capabilities of modern computers, with predicable odds and percentages, movement points mapped out, with weather and terrain effects already applied, these are computer games on a war theme.

This is a wargame.
Attachments
MASSENA 4 reduced.jpg
MASSENA 4 reduced.jpg (193.53 KiB) Viewed 237 times
"In politics stupidity is not a handicap" - Napoleon

“A people which is able to say everything becomes able to do everything” - Napoleon

“Among those who dislike oppression are many who like to oppress" - Napoleon
Post Reply

Return to “Campaigns on the Danube 1805 - 1809”