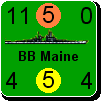
I had to make the 4-3 sacrifice, because this was the best I could do with the movement points of the units available. There was no spare Corps for that hole in the line, and there was no better unit to take the place of the MOT. I railed the Moscow MIL there (as suggested by . . . I forget) because it can die and be rebuilt to serve on the Moscow Line next turn. Otherwise, he's doing nothing of value with his 2 movement points.ORIGINAL: Shannon V. OKeets
No sacrifices. The 4-3 needs to be behind the river.ORIGINAL: Red Prince
On the South Front:
-----
Here I've swapped positions of the 4-3 INF and the 6-3 INF (dark blue arrows). I'm pretty sure that the 4-3 can't be overrun. Even if it can (I could be wrong), the only 2 units able to do so can't move up to the front, and there aren't enough other units with the range to make terrific attacks on the river lines or the 2 cities here.
The other unit with a light blue circle, the Sevastapol MIL, I moved into the port to prevent a paradrop into Crimea.
As you can see, I've pulled most of my ARM and MECH units down from the North Front to try to make some heavier stacks. This is a long line to cover, and the USSR just hasn't got a whole lot of units to work with. If the sacrifices up north can buy a little extra time there, that's good, but this is the line that needs to hold as long as possible. I think I've got enough flexibility to adjust things next impulse. The biggest problem is that I can't keep a strong line and still have a secondary line behind it.

A secondary line is a luxury the USSR can not afford. Only the HQ gets to sit comfortably out of harm's way. And that respite might only be for 1 impulse. The front line should be as strong as possible. There should never be two divisions in the same hex. Spread them out like icing on a cake: no clumps. There is a hole NE of Dnepropetrovsk that should be occupied by some random corps.
I am not going to try to tweak every hex here. But if there is a cheaper unit than the Mot to sit and die in Kiev that would be nice. Maybe the 4-1 Gar in the north should rail to Kiev instead of the Moscow Militia - since there is only 1 rail move available. Oh, but all the rail moves have been made.[:(] The lesson here is to never make your rail moves until you have thought through all your land moves. Thinking back to that 4-1, it can either die in Vitebsk or move 1 hex NE and pray.
About 1/3 of these units came from the Gomel, Bryansk and Kursk region. Even the fast units could only get so far down south. If I want to "tidy up" this line before the Germans get there, the sacrifice had to be made. I figured out which hexes could be attacked without him being there, and it didn't look good. With him there, and with the bombers too far off to hurt the line, I still have time to fix things.


