Taking down an NSS (OT41) - Hardradi(G) vs JohnDoe(S) (Completed)

Please post your after action reports on your battles and campaigns here.

Moderator: Joel Billings

User avatar
Hardradi
Posts: 835
Joined: Wed Feb 09, 2011 8:16 am
Location: Swan River Colony

Taking down an NSS (OT41) - Hardradi(G) vs JohnDoe(S) (Completed)

Post by Hardradi »

Introduction

Up against my previous opponent in Road to Leningrad – JohnDoe. Another mirror match where we each take both sides and play against each other. This will be the Operation Typhoon 41 Scenario.
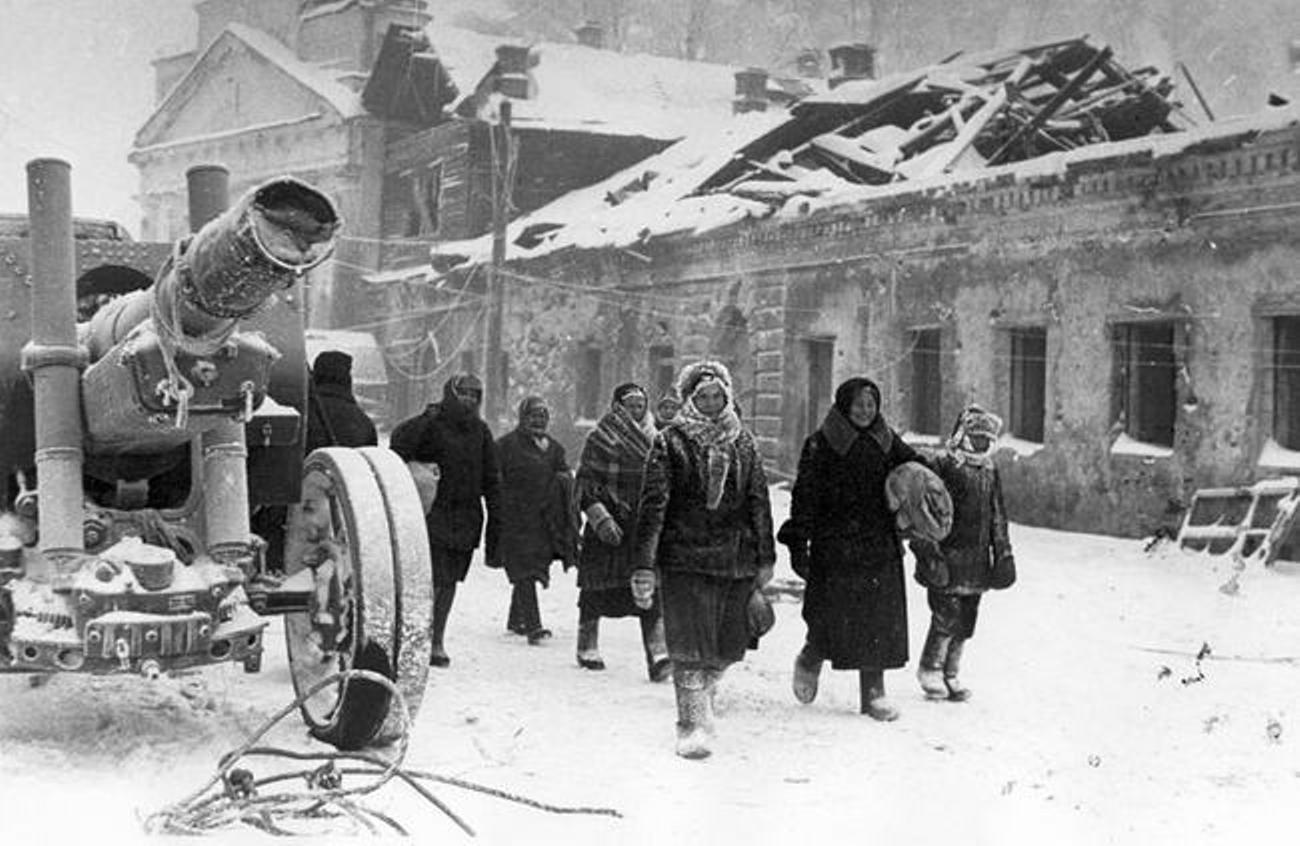
This is my first attempt at this scenario. I have never played it in WitE1 nor read any specific books about the Operation. I feel like I have a knowledge gap. I know about the harsh winter, the
ill prepared Germans, the Siberian Divisions, Glantz’s lines of reserve armies and German recon forces seeing the spires of Moscow in the distance but I do not the play by play.

What to do? I look at Zovs unfinished AAR but it’s not much help. I find a map in one of the many, many unread ebooks that I have. I use this map to aim my Panzer Groups at specific points and
look for encirclement's of Soviet troops. All roads lead to Moscow and thats where my three Panzer groups are heading. I also read somewhere that Guderian’s 2nd Panzer Group was late to the party
and unprepared compared to the 3rd and 4th Panzer Groups. I know this means they had just got done with the encirclement of the Southwestern Front.

The weather looks ok to me. Probably a good time to utilise the Luftwaffe before it starts snowing. Its go time, charge!!!

Vilcum's mod "More info on zoom1 (9x9)" (with some minor modifications to the HQ counters by me)
Image


User avatar
Hardradi
Posts: 835
Joined: Wed Feb 09, 2011 8:16 am
Location: Swan River Colony

RE: Taking down an NSS (OT41) - Hardradi(G) vs JohnDoe(S) - Turn 2

Post by Hardradi »

TURN 1 (30 September 1941): Charge!!!

We successfully form three pockets and take two objectives.

The two northern pockets (P#1 and P#2) are strong and should hold. Pocket #3 is not successfully screened and is expected to be re-opened by the Soviets.

We have taken and secured the important objective and rail centre of Vyazma. Part of pocket #1 overlaps the double rail line to Vyazma and needs to be cleared. A Panzer Division, from 3rd Panzer Group is pushing up the Smolensk-Moscow Highway.

Elements of 4th Panzer Group are within 20 miles of Kaluga.

Orel, an objective, is taken but not held in force. It is expected to be re-occupied by the Soviets. Cutting the Soviet rail line here may also help.
Image

I push the Luftwaffe hard in ground support. With worse weather on the way, why not.
Image

Image

User avatar
Hardradi
Posts: 835
Joined: Wed Feb 09, 2011 8:16 am
Location: Swan River Colony

RE: Taking down an NSS (OT41) - Hardradi(G) vs JohnDoe(S) - Turn 2

Post by Hardradi »

TURN 2 (7 October 1941): Mixed news

In the north, good news, the big pocket south of Vyazma has held and the positions directly in front of 2nd and 4th Panzer Groups look relatively clear of enemy forces.

At Orel, the city has been retaken by a Soviet Guards Division. The pocket west of the city has been reopened but it looks like most of the Soviet troops could not make it through the narrow neck and are now stuck in a sack.

West of Kursk, a Panzer regiment has been cut off by Soviet infantry.

Even further south near Sumy, as expected, a Soviet cavalry division has re-opened the weakly held pocket made by 2nd Panzer Group.

Image

I missed an ending screenshot for Turn 2 (you will be able to see my final positions in the Turn 3 opening screenshot). The two big pockets,
north and centre, were now shored up with infantry while the motorised and panzer division pushed towards Moscow and the other objectives.
I made it to the Mozhaysk Defence Line and broke through to the south of the objective. Orel was surrounded by Panzer regiments and cut off
but not taken.

The pocket to the south was secured with a mixture of troops (whatever was available). My long right flank is secured by motorised and panzer
regiments from 2nd Panzer Group.

Progress looked something like this:
Image

Vyazma was the only objective I had actually captured. It was this turn where my rail repair route to Vyaza was blocked by three of my units
in a single hex. Rather the hold up repair I disbanded a regiment to clear the way for the rail repair.
User avatar
tm1
Posts: 2384
Joined: Tue May 14, 2013 10:21 pm
Location: Central Coast NSW Australia

RE: Taking down an NSS (OT41) - Hardradi(G) vs JohnDoe(S) - Turn 2

Post by tm1 »

ORIGINAL: Hardradi

TURN 1 (30 September 1941): Charge!!!

We successfully form three pockets and take two objectives.

The two northern pockets (P#1 and P#2) are strong and should hold. Pocket #3 is not successfully screened and is expected to be re-opened by the Soviets.

We have taken and secured the important objective and rail centre of Vyazma. Part of pocket #1 overlaps the double rail line to Vyazma and needs to be cleared. A Panzer Division, from 3rd Panzer Group is pushing up the Smolensk-Moscow Highway.

Elements of 4th Panzer Group are within 20 miles of Kaluga.

Orel, an objective, is taken but not held in force. It is expected to be re-occupied by the Soviets. Cutting the Soviet rail line here may also help.


I push the Luftwaffe hard in ground support. With worse weather on the way, why not.


Image


Nice screen shot editing specially the "Brandenburgers" nice touch adds to the commentary, I use paint and that's just to give a basic screen shot don't have clue how spice pics up.

Also there a number of players that throw in a real picture in there AAR makes it look authentic and or realism to the game.

The Panzer column picture is tops.


User avatar
Hardradi
Posts: 835
Joined: Wed Feb 09, 2011 8:16 am
Location: Swan River Colony

RE: Taking down an NSS (OT41) - Hardradi(G) vs JohnDoe(S) - Turn 2

Post by Hardradi »

Just start experimenting with the controls in Paint and you will pick up a lot. I use Paint, because its generally quick and easy. I use GIMP for more advanced stuff, its free compared to Adobe. For example, the lines I drew above I used a second layer in GIMP and traced it out from my turn 3 opening positions, then copied it onto the Turn 2 screenshot. It all takes time, practice and frustration to learn but is rewarding. A bit like WitE. [:)]

Yes, its quite a dramatic shot. Couldn't resist it.

This is a photo of Panzer-Brigade (Oberst Richard) Koll of 6th Panzer Division advancing north of Vyazma. Immediately ahead is the brigade commander's Panzerbefehlswagen III, denoted by the white turret code "RO6." The vehicles ahead of it are Phänomen Granit 25H ambulances,
while Soviet POWs walk toward the rear on the right. The smoke is from a Soviet oil dump hit by Luftwaffe Junkers Ju-87 Stukas. This photo is by Oberst a.D. Helmut Ritgen on 2 October 1941 and is from his book "The 6th Panzer Division: 1937-45."


Read more: https://worldwartwodaily.filminspector. ... z6wy0zyEZ4
Under Creative Commons License: Attribution
Follow us: @jamesjbjorkman on Twitter
User avatar
Hardradi
Posts: 835
Joined: Wed Feb 09, 2011 8:16 am
Location: Swan River Colony

RE: Taking down an NSS (OT41) - Hardradi(G) vs JohnDoe(S) - Turn 3

Post by Hardradi »

TURN 3 (14 October 1941): Beyond Borodino

All pockets hold. The weather has turned for the worse with rain and mud.
Image

I check the supply situation. It’s not good, I should have looked at this earlier. The Armies are onyl being supplied about 50% of what they would like. Its time to repair those railyards.
Image

Pockets area cleared.
Image

Future weather reports indicate heavy rain and lots of light mud. In the north, three Panzer Groups converge in the direction of Moscow.

Mozhaysk is taken by 3rd Panzer Group (A) and its leading elements push on up the Moscow Highway. Just to the east, its lead elements (B) are about 30 miles away from West Moscow. Here the ground is mostly clear with good roads.

4th Panzer Group bypasses Kaluga (C) where about seven Soviet Rifle Divisions are now trapped. Its lead element, 10th Panzer Division, crosses the Oka River unopposed. (D) It is about 40 miles from Western Moscow. The ground ahead of this Division is also clear.

To the southeast, elements of Guderians 2nd Panzer Group (E) bypass Tula and are 20 miles from the Oka River.

Image

To the south, the bulk of Guderians Panzer Group have surrounded Orel and formed a solid screen protecting Army Group Centre’s right wing. Kursk is also threatened with encirclement.

Image

User avatar
Hardradi
Posts: 835
Joined: Wed Feb 09, 2011 8:16 am
Location: Swan River Colony

RE: Taking down an NSS (OT41) - Hardradi(G) vs JohnDoe(S) - Turn 4A

Post by Hardradi »

Turn 4A (21 October 1941): In the footsteps of Napoleon

It’s raining a lot now.

Something occurs to me this turn. A lot of my unit CV’s have dropped to 1 (you can see this in the subsequent screenshots below). At first I thought this was caused by my
severe supply/replacement problems. It takes me a while to figure out what’s going on. It’s something called heavy mud. If you are on a hex with heavy mud you have little to no CV.

Ok, the Drive on Moscow might still be on. The Panzer Division from 3rd Panzer directly south of Moscow has been cut off and swamped by Soviet infantry. I am pretty sure
it can be broken out. The other Divisions of 3rd Panzer Group to the west are only moderately screened. Perhaps the way to Moscow will be open this way.

My opponent might be struggling to bring units into the battle because of the weather or he has strengthened Moscow city itself.

The 10th Panzer (of 4th panzer Group) is not in the ZOC of any enemy units. I check and this unit has not been in any battles. It is possible that it may not have even been
in the ZOC of any enemy units. Could the ground ahead to Moscow be clear of enemy units?

Image

10th Panzer pushes north and reaches the Moskva(the river) uncontested. I bring forward the other elements of 4th Panzer Group and try to catch up. They are stopped at the Moskva.

10th Panzer crosses the Moskva and seizes Lyubertsy airfield. Still no enemy opposition. I can tell by the ZOC conversion that there are units in Moscow but none to the east(right). I
still have the movement points to push ahead at least one more hex. Another double track rail line would be cut and another interdicted. The hex is light mud. It will leave a 10 mile
gap between 10th Panzer and the other elements of 4th Panzer Group still on the southern banks of the Moskva. I hesitate for a while, this would bring me to the outskirts of Moscow.
If I do not do it now, next turn this could be blocked by enemy units. I do it.

Image

Motor cycle riders from 10th Motorcycle Battalion bring back reports of seeing the spires of the Kremlin in the distance. [10th Panzer's CV has dropped from a 10 to a 4]
Image

User avatar
Beethoven1
Posts: 1439
Joined: Wed Mar 24, 2021 9:23 pm

RE: Taking down an NSS (OT41) - Hardradi(G) vs JohnDoe(S) - Turn 4A

Post by Beethoven1 »

Some nice suspense! The world holds its breath to find out the fate of Moscow. If the Soviets have any sort of counterattack in them, I am betting we will see it next turn against 10th Panzer.
User avatar
Hardradi
Posts: 835
Joined: Wed Feb 09, 2011 8:16 am
Location: Swan River Colony

RE: Taking down an NSS (OT41) - Hardradi(G) vs JohnDoe(S) - Turn 4A

Post by Hardradi »

The turns not over yet [:)]
User avatar
Hardradi
Posts: 835
Joined: Wed Feb 09, 2011 8:16 am
Location: Swan River Colony

RE: Taking down an NSS (OT41) - Hardradi(G) vs JohnDoe(S) - Turn 4B

Post by Hardradi »

Turn 4B (21 October 1941): The Lyubertsy Air Lift

10th Panzer has pulled off a tactical victory, somehow getting all the way to Moscow without meeting any resistance. OKH gets on the phone the commander of the 7th Division currently refitting back in Vyazma. “Get me your best regiment”
The 1st Regiment of 7th Division is earmarked for an airlift operation. All Ju52 transport aircraft are scrambled at their respective air bases. JG51, also based at Vyazma, is fitted with drop tanks so that it can escort the air convoy into hostile territory.

Image

The Lyubersty Air Lift is a go. The VVS does not disappoint. They scramble the battered regiments of their polks. An array of outdated, new, heavy and lend lease fighters are hurled
at the air lift convoy. Despite the ad-hoc nature of their forces, they manage to inflict an impressive casualty count against the Luftwaffe. Lucky there were not many more. The airlift
is a success. The deep bridgehead over the Moskva reaching all the way to Moscow is secured.

Image

The pocket around Kaluga is effectively compressed to the city limits. The Soviets still occupy three objectives to the south of Moscow. Kaluga, Tula and Orel are all well defended. I begin to wonder if my weakening forces are going to be able to destroy these garrisons. Large numbers of 2nd Panzer Groups worn
out forces are required to screen the whole right flank. These units are all at the end of long truck supply chain.

Information from the various battles indicates that the enemy may be weak (their CVs are falling through the floor even in strong defensive positions).

Image

The 10th Panzer steps up to take a run with the ball, the battle ground Moscow, is light mud. The forces are relatively even but the city is heavily fortified and considered difficult terrain
for Panzers. Despite not being allowed to fully commit to the battle by General Kuntzen, 10th Panzer gives it hard go. There are heavy casualties on both sides.

Image

End north.
Image

End south
Image


User avatar
Hardradi
Posts: 835
Joined: Wed Feb 09, 2011 8:16 am
Location: Swan River Colony

RE: Taking down an NSS (OT41) - Hardradi(G) vs JohnDoe(S) - Turn 4B

Post by Hardradi »

T5 (28th October 1941): Logistics breakdown

10th Panzer Division still holds along with the Lyubertsy Air Lift Regiment. No attacks, it must be the mud. For some reason, like last turn, the positions around 10th Panzer have not been occupied by
any forces of significance or strength.

We hold the pocket south of Moscow and the Soviets still hold four major cities to the south although they are all isolated.

Image

Logistics are terrible. We are running under 29% of our need. I didn’t look at this for the first three turns. I was too busy charging forward. I have a feeling this was a mistake. Major AP has started
being expended to try and repair the rail yards all over the map. I need to bust the Soviets out of Kaluga and Orel so that I can use their rail yards as well.

Image

In the south, I search around for light mud hexes from which to attack. Otherwise, I keep my regiments away from the cities to try to reduce fatigue and build CPP. They can come out and attack me if they want.

Image

In the north, again it’s looking like a hard ask to break down these isolated cities. My opponent is racking up points by holding them. In hindsight it might have been better to not have bypassed them but then I might not have made it to Moscow. I try to tear apart the units in the pocket bringing forward stronger CV units
but the heavy mud makes it very difficult. Unbelievably, most of them hold.

And now Moscow. 10th Panzer pushes north and takes the undefended town of Mytischi (A). The Klyzma River is reached. A panzer regiment heads east along the river capturing more territory (B). Not sure if this was a good idea but I might need this for a retreat space. The corridor to the Mosvka is fortified (C) and another
infantry regiment is airlifted in from Vyazma. To the southwest, other elements of 4th Panzer Group break through to the Moskva south of West Moscow (D).

Image

Weather prediction.
Image


User avatar
Beethoven1
Posts: 1439
Joined: Wed Mar 24, 2021 9:23 pm

RE: Taking down an NSS (OT41) - Hardradi(G) vs JohnDoe(S) - Turn 4B

Post by Beethoven1 »

Interesting to see the use of the airlift, well done with that. I guess at some point I will have to read the section of the manual that explains how to do that, because obviously it seems quite useful in certain circumstances.
User avatar
Seminole
Posts: 2240
Joined: Thu Jul 28, 2011 12:56 am

RE: Taking down an NSS (OT41) - Hardradi(G) vs JohnDoe(S) - Turn 4B

Post by Seminole »

ORIGINAL: Beethoven1

Interesting to see the use of the airlift, well done with that. I guess at some point I will have to read the section of the manual that explains how to do that, because obviously it seems quite useful in certain circumstances.

It was a tactic I saw develop in WitW during the allied breakout phase. They have lots of paras that can be flown into the liberated airbases in France in the wake of roaming mechanized units, helping firm up pockets with lots of extra ZOC.
"War is never a technical problem only, and if in pursuing technical solutions you neglect the psychological and the political, then the best technical solutions will be worthless." - Hermann Balck
User avatar
Hardradi
Posts: 835
Joined: Wed Feb 09, 2011 8:16 am
Location: Swan River Colony

RE: Taking down an NSS (OT41) - Hardradi(G) vs JohnDoe(S) - Turn 4B

Post by Hardradi »

ORIGINAL: Beethoven1

Interesting to see the use of the airlift, well done with that. I guess at some point I will have to read the section of the manual that explains how to do that, because obviously it seems quite useful in certain circumstances.

It would have been more interesting if the VVS showed up in more force. [:@] Its pretty intuitive to use, especially compared to the WitE1 "mechanic".
User avatar
Hardradi
Posts: 835
Joined: Wed Feb 09, 2011 8:16 am
Location: Swan River Colony

RE: Taking down an NSS (OT41) - Hardradi(G) vs JohnDoe(S) - Turn 6

Post by Hardradi »

Turn 6 (4 November 1941): Situation improving

The enemy appear to have gone into hibernation. No attacks against my positions. The most noticeable move is the cordon of Soviet Infantry Divisions
now north of 10th Panzer Division.

Image

The regiment of 10th Panzer that had split off returns and 10th Panzer Division reforms as a whole. It strikes west and routs the Soviet unit in the position but is unable to
advance. Further elements of 4th Panzer Group crowd in behind. I keep enough space to allow for retreats.
All of Moscow’s rail routes are now either cut of interdicted. At this stage I realise that Moscow is a National Supply Source and should be generating its own supplies. I
assume that units inside Moscow are never going to be isolated. I assume that all the divisions outside of Moscow will now crumble as they won’t be getting supplies direct
from Moscow.

[NOTE: Found this out later 25.2.3 (thanks loki):
“If a NSS is adjacent to an enemy unit, it will be reduced to 50,000 tons of freight and will not receive an automatic delivery of freight. It will continue to function
as an NSS for determining whether units and hexes are isolated. A depot will totally cease to function as a NSS if it cannot trace a rail link to another on map NSS.
Under these circumstances it will not prevent unit and hex isolation, although the depot may continue to store freight, after having the freight present reduced to 50,000”]


In this weather, the pocket south of Moscow is still too tough to completely crack in the heavy mud. Through careful planning and shuffling it is severely diminished. With my terrible
supply situation both Kaluga and Tula need to be cleared ASAP. My focus on light mud hexes and trying to get strong divisions into these positions pays off. I am able to crush the
beleaguered defenders in both cases.
Of the minor cities, only Orel further south and Rzhev and Kalinin in the north still hold out.

Image

Taking these two victory locations will also help with my dismal points score to date.

Image

User avatar
Hardradi
Posts: 835
Joined: Wed Feb 09, 2011 8:16 am
Location: Swan River Colony

RE: Taking down an NSS (OT41) - Hardradi(G) vs JohnDoe(S) - Turn 6

Post by Hardradi »

Turn 7 (11 November 1941): Time to board a plane comrade Stalin [:D]

The 7th of November passed. This year there was no October Revolution Parade in Red Square. Only a few stranded refugees turned out for the parade. Every man and weapon was needed on the barricades.

Image

In the previous week, 10th Panzer had outed Soviet forces to its west but was unable to advance to secure the newly won position. Soviet cavalry divisions have now reformed the defences in this wooded area (1).
To the west advancing Army Group North units have been cut off (2).

Image

10th Panzer routs the weak cavalry forces that the Soviets used to re-capture the woody battleground to the west. Follow on forces now fearlessly advance into the wake of 10th Panzers advance to protect it supply route south. Other elements push back Soviet defenders on the south side of the city tightening the noose. To the east, elements of 2nd Panzer Group feint north trying to encircle and unhinge the defenders north of Moscow.

Army Group North forces extract themselves from their pocket and pocket the two enemy divisions. Intel from captured Soviet POWs indicates an overall supply situation for the enemy is worse than ours. The 9th Army creates a pocket northwest of Vyazma.

Just south of Moscow, the pocket is finally cleared. 3rd Panzer Group forces under General Model assist other elements of 4th Panzer Group push up on the western side of Moscow taking Manikhina and Alabusheva. The two Pincers are tantalising close to touching.
Luftwaffe drops leaflets over Moscow “Пора сесть в самолет товарища Сталина.”

West of Moscow, after carefully watching this section of clear ground with recon for a few weeks, 3rd Panzer Group breaks through Soviet defences and lunges across the clear ground in the direction of Kalinin. This move threatens the entire Soviet right flank.

Image
User avatar
Hardradi
Posts: 835
Joined: Wed Feb 09, 2011 8:16 am
Location: Swan River Colony

RE: Taking down an NSS (OT41) - Hardradi(G) vs JohnDoe(S) - Turn 8

Post by Hardradi »

Turn 8 (18th November 1941): Attack on Moscow

Army Group North forces continues to spar with the Soviets on the north western flank.

After cutting off Soviet forces last week, the 9th Army is hit with a series of violent Soviet attacks. They manage to re-establish contact with their cut off divisions.

3rd Panzer Group is also attacked either side of Mozhaysk. One attack is successful and the other fails. Strangely the area north of 3rd Panzer Group is clear of enemy forces

10th Panzer is also unsuccessfully attacked. The 10 mile gap between it and other element of 4th Panzer Group fills with Soviet units.

The south is relatively quiet.

Image

Even though Kaluga depot is now receiving supplies by rail, we are only receiving 25% of what we need. With the ground frozen it’s time to strike back.

3rd Panzer Group unleashes across the clear ground between Rzhev and Kalinin. Kalinin is taken on the march. A link up is also achieved with forces of Army Group North and a porous pocket is formed. Kalinin another objective has fallen and Rhzev another objective is now cut off.

With the mud gone it’s also time to have a go at the big prize. Elements of 4th Panzer Group are able to link up with 10th Panzer. Moscow is now surrounded! Attacks go in on both Moscow and West Moscow. The defenders hold but West Moscow looks weak. It is more vulnerable than Moscow and North Moscow because of the sheer number of units that can be brought to bear from this direction at this time.

Image

Next turn Tula, will also be part of the rail network. Hopefully this will improve supplies, as a 25% supply rate seems unsustainable. We are still madly trying to repair railyards and railways.

Image
User avatar
Hardradi
Posts: 835
Joined: Wed Feb 09, 2011 8:16 am
Location: Swan River Colony

RE: Taking down an NSS (OT41) - Hardradi(G) vs JohnDoe(S) - Turn 9

Post by Hardradi »

Turn 9 (25 November 1941): Moscow, Moscow,

West of Kalinin, Soviet forces manage to break open our pocket. This is delaying the inevitable.

Moscow is now properly isolated. The enemy was unable to break back into the city.

Along our right flank two regiments are cut off by advancing Soviet forces. They should be able to be rescued.

Image

Its time! Infantry Divisions of 4th Panzer Group assault and take Western Moscow.

Image

And again. This time for Moscow proper.

Image

Third time is not a charm. Soviet forces are too strong in Northern Moscow.

Image

West of Kalinin we are able to re-pocket the Soviet forces in this area, along with Rzhev. Southeast of Kalinin, 3rd Panzer Group try for a pincer attack but the difficult terrain and weather slows down the advancing Panzers to much.

Image

Supply has turned a corner and is improving. Our Soviet opponents appear to be struggling. Front line intel shows that they are generally running at less than 55%.
Image

Soviets are winning the kill count but I have Moscow. Still projecting ahead, it does not look like a spectacular victory.
Image
User avatar
Hardradi
Posts: 835
Joined: Wed Feb 09, 2011 8:16 am
Location: Swan River Colony

RE: Taking down an NSS (OT41) - Hardradi(G) vs JohnDoe(S) - Turn 10

Post by Hardradi »

Turn 10 (2 December 1941): North Moscow and big pockets


Opening
Image

Fall of North Moscow. Might have been a bit of overkill here.
Image

Supplies are at about 33% of need. My troops are living hand to mouth. It wouldn't surprise me if they had become cannibals.

End north. Two big pockets have formed. Rzhev, an objective, still holds out in the western one.
Image

End overview (note my anti motorization screen. I stopped using it back in my Leningrad games but we have no house rule against it)
Image


User avatar
Hardradi
Posts: 835
Joined: Wed Feb 09, 2011 8:16 am
Location: Swan River Colony

RE: Taking down an NSS (OT41) - Hardradi(G) vs JohnDoe(S) - Turn 11

Post by Hardradi »

Turn 11 (9 December 1941): Reduction of pockets

One attack by the Soviets trying to break out of the pocket west of Moscow. The western pocket is now secure.
Image

Our forces are so weakened we can barely muster the strength to reduce the pocket to the west.
Image

End overview
Image

Post Reply

Return to “After Action Reports”