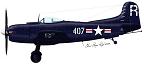
Thanks, guys. I did a follow up raid about a week or so ago, with indifferent results. One sub hit. He's since moved fighters (Tojos) there. One less squadron on the front, I suppose.
11 October 1942
The dash-4 Dauntless is in production at 80 a month. Over 20 in the pool now. My carriers are all undergoing refit and are tied up for the next 19 days, but once they're out, I can probably upgrade a couple squadrons and use what goes in the pool to refresh the rest. A big convoy of troop transports from Cape Town in enroute to Pearl, having left Panama and should arrive within the next two weeks. More offensive options when they arrive. More on that later.
Things have gotten very messy in the Rangoon/Moulmein area. My troops made it to Thanbyuzayat where he had a ton of troops. It came down to one division and lots of flak, but that one division had badly beaten off my attacks there, despite a 5-1 advantage on my part. Since then, he's brought up cruisers which have beaten up my transports there and has also landed troops in Moulmein, in my backfield. My troops have turned around to go back to Moulmein. Everything's a mess right now. Blenheims have been ineffective against his ships. I've just moved in some B-25 squadrons to Pegu to help. I've also converted some squadrons to Vengeances. While I was at it, most of the RAF fighter squadrons went to the cannon armed IIc version of the Hurricane. I've brought down my cruisers to help on my end, and they did "okay", but took their own losses. I did lose CA
Hawkins
Day Time Surface Combat, near Bassein at 51,52, Range 5,000 Yards
Japanese Ships
CL Naka, Shell hits 26, heavy fires, heavy damage
DD Michishio, Shell hits 2, on fire
DD Nenohi, Shell hits 1
Allied Ships
CA Exeter, Shell hits 1
CL Hobart, Shell hits 5
CL Enterprise~
DD Nepal, Shell hits 1
DD Van Galen, Shell hits 3
Poor visibility due to Thunderstorms
Maximum visibility in Thunderstorms: 6,000 yards
Range closes to 17,000 yards...
Range closes to 11,000 yards...
Range closes to 7,000 yards...
Range closes to 5,000 yards...
CONTACT: Japanese lookouts spot Allied task force at 5,000 yards
CONTACT: Allied lookouts spot Japanese task force at 5,000 yards
Tawara, Yoshioki crosses the 'T'
CL Naka engages CA Exeter at 5,000 yards
CA Exeter engages DD Nenohi at 5,000 yards
CL Naka engages CL Hobart at 5,000 yards
DD Van Galen engages DD Nenohi at 5,000 yards
Range closes to 4,000 yards
CA Exeter engages CL Naka at 4,000 yards
CL Enterprise~ engages CL Naka at 4,000 yards
CL Hobart engages DD Michishio at 4,000 yards
DD Michishio engages DD Van Galen at 4,000 yards
Range increases to 6,000 yards
CL Naka engages CA Exeter at 6,000 yards
CL Naka engages CL Enterprise~ at 6,000 yards
CL Naka engages CL Hobart at 6,000 yards
Range increases to 9,000 yards
CL Naka engages CA Exeter at 9,000 yards
CL Enterprise~ engages CL Naka at 9,000 yards
CL Hobart engages DD Michishio at 9,000 yards
DD Nenohi engages DD Van Galen at 9,000 yards
DD Nepal engages DD Nenohi at 9,000 yards
Range increases to 12,000 yards
CL Naka engages CL Hobart at 12,000 yards
CL Naka engages CL Enterprise~ at 12,000 yards
DD Michishio engages DD Van Galen at 12,000 yards
DD Nenohi engages DD Van Galen at 12,000 yards
DD Nenohi engages DD Nepal at 12,000 yards
Range increases to 14,000 yards
CL Naka engages CA Exeter at 14,000 yards
DD Nenohi engages DD Van Galen at 14,000 yards
DD Michishio engages DD Nepal at 14,000 yards
DD Michishio engages DD Nepal at 14,000 yards
CL Naka engages CA Exeter at 14,000 yards
DD Nepal engages DD Nenohi at 14,000 yards
CL Hobart engages DD Michishio at 14,000 yards
DD Michishio engages DD Nepal at 14,000 yards
Range increases to 15,000 yards
CL Enterprise~ engages CL Naka at 15,000 yards
CL Hobart engages CL Naka at 15,000 yards
DD Van Galen engages DD Michishio at 15,000 yards
Range closes to 13,000 yards
CL Naka engages CA Exeter at 13,000 yards
CL Naka engages CL Hobart at 13,000 yards
DD Michishio engages DD Van Galen at 13,000 yards
Range closes to 11,000 yards
CA Exeter engages CL Naka at 11,000 yards
CL Enterprise~ engages DD Nenohi at 11,000 yards
CL Naka engages CL Hobart at 11,000 yards
DD Nenohi engages DD Van Galen at 11,000 yards
DD Nenohi engages DD Nepal at 11,000 yards
Range closes to 8,000 yards
CA Exeter engages CL Naka at 8,000 yards
CL Naka engages CL Enterprise~ at 8,000 yards
CL Naka engages CL Hobart at 8,000 yards
DD Nepal engages DD Nenohi at 8,000 yards
Range increases to 11,000 yards
CL Naka engages CA Exeter at 11,000 yards
DD Nepal engages DD Nenohi at 11,000 yards
DD Van Galen engages DD Michishio at 11,000 yards
DD Nepal engages DD Nenohi at 11,000 yards
Tawara, Yoshioki orders Japanese TF to disengage
Range closes to 10,000 yards
CL Naka engages CA Exeter at 10,000 yards
CL Naka engages CL Enterprise~ at 10,000 yards
CL Hobart engages CL Naka at 10,000 yards
DD Nenohi engages DD Van Galen at 10,000 yards
Range closes to 7,000 yards
CL Naka engages CA Exeter at 7,000 yards
DD Nenohi engages DD Van Galen at 7,000 yards
CL Naka engages CL Hobart at 7,000 yards
CA Exeter engages CL Naka at 7,000 yards
CL Enterprise~ engages CL Naka at 7,000 yards
DD Nepal engages DD Michishio at 7,000 yards
DD Nepal engages DD Michishio at 7,000 yards
DD Nenohi engages DD Van Galen at 7,000 yards
CL Naka engages CL Hobart at 7,000 yards
DD Van Galen engages DD Michishio at 7,000 yards
DD Michishio engages DD Nepal at 7,000 yards
Task forces break off...
Night Time Surface Combat, near Rangoon at 51,54, Range 1,000 Yards
Japanese Ships
CL Naka, Shell hits 1, on fire
CL Kitakami, Shell hits 20, and is sunk
CL Oi, Shell hits 26, Torpedo hits 1, and is sunk
DD Michishio
DD Nenohi, Shell hits 1
Allied Ships
CA Exeter
CA Hawkins~, Shell hits 23, Torpedo hits 5, and is sunk
CL Hobart
CL Enterprise~
CL Birmingham~
DD Nepal
DD Van Galen, Shell hits 1
DD Arrow
DD Fortune~
DD Griffin~
Reduced visibility due to Thunderstorms with 0% moonlight
Maximum visibility in Thunderstorms and 0% moonlight: 2,000 yards
Range closes to 17,000 yards...
Range closes to 11,000 yards...
Range closes to 7,000 yards...
Range closes to 5,000 yards...
Range closes to 3,000 yards...
Range closes to 1,000 yards...
Farley H. crosses the 'T'
CA Hawkins~ engages CL Oi at 1,000 yards
CL Kitakami engages CA Exeter at 1,000 yards
CA Hawkins~ engages CL Naka at 1,000 yards
DD Nenohi engages CA Hawkins~ at 1,000 yards
DD Nepal engages DD Michishio at 1,000 yards
Range increases to 2,000 yards
CL Oi engages CA Hawkins~ at 2,000 yards
CL Kitakami engages CA Hawkins~ at 2,000 yards
CL Oi engages CL Birmingham~ at 2,000 yards
CL Hobart engages CL Oi at 2,000 yards
CL Oi engages CA Hawkins~ at 2,000 yards
CL Oi sunk by CA Exeter at 2,000 yards
DD Nepal engages DD Nenohi at 2,000 yards
DD Fortune~ engages DD Michishio at 2,000 yards
DD Van Galen engages DD Nenohi at 2,000 yards
Range increases to 3,000 yards
CA Hawkins~ sunk by CL Kitakami at 3,000 yards
CA Exeter engages CL Kitakami at 3,000 yards
CL Kitakami engages CL Birmingham~ at 3,000 yards
DD Van Galen engages DD Michishio at 3,000 yards
DD Nenohi engages DD Griffin~ at 3,000 yards
CL Kitakami engages CA Exeter at 3,000 yards
CL Birmingham~ engages CL Kitakami at 3,000 yards
CL Kitakami engages CL Enterprise~ at 3,000 yards
CL Kitakami engages CL Hobart at 3,000 yards
Range increases to 5,000 yards
CA Exeter engages CL Kitakami at 5,000 yards
DD Nenohi engages DD Van Galen at 5,000 yards
DD Michishio engages DD Nepal at 5,000 yards
CL Kitakami engages CA Exeter at 5,000 yards
CL Kitakami engages CL Birmingham~ at 5,000 yards
CL Kitakami engages CL Enterprise~ at 5,000 yards
DD Michishio engages DD Nepal at 5,000 yards
DD Michishio engages DD Arrow at 5,000 yards
Range increases to 6,000 yards
CL Kitakami sunk by CL Birmingham~ at 6,000 yards
CL Enterprise~ engages DD Nenohi at 6,000 yards
CL Naka engages CA Exeter at 6,000 yards
CL Naka engages CL Birmingham~ at 6,000 yards
CL Enterprise~ engages DD Michishio at 6,000 yards
DD Nepal engages DD Michishio at 6,000 yards
Task forces break off...
Night Time Surface Combat, near Rangoon at 51,55, Range 1,000 Yards
Japanese Ships
CA Mogami
CA Suzuya, Shell hits 14, Torpedo hits 1, on fire
DD Fubuki, Shell hits 1
DD Shinonome, Shell hits 1
DD Ayanami
DD Sazanami
Allied Ships
CA Exeter
CL Hobart, Shell hits 1
CL Enterprise~, Shell hits 2
CL Birmingham~, Shell hits 4, Torpedo hits 2, on fire
DD Nepal, Shell hits 1
DD Van Galen, Shell hits 1
DD Arrow
DD Fortune~
DD Griffin~, Shell hits 2, on fire
Low visibility due to Thunderstorms with 0% moonlight
Maximum visibility in Thunderstorms and 0% moonlight: 2,000 yards
Range closes to 17,000 yards...
Range closes to 11,000 yards...
Range closes to 7,000 yards...
Range closes to 5,000 yards...
Range closes to 3,000 yards...
Range closes to 1,000 yards...
Gordon, O L crosses the 'T'
CA Suzuya engages CL Birmingham~ at 1,000 yards
CL Birmingham~ engages CA Suzuya at 1,000 yards
CL Enterprise~ engages DD Sazanami at 1,000 yards
CA Suzuya engages CL Hobart at 1,000 yards
DD Sazanami engages DD Griffin~ at 1,000 yards
DD Fubuki engages DD Griffin~ at 1,000 yards
DD Sazanami engages DD Van Galen at 1,000 yards
Range increases to 2,000 yards
CA Mogami engages CL Enterprise~ at 2,000 yards
CA Suzuya engages CL Enterprise~ at 2,000 yards
DD Ayanami engages DD Van Galen at 2,000 yards
DD Sazanami engages DD Griffin~ at 2,000 yards
DD Fubuki engages DD Van Galen at 2,000 yards
DD Van Galen engages DD Fubuki at 2,000 yards
Masuyama L. orders Japanese TF to disengage
Range increases to 6,000 yards
CA Suzuya engages CL Hobart at 6,000 yards
CA Mogami engages CL Birmingham~ at 6,000 yards
DD Van Galen engages DD Sazanami at 6,000 yards
DD Van Galen engages DD Shinonome at 6,000 yards
DD Fubuki engages DD Nepal at 6,000 yards
DD Nepal engages DD Shinonome at 6,000 yards
Range increases to 7,000 yards
CA Suzuya engages CL Hobart at 7,000 yards
CA Mogami engages CL Birmingham~ at 7,000 yards
CL Enterprise~ engages DD Sazanami at 7,000 yards
CA Suzuya engages CL Hobart at 7,000 yards
DD Shinonome engages DD Griffin~ at 7,000 yards
DD Nepal engages DD Fubuki at 7,000 yards
Task forces break off...
---------------------------------------------
Day Time Surface Combat, near Rangoon at 51,55, Range 7,000 Yards
Japanese Ships
CA Mogami, Shell hits 2
CA Suzuya, Shell hits 2
DD Fubuki, Shell hits 3, on fire
DD Shinonome, Shell hits 3, heavy fires
DD Ayanami
DD Sazanami
Allied Ships
CA Exeter
CL Hobart
CL Enterprise~
CL Birmingham~, Shell hits 1
DD Nepal
DD Van Galen
DD Arrow
DD Fortune~
DD Griffin~, Shell hits 1
Poor visibility due to Thunderstorms
Maximum visibility in Thunderstorms: 7,000 yards
Range closes to 22,000 yards...
Range closes to 20,000 yards...
Range closes to 18,000 yards...
Range closes to 16,000 yards...
Range closes to 14,000 yards...
Range closes to 12,000 yards...
Range closes to 11,000 yards...
Range closes to 10,000 yards...
Range closes to 9,000 yards...
Range closes to 8,000 yards...
Range closes to 7,000 yards...
CONTACT: Japanese lookouts spot Allied task force at 7,000 yards
CONTACT: Allied lookouts spot Japanese task force at 7,000 yards
CL Birmingham~ engages CA Suzuya at 7,000 yards
CA Mogami engages CL Birmingham~ at 7,000 yards
CL Birmingham~ engages DD Sazanami at 7,000 yards
CL Hobart engages CA Mogami at 7,000 yards
DD Griffin~ engages DD Fubuki at 7,000 yards
DD Arrow engages DD Shinonome at 7,000 yards
DD Nepal engages DD Shinonome at 7,000 yards
CA Mogami engages CL Birmingham~ at 7,000 yards
DD Nepal engages DD Ayanami at 7,000 yards
DD Fubuki engages DD Griffin~ at 7,000 yards
DD Shinonome engages DD Fortune~ at 7,000 yards
DD Arrow engages DD Shinonome at 7,000 yards
DD Shinonome engages DD Van Galen at 7,000 yards
Range increases to 10,000 yards
CA Suzuya engages CA Exeter at 10,000 yards
CA Mogami engages CA Exeter at 10,000 yards
CA Mogami engages CL Hobart at 10,000 yards
DD Griffin~ engages DD Fubuki at 10,000 yards
DD Fubuki engages DD Van Galen at 10,000 yards
DD Shinonome engages DD Van Galen at 10,000 yards
Range increases to 13,000 yards
CA Exeter engages CA Suzuya at 13,000 yards
CA Suzuya engages CL Birmingham~ at 13,000 yards
CL Enterprise~ engages CA Mogami at 13,000 yards
DD Arrow engages DD Ayanami at 13,000 yards
DD Shinonome engages DD Van Galen at 13,000 yards
DD Van Galen engages DD Fubuki at 13,000 yards
DD Arrow engages DD Shinonome at 13,000 yards
DD Shinonome engages DD Van Galen at 13,000 yards
DD Nepal engages DD Fubuki at 13,000 yards
Range increases to 17,000 yards
CA Exeter engages CA Suzuya at 17,000 yards
CL Birmingham~ engages CA Suzuya at 17,000 yards
DD Griffin~ engages DD Sazanami at 17,000 yards
DD Shinonome engages DD Griffin~ at 17,000 yards
DD Arrow engages DD Shinonome at 17,000 yards
DD Van Galen engages DD Shinonome at 17,000 yards
DD Nepal engages DD Fubuki at 17,000 yards
Range increases to 18,000 yards
CA Exeter engages CA Suzuya at 18,000 yards
CL Birmingham~ engages CA Mogami at 18,000 yards
CL Enterprise~ engages CA Mogami at 18,000 yards
CA Mogami engages CL Hobart at 18,000 yards
DD Fubuki engages DD Fortune~ at 18,000 yards
DD Arrow engages DD Fubuki at 18,000 yards
DD Van Galen engages DD Shinonome at 18,000 yards
DD Fubuki engages DD Nepal at 18,000 yards
Range increases to 20,000 yards
CA Mogami engages CA Exeter at 20,000 yards
CA Mogami engages CL Birmingham~ at 20,000 yards
CL Enterprise~ engages DD Sazanami at 20,000 yards
CA Exeter engages DD Ayanami at 20,000 yards
CA Mogami engages DD Griffin~ at 20,000 yards
CA Mogami engages DD Fortune~ at 20,000 yards
CA Mogami engages DD Nepal at 20,000 yards
Task forces break off...
Some of his hits on my transports.
Night Time Surface Combat, near Rangoon at 53,55, Range 2,000 Yards
Japanese Ships
CA Mogami
CA Suzuya
DD Fubuki
DD Shinonome
DD Ayanami
DD Sazanami
Allied Ships
xAP Devonshire
xAP Dilwara, Shell hits 27, heavy fires, heavy damage
xAP Rohna, Shell hits 9, heavy fires, heavy damage
xAP Khandalla, Shell hits 17, heavy fires, heavy damage
xAP Santhia, Shell hits 15, on fire, heavy damage
xAP Zealandia, Shell hits 2, Torpedo hits 1, and is sunk
xAP Marella
xAK Clan Alpine
xAK Filleigh
xAK Nirpura
xAK Nirvana
xAK John Lykes, Shell hits 2, on fire
xAK Ombilin
Poor visibility due to Thunderstorms with 0% moonlight
Maximum visibility in Thunderstorms and 0% moonlight: 2,000 yards
Range closes to 11,000 yards...
Range closes to 10,000 yards...
Range closes to 9,000 yards...
Range closes to 8,000 yards...
Range closes to 7,000 yards...
Range closes to 6,000 yards...
Range closes to 5,000 yards...
Range closes to 4,000 yards...
Range closes to 3,000 yards...
Range closes to 2,000 yards...
CONTACT: Japanese lookouts spot Allied task force at 2,000 yards
Japanese launch Long Lance torpedoes at 2,000 yards before allies detect Japanese presence
CA Mogami launches Long Lance Torpedoes at xAP Zealandia at 2,000 yards
DD Sazanami fires at xAP Santhia at 2,000 yards
DD Ayanami fires at xAP Khandalla at 2,000 yards
DD Ayanami fires at xAP Rohna at 2,000 yards
DD Ayanami fires at xAP Dilwara at 2,000 yards
DD Sazanami engages xAP Santhia at 2,000 yards
CA Suzuya engages xAP Khandalla at 2,000 yards
DD Ayanami engages xAP Rohna at 2,000 yards
DD Ayanami engages xAP Dilwara at 2,000 yards
CA Suzuya engages xAP Dilwara at 2,000 yards
DD Ayanami engages xAP Zealandia at 2,000 yards
DD Sazanami engages xAP Dilwara at 2,000 yards
DD Shinonome engages xAP Dilwara at 2,000 yards
DD Fubuki engages xAP Dilwara at 2,000 yards
CA Mogami engages xAP Santhia at 2,000 yards
DD Fubuki engages xAP Khandalla at 2,000 yards
DD Ayanami engages xAP Dilwara at 2,000 yards
DD Fubuki engages xAP Dilwara at 2,000 yards
DD Fubuki engages xAK John Lykes at 2,000 yards
Range increases to 3,000 yards
CA Mogami engages xAP Dilwara at 3,000 yards
DD Sazanami engages xAP Khandalla at 3,000 yards
DD Shinonome engages xAP Dilwara at 3,000 yards
Allied Task Force Manages to Escape
Task forces break off...
Day Time Surface Combat, near Moulmein at 54,55, Range 4,000 Yards
Japanese Ships
CL Sendai
CL Nagara, Shell hits 7, on fire
DD Shirakumo, Shell hits 3, on fire
DD Ushio, Shell hits 5, heavy fires
Allied Ships
DD Norman, Shell hits 16, heavy fires, heavy damage
DD Tjerk Hiddes, Shell hits 16, and is sunk
AMC Westralia, Shell hits 13, Torpedo hits 3, and is sunk
xAK Jaladuta
xAK Jalajaran, Shell hits 4
xAK Empire Kumari
xAKL Kalarand
xAK Mundra
xAK Empire Tugela
xAK Empire Kohinoor
xAK Lulworth Hill
xAK Shirala
xAK Steaua Romania
xAK Testbank
xAK Uffington Court
xAKL Jalatarang
xAP Australia Star, Shell hits 1
xAP Idomeneus
xAKL Agnes, Shell hits 2, heavy fires
xAK Anatina, Shell hits 2
xAKL Mabella
xAKL Bust
xAKL Hermelin, Shell hits 3, heavy fires, heavy damage
xAP Boschfontein
xAP Kota Tjandi~, Shell hits 3, Torpedo hits 1, and is sunk
xAP Camphuys
xAP Le Maire
xAP Stagen
xAP +Tasman
xAP Tanimbar, Shell hits 5
xAP Koolinda, Shell hits 11, heavy fires, heavy damage
xAP Montoro, Shell hits 9, Torpedo hits 2, and is sunk
xAP Koolama, Shell hits 20, on fire
xAK Van Heutsz
xAK Tjibesar, Shell hits 2, on fire
xAKL Musi
xAK Apory
xAK Seistan
xAK Siang Wo, Shell hits 4, Torpedo hits 2, and is sunk
xAKL Saaid
xAKL Dah Puh, Shell hits 4, heavy fires, heavy damage
xAKL Dai Dah
xAKL Graciosa
xAKL Lindinha
xAKL Margaret
xAKL Nyoughla
Allied ground losses:
6796 casualties reported
Squads: 204 destroyed, 78 disabled
Non Combat: 278 destroyed, 143 disabled
Engineers: 23 destroyed, 0 disabled
Guns lost 81 (53 destroyed, 28 disabled)
Vehicles lost 54 (40 destroyed, 14 disabled)
Reduced visibility due to Thunderstorms
Maximum visibility in Thunderstorms: 4,000 yards
Range closes to 21,000 yards...
Range closes to 19,000 yards...
Range closes to 17,000 yards...
Range closes to 15,000 yards...
Range closes to 13,000 yards...
Range closes to 11,000 yards...
Range closes to 10,000 yards...
Range closes to 9,000 yards...
Range closes to 8,000 yards...
Range closes to 7,000 yards...
Range closes to 6,000 yards...
Range closes to 5,000 yards...
Range closes to 4,000 yards...
CONTACT: Japanese lookouts spot Allied task force at 4,000 yards
CONTACT: Allied lookouts spot Japanese task force at 4,000 yards
Hirata, Noboru crosses the 'T'
DD Tjerk Hiddes engages DD Ushio at 4,000 yards
DD Norman engages DD Ushio at 4,000 yards
DD Ushio engages AMC Westralia at 4,000 yards
DD Ushio engages xAP Koolama at 4,000 yards
CL Nagara engages AMC Westralia at 4,000 yards
CL Sendai engages AMC Westralia at 4,000 yards
DD Ushio engages AMC Westralia at 4,000 yards
DD Norman engages DD Shirakumo at 4,000 yards
DD Ushio engages xAKL Hermelin at 4,000 yards
AMC Westralia sunk by CL Nagara at 4,000 yards
DD Ushio engages DD Tjerk Hiddes at 4,000 yards
DD Shirakumo engages DD Tjerk Hiddes at 4,000 yards
DD Ushio engages xAP Kota Tjandi~ at 4,000 yards
xAKL Dah Puh collides with xAK Testbank at 54 , 55
CL Nagara engages DD Tjerk Hiddes at 4,000 yards
DD Norman engages DD Ushio at 4,000 yards
CL Sendai engages xAP Montoro at 4,000 yards
Range closes to 2,000 yards
CL Nagara engages DD Tjerk Hiddes at 2,000 yards
xAP Montoro sunk by CL Sendai at 2,000 yards
DD Shirakumo engages xAP Koolama at 2,000 yards
xAK Siang Wo sunk by DD Shirakumo at 2,000 yards
CL Nagara engages xAK Jalajaran at 2,000 yards
DD Shirakumo engages DD Tjerk Hiddes at 2,000 yards
DD Shirakumo engages DD Norman at 2,000 yards
DD Ushio engages xAP Koolama at 2,000 yards
DD Ushio engages xAP Koolinda at 2,000 yards
CL Nagara engages xAP Kota Tjandi~ at 2,000 yards
DD Ushio engages xAKL Dah Puh at 2,000 yards
CL Nagara engages DD Tjerk Hiddes at 2,000 yards
DD Ushio engages DD Norman at 2,000 yards
DD Shirakumo engages xAP Koolinda at 2,000 yards
DD Shirakumo engages xAKL Dah Puh at 2,000 yards
DD Shirakumo engages xAKL Agnes at 2,000 yards
Range increases to 3,000 yards
DD Shirakumo engages DD Tjerk Hiddes at 3,000 yards
DD Shirakumo engages DD Norman at 3,000 yards
DD Ushio engages DD Tjerk Hiddes at 3,000 yards
DD Tjerk Hiddes engages DD Shirakumo at 3,000 yards
Range closes to 2,000 yards
CL Nagara engages DD Tjerk Hiddes at 2,000 yards
DD Ushio engages DD Norman at 2,000 yards
DD Ushio engages DD Norman at 2,000 yards
DD Ushio engages xAP Koolinda at 2,000 yards
Range increases to 3,000 yards
CL Nagara engages DD Norman at 3,000 yards
DD Shirakumo engages xAP Koolama at 3,000 yards
DD Ushio engages DD Norman at 3,000 yards
DD Shirakumo engages xAK Tjibesar at 3,000 yards
Range closes to 2,000 yards
CL Nagara engages DD Norman at 2,000 yards
CL Nagara engages xAP Koolama at 2,000 yards
DD Ushio engages DD Norman at 2,000 yards
DD Shirakumo engages DD Norman at 2,000 yards
DD Ushio engages xAK Anatina at 2,000 yards
DD Ushio engages DD Norman at 2,000 yards
DD Ushio engages xAP Koolama at 2,000 yards
DD Shirakumo engages xAP Koolinda at 2,000 yards
Hirata, Noboru orders Japanese TF to disengage
CL Nagara engages DD Norman at 2,000 yards
DD Shirakumo engages xAP Koolinda at 2,000 yards
DD Shirakumo engages xAP Tanimbar at 2,000 yards
Range increases to 7,000 yards
DD Norman engages DD Shirakumo at 7,000 yards
DD Ushio engages xAP Koolinda at 7,000 yards
DD Shirakumo engages xAP Tanimbar at 7,000 yards
Range increases to 11,000 yards
xAP Boschfontein collides with xAK Lulworth Hill at 54 , 55
DD Shirakumo engages DD Norman at 11,000 yards
DD Shirakumo engages xAP Koolama at 11,000 yards
DD Ushio engages DD Norman at 11,000 yards
DD Shirakumo engages DD Norman at 11,000 yards
CL Sendai engages xAP Australia Star at 11,000 yards
Task forces break off...
---------------------------------------------
Day Time Surface Combat, near Moulmein at 54,55, Range 4,000 Yards
Japanese Ships
CL Sendai
CL Nagara, Shell hits 2, on fire
Allied Ships
DD Norman, Shell hits 15, and is sunk
xAK Jaladuta
xAK Jalajaran
xAK Empire Kumari
xAKL Kalarand
xAK Mundra, Shell hits 1
xAK Empire Tugela
xAK Empire Kohinoor
xAK Lulworth Hill
xAK Shirala
xAK Steaua Romania
xAK Testbank
xAK Uffington Court
xAKL Jalatarang, Shell hits 1
xAP Australia Star, on fire
xAP Idomeneus
xAKL Agnes, heavy fires
xAK Anatina
xAKL Mabella, Shell hits 2, on fire
xAKL Bust
xAKL Hermelin, and is sunk
xAP Boschfontein, Shell hits 2, on fire
xAP Camphuys
xAP Le Maire
xAP Stagen
xAP +Tasman
xAP Tanimbar, Shell hits 6, heavy fires
xAP Koolinda, Shell hits 15, and is sunk
xAP Koolama, Torpedo hits 1, and is sunk
xAK Van Heutsz
xAK Tjibesar, Shell hits 1, heavy fires, heavy damage
xAKL Musi
xAK Apory
xAK Seistan
xAKL Saaid
xAKL Dah Puh, and is sunk
xAKL Dai Dah
xAKL Graciosa
xAKL Lindinha
xAKL Margaret
xAKL Nyoughla, Shell hits 2, heavy fires, heavy damage
Allied ground losses:
6768 casualties reported
Squads: 294 destroyed, 92 disabled
Non Combat: 138 destroyed, 84 disabled
Engineers: 40 destroyed, 5 disabled
Guns lost 113 (88 destroyed, 25 disabled)
Vehicles lost 24 (13 destroyed, 11 disabled)
Reduced visibility due to Thunderstorms
Maximum visibility in Thunderstorms: 4,000 yards
Range closes to 19,000 yards...
Range closes to 17,000 yards...
Range closes to 15,000 yards...
Range closes to 13,000 yards...
Range closes to 11,000 yards...
Range closes to 10,000 yards...
Range closes to 9,000 yards...
Range closes to 8,000 yards...
Range closes to 7,000 yards...
Range closes to 6,000 yards...
Range closes to 5,000 yards...
Range closes to 4,000 yards...
CONTACT: Japanese lookouts spot Allied task force at 4,000 yards
Japanese open fire on surprised Allied ships at 4,000 yards
CL Nagara launches Long Lance Torpedoes at DD Norman at 4,000 yards
CL Sendai launches Long Lance Torpedoes at xAP Koolama at 4,000 yards
Range closes to 3,000 yards
CL Sendai engages DD Norman at 3,000 yards
CL Sendai engages DD Norman at 3,000 yards
CL Sendai engages xAK Tjibesar at 3,000 yards
Range closes to 2,000 yards
CL Nagara engages DD Norman at 2,000 yards
CL Sendai engages DD Norman at 2,000 yards
CL Nagara engages DD Norman at 2,000 yards
CL Sendai engages DD Norman at 2,000 yards
Range increases to 3,000 yards
CL Sendai engages DD Norman at 3,000 yards
Range closes to 2,000 yards
DD Norman sunk by CL Nagara at 2,000 yards
CL Nagara engages xAP Koolinda at 2,000 yards
xAP Koolinda sunk by CL Nagara at 2,000 yards
CL Nagara engages xAP Tanimbar at 2,000 yards
Range increases to 3,000 yards
CL Nagara engages xAP Boschfontein at 3,000 yards
Range closes to 2,000 yards
CL Sendai engages xAP Tanimbar at 2,000 yards
CL Nagara engages xAKL Saaid at 2,000 yards
Hirata, Noboru orders Japanese TF to disengage
Range increases to 4,000 yards
CL Sendai engages xAP Tanimbar at 4,000 yards
CL Nagara engages xAKL Nyoughla at 4,000 yards
CL Sendai engages xAKL Mabella at 4,000 yards
CL Sendai engages xAKL Jalatarang at 4,000 yards
Range increases to 9,000 yards
CL Nagara engages xAP Tanimbar at 9,000 yards
CL Sendai engages xAK Mundra at 9,000 yards
CL Nagara engages xAK Jaladuta at 9,000 yards
CL Sendai engages xAKL Mabella at 9,000 yards
Task forces break off...
With him focused so much in the Burma and Milne Bay areas, I'm highly tempted to kick off a Marianas invasion once my carriers get their upgrades. I'd take Guam, Tinian and Saipan all in one swoop. Doing so would complicate his supply situation from Truk on south -- especially if I get stuff like B-25s up and running. I'd need to be sure to get tons of supply and support forces all brought in with the initial invasion. I figure my carriers will be tied up awhile escorting follow-on supply convoys. I am down one carrier, as I've withdrawn my last Royal Navy CV, but I do have all the USN ones. He has also lost at least two fleet carriers, which I have credit for, including
Kaga. I highly suspect either
Hiryu or
Soryu is dead, as I did leave one of them badly damaged with heavy fires. One of the 'Kakus may still be out of action from damage.