The Power of Inexperience / GreyJoy(A)-Rader(J)

Post descriptions of your brilliant victories and unfortunate defeats here.

Moderators: wdolson, MOD_War-in-the-Pacific-Admirals-Edition

erstad
Posts: 1944
Joined: Mon Aug 02, 2004 11:40 pm
Location: Midwest USA

RE: Fighting for surviving

Post by erstad »

ORIGINAL: kfsgo

ORIGINAL: crsutton

No longer necessary under the current betas. You simply purchase the unit back for a few PPs and start rebuilding if you have devices in the pool. It is no more difficult than saving a fragment. Takes the same amount of time and uses the same pools.

That's true, but at the same time if you evacuate fragments you can rebuild them just behind the front, rather than having to ship them all the way back from SF/Aden/Tokyo/wherever, so it's still worth doing if you're just going to send'em back where they were.

Yeah, but they'll rebuild a lot faster in the home islands.
User avatar
GreyJoy
Posts: 6750
Joined: Fri Mar 18, 2011 12:34 pm

RE: Fighting for surviving

Post by GreyJoy »

Guys, I'm pretty sure in the last 4 months (since the first landing at Tulagi) he didn't move in or out anything important. Maybe a couple of cadres in order to rebuild them...i don't know...but i don't care much.
There are no aviation support units present there Crsutton. Only combat units. So that Fast Transport TF must have been transporting in supplies as some suggested.
And if he's bringing in supplies, that means he wants to stay there....but against 2 and half experienced american divisions, fully supplied and behind 7 forts i really don't see his big picture...
For me it's ok if he wants to stay there and fight...as long as those 5 divs are there they are not invading or digging in anywhere else...and if he wants to save them he must try a very difficult "dunkirk" or a massiva landing in order to conquest the whole island...At this stage of the war i'd welcome both of those options.
He can for sure try to move out his troops using float transport planes...but he'd need an entire air army of them!...and lot of time...and time is on my side with the turning tide!
 
More reinforcements are coming from the U.S....and i'm massing my 4Es...i wanna have a force of 150 of them before committing them again...My pools are finally growing and my losses are decreasing...i really value as a treasure the "Tulagi" affair...he cannot simply forget about those 80k men at Tulagi...but i see the difficulty of the decisions he has to take.
 
however in the next turns i'll try to put some LRCAP over Tulagi and see if he's doing something....
Xargun
Posts: 4396
Joined: Fri Feb 13, 2004 11:34 pm
Location: Near Columbus, Ohio
Contact:

RE: Fighting for surviving

Post by Xargun »

ORIGINAL: erstad

Yeah, but they'll rebuild a lot faster in the home islands.

That is arguable - as long as you have a non-malaria base with plenty of support, an HQ and supplies it doesn't matter where they are. The one thing you are missing is that although you can buy them back the same turn they are destroyed it takes roughly a month for the unit to reappear in Tokyo - you can easily use that month to replace 20% or more of the unit in the field. And sometimes 20% is all you care about. But then its hard to guess what Rader is thinking...

Personally I would use some CAs and DDs and bombard them every night for the next month or so until he stops you. You have plenty of ships and ammo and every squad you disable will suck up more supply to heal as well as be a drain on the unit - especially if you hit support squads.


Xargun
User avatar
DOCUP
Posts: 3117
Joined: Wed Jul 07, 2010 7:38 pm

RE: Fighting for surviving

Post by DOCUP »

Use the bombardments as a trap. Set up small bombardment fleets and run them in on Tulagi.  But have a strong SAG out of his recon range or disbanded in port.  When you see him move a strong SAG in, move in your bigger SAG.
 
doc
User avatar
GreyJoy
Posts: 6750
Joined: Fri Mar 18, 2011 12:34 pm

Fighting

Post by GreyJoy »

Apr 15,16 43

WHAT A TURN!!!

In order...

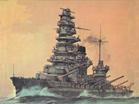
My CL Richmond TF tried to chase down the enemy fast transport till Thousands Ships bay...it ended up right into the arms of the GREATEST SCTF of the whole war (6 BBs and endless DDs)...
My commander was so wise to detect the enemy formation very early and managed to escape without a scratch....


--------------------------------------------------------------------------------
Night Time Surface Combat, near Thousand Ships Bay at 114,136, Range 29,000 Yards

Japanese Ships
BB Haruna
BB Kirishima
BB Nagato
BB Mutsu
BB Fuso
BB Yamashiro
DD Naganami
DD Kiyonami
DD Kagero
DD Hayashio
DD Asashio
DD Inazuma
DD Shinonome
DD Shirakumo
DD Isonami
DD Hatsuyuki
DD Uranami
DD Sagiri
DD Amagiri
DD Akebono
DD Ushio
DD Mochizuki
DD Kosugiri
DD Tagonami
DD Yamanagiri

Allied Ships
CL Richmond
DD Fletcher
DD Cony
DD DeHaven
DD Nicholas
DD Radford
DD Waller


CONTACT: Allies radar detects Japanese task force at 27,000 yards
Allied TF attempts to evade combat
Allied Surface Combat TF evades combat


The orderes were to retire to Lunga passing by Tulagi...and so we did...and found the enemy CLs still there without the CAs that fled away.... it ended up into a series of battles that saw the COMPLETE annihilation of the whole enemy force

--------------------------------------------------------------------------------
Night Time Surface Combat, near Tulagi at 114,137, Range 10,000 Yards

Japanese aircraft
no flights

Japanese aircraft losses
E7K2 Alf: 1 destroyed

Japanese Ships
CL Kashima, Shell hits 1, Torpedo hits 1, and is sunk
CL Kashii, Shell hits 13, Torpedo hits 2, and is sunk
CL Jintsu, Shell hits 7, on fire
APD Fumizuki, Shell hits 5, and is sunk
APD Hayate, Shell hits 4
APD Asanagi, Shell hits 7, on fire, heavy damage
APD Fuyo, Shell hits 1
APD Karukaya, Shell hits 2

Allied Ships
CL Richmond, Shell hits 5
DD Fletcher
DD Cony, Shell hits 1
DD DeHaven
DD Nicholas
DD Radford, Shell hits 1
DD Waller, Shell hits 1


--------------------------------------------------------------------------------
Night Time Surface Combat, near Tulagi at 114,137, Range 11,000 Yards

Japanese Ships
CL Jintsu, Shell hits 1, heavy fires, heavy damage
APD Hayate, Shell hits 2, on fire
APD Asanagi, on fire, heavy damage
APD Fuyo, on fire
APD Karukaya, Shell hits 1

Allied Ships
CL Richmond, Shell hits 1
DD Fletcher
DD Cony, Shell hits 1
DD DeHaven
DD Nicholas
DD Radford
DD Waller

--------------------------------------------------------------------------------
Night Time Surface Combat, near Tulagi at 114,137, Range 13,000 Yards

Japanese Ships
CL Jintsu, Shell hits 1, heavy fires, heavy damage
APD Hayate, Shell hits 3, heavy fires, heavy damage
APD Asanagi, Shell hits 6, heavy fires, heavy damage
APD Fuyo, on fire
APD Karukaya, Shell hits 2, heavy fires

Allied Ships
CL Richmond
DD Fletcher
DD Cony
DD DeHaven
DD Nicholas
DD Radford
DD Waller


--------------------------------------------------------------------------------
Night Time Surface Combat, near Tulagi at 114,137, Range 11,000 Yards

Japanese aircraft
no flights

Japanese aircraft losses
E7K2 Alf: 1 destroyed

Japanese Ships
CL Jintsu, Shell hits 16, and is sunk
APD Hayate, Shell hits 51, and is sunk
APD Asanagi, Shell hits 8, and is sunk
APD Fuyo, Shell hits 41, and is sunk
APD Karukaya, Shell hits 9, and is sunk

Allied Ships
CL Richmond, Shell hits 4, on fire
DD Fletcher
DD Cony, on fire
DD DeHaven
DD Nicholas
DD Radford
DD Waller, on fire


My commander then decided that Lunga wasn't a so safe place, probably due to the damages suffered during the last battles and moved away towards Lungaville at flank speed...

But at Lunga i had ordered another DD division to remain there just in case... as soon as the day came (and for 2 days in a row) enemy air formations attacked several times my anchored destroyers...


--------------------------------------------------------------------------------
Morning Air attack on TF, near Lunga at 114,138

Weather in hex: Clear sky

Raid detected at 172 NM, estimated altitude 10,000 feet.
Estimated time to target is 60 minutes

Japanese aircraft
A6M3a Zero x 40
G4M1 Betty x 9
N1K1-J George x 17


Allied aircraft
Spitfire VIII x 7
Kittyhawk III x 14
Spitfire Vc Trop x 10
Hurricane XIIb x 7
P-38G Lightning x 9
P-40K Warhawk x 9
F4U-1 Corsair x 7
F6F-3 Hellcat x 12


Japanese aircraft losses
A6M3a Zero: 7 destroyed
G4M1 Betty: 4 destroyed

Allied aircraft losses
Kittyhawk III: 2 destroyed


--------------------------------------------------------------------------------
Afternoon Air attack on TF, near Lunga at 114,138

Weather in hex: Moderate rain

Raid detected at 192 NM, estimated altitude 9,000 feet.
Estimated time to target is 67 minutes

Japanese aircraft
A6M3a Zero x 30
A6M5 Zero x 21
G4M1 Betty x 5
N1K1-J George x 17


Allied aircraft
Spitfire VIII x 7
Kittyhawk III x 12
Spitfire Vc Trop x 10
Hurricane XIIb x 6
P-38G Lightning x 8
P-40K Warhawk x 9
F4U-1 Corsair x 7
F6F-3 Hellcat x 11


Japanese aircraft losses
A6M3a Zero: 8 destroyed
A6M5 Zero: 4 destroyed
G4M1 Betty: 2 destroyed
N1K1-J George: 1 destroyed

Allied aircraft losses
P-40K Warhawk: 1 destroyed


--------------------------------------------------------------------------------
Morning Air attack on TF, near Lunga at 114,138

Weather in hex: Light rain

Raid detected at 160 NM, estimated altitude 8,000 feet.
Estimated time to target is 56 minutes

Japanese aircraft
A6M2-N Rufe x 4
A6M3a Zero x 9
A6M5 Zero x 17
G4M1 Betty x 3
N1K1-J George x 20


Allied aircraft
Spitfire VIII x 7
Kittyhawk III x 12
Spitfire Vc Trop x 10
Hurricane XIIb x 7
P-38G Lightning x 7
P-40K Warhawk x 8
F4U-1 Corsair x 7
F6F-3 Hellcat x 10


Japanese aircraft losses
A6M5 Zero: 5 destroyed
G4M1 Betty: 1 destroyed
N1K1-J George: 3 destroyed

Allied aircraft losses
P-38G Lightning: 1 destroyed
P-40K Warhawk: 1 destroyed
F6F-3 Hellcat: 1 destroyed


--------------------------------------------------------------------------------
Morning Air attack on TF, near Lunga at 114,138

Weather in hex: Light rain

Raid detected at 56 NM, estimated altitude 14,000 feet.
Estimated time to target is 20 minutes

Japanese aircraft
A6M3a Zero x 14
D3A1 Val x 18


Allied aircraft
Spitfire VIII x 6
Kittyhawk III x 12
Spitfire Vc Trop x 8
Hurricane XIIb x 7
P-38G Lightning x 5
P-40K Warhawk x 6
F4U-1 Corsair x 7
F6F-3 Hellcat x 9


Japanese aircraft losses
A6M3a Zero: 7 destroyed
D3A1 Val: 5 destroyed

No Allied losses

Allied Ships
xAK Mormacrey


--------------------------------------------------------------------------------
Afternoon Air attack on TF, near Lunga at 114,138

Weather in hex: Light rain

Raid detected at 118 NM, estimated altitude 15,000 feet.
Estimated time to target is 44 minutes

Japanese aircraft
A6M2-N Rufe x 16
A6M3 Zero x 19
A6M3a Zero x 38
A6M5 Zero x 37
D3A1 Val x 16
N1K1-J George x 38
Ki-43-IIb Oscar x 34
Ki-44-IIa Tojo x 120
Ki-45 KAIa Nick x 21


Allied aircraft
Spitfire VIII x 7
Kittyhawk III x 12
Spitfire Vc Trop x 10
Hurricane XIIb x 7
P-38G Lightning x 6
P-40K Warhawk x 8
F4U-1 Corsair x 7
F6F-3 Hellcat x 9


Japanese aircraft losses
A6M2-N Rufe: 1 destroyed
D3A1 Val: 2 destroyed, 5 damaged
Ki-43-IIb Oscar: 1 destroyed
Ki-44-IIa Tojo: 1 destroyed

Allied aircraft losses
F6F-3 Hellcat: 1 destroyed

Allied Ships
DD Perkins
DD Drayton
DD Jarvis

The overall result of the aerial battles after 2 days was 101 enemy planes directly downed in A2A combats against only 10 on our owns...with not a single KIA pilots among them[8D]

Wow....

Now i have to decide what to do with those BBs at Thousands Ships bay....


Image
Attachments
Immagine.jpg
Immagine.jpg (308.56 KiB) Viewed 372 times
User avatar
GreyJoy
Posts: 6750
Joined: Fri Mar 18, 2011 12:34 pm

RE: Fighting

Post by GreyJoy »

.

Image
Attachments
Immagine2.jpg
Immagine2.jpg (293.12 KiB) Viewed 372 times
User avatar
GreyJoy
Posts: 6750
Joined: Fri Mar 18, 2011 12:34 pm

RE: Fighting

Post by GreyJoy »

.

Image
Attachments
Immagine3.jpg
Immagine3.jpg (266.42 KiB) Viewed 372 times
User avatar
GreyJoy
Posts: 6750
Joined: Fri Mar 18, 2011 12:34 pm

RE: Fighting

Post by GreyJoy »

.

Image
Attachments
Immagine4.jpg
Immagine4.jpg (225.17 KiB) Viewed 372 times
User avatar
GreyJoy
Posts: 6750
Joined: Fri Mar 18, 2011 12:34 pm

RE: Fighting

Post by GreyJoy »

Ok...now the BIG question is: what shall i do with those 6 BBs only 1 hex from Tulagi? They are clearly ready to bombard the hell out of the big island...thus annihilating my supplies and my support troops, not counting the CD guns that will me mauled.... Shall i risk my own BBs in what clearly seems to be a trap? Shall i committ my air forces?...or simply should i wait and accept the risk of a bombardment run hoping it would be stopped or slowed by mines and PTs?

...mumble muble...[&:]
User avatar
JohnDillworth
Posts: 3104
Joined: Thu Mar 19, 2009 5:22 pm

RE: Fighting

Post by JohnDillworth »

You have 4 BB's that are a match for these 6.  Set up Lee as your commander, include enough DD's and off you go!
Today I come bearing an olive branch in one hand, and the freedom fighter's gun in the other. Do not let the olive branch fall from my hand. I repeat, do not let the olive branch fall from my hand. - Yasser Arafat Speech to UN General Assembly
User avatar
ny59giants
Posts: 9891
Joined: Mon Jan 10, 2005 12:02 pm

RE: Fighting

Post by ny59giants »

Does the SC TF with CL Richmond include all Fletcher Class DDs??

If you do follow JD's advice, I would have as many Fletcher and Porter DDs (best surface combat DDs) in the TF and keep the number as close to 12 as possible. Too many ships will not help. Personally, I would flood the hex with subs.
[center]Image[/center]
User avatar
dekwik
Posts: 90
Joined: Fri Sep 21, 2007 9:47 pm
Location: Atlanta

RE: Fighting

Post by dekwik »

If the bombardment is a prelude to "Dunkirk" then you may be best to sit back and keep your powder dry for a few more days. You might be able to hit the troop convoy on the way out with air attacks (it's harder to CAP a convoy it seems than a base hex) or multiple STFs. Or on the way in if that's the direction Rader is still going. Several 6 to 12 ship STFs will give him problems keeping the fox away from the chickens, especially if he keeps on using huge TFs.
Derek
User avatar
witpqs
Posts: 26376
Joined: Mon Oct 04, 2004 7:48 pm
Location: Argleton

RE: Fighting

Post by witpqs »

ORIGINAL: ny59giants

Does the SC TF with CL Richmond include all Fletcher Class DDs??

If you do follow JD's advice, I would have as many Fletcher and Porter DDs (best surface combat DDs) in the TF and keep the number as close to 12 as possible. Too many ships will not help. Personally, I would flood the hex with subs.

But have those DDs with Richmond had a chance to rearm?
User avatar
GreyJoy
Posts: 6750
Joined: Fri Mar 18, 2011 12:34 pm

RE: Fighting

Post by GreyJoy »

Thx guys for your suggestions.

I've made up my mind. I won't risk a very difficult manouver of sending my BBs from Ndeni tu Tulagi in one night (the risk of screwing up everything with 2days/turn is too high). I'll play conservatively. My combat fleet, divided in 3 different TF (of 11, 12 and 13 ships) and preceded by an ASW TF will move to Karaikira first, waiting to see what is he up to. we'll stay in Karaikira for 2 days (1 turn) and then we'll decide. I've chosen every single commander of every single ship...
At Karaikira our fleet will be welcomed by a 400 fighter strong CAP umbrella...i'm pretty sure we'll have to fight his bombers...hopefully the KB will remain at Shortland (at least it seems to be there)...however in case she shows up my CAP should be more than a nouisance for the mighty KB!
My CVs remains where they are...safe!

I decided it's better to let him come to me and hopefully ruin his day with mines and PTs at Tulagi. I sent 4 DDs to sweep Tulagi...let's see if i can ruin his bombing run...

My calculations are based on the fact that even if he nukes Tulagi, my positions should remain defendable...

His LBA bombers and fighters should have a very low morale after the defeats of the last 2 days....hopefully he won't risk another carnage and keep the range of them away from Karaikira...

finger crossed...[8|]
User avatar
GreyJoy
Posts: 6750
Joined: Fri Mar 18, 2011 12:34 pm

RE: Fighting

Post by GreyJoy »

About the Fletchers that were in the richmond TF...2 of them are damaged and along with the CL will be moved to Sydney in order to repair and upgrade. 4 of them will move back to ndeni to rearm and refuel. More 12 DDs are arriving from Suva (and among them 4 Fletchers).

Another strong SCTF is moving from PH in these hours...

Ndeni has ADs, AKEs and AGs...there every ship of mine can rearm easily....
User avatar
GreyJoy
Posts: 6750
Joined: Fri Mar 18, 2011 12:34 pm

RE: Fighting

Post by GreyJoy »

Forgot to say that 10 subs are moving to Tulagi to join 15 PTs and 380 mines
User avatar
GreyJoy
Posts: 6750
Joined: Fri Mar 18, 2011 12:34 pm

RE: Fighting

Post by GreyJoy »

Anyway the sinking of 3 more CLs the last turn was really a good news. His surface assets are really suffering during this campaign of The Solomons and what has been till now his main asset (the air force) is losing battle after battle...during the last turn, for ex, he must have lost nearly 80/100 pilots against 0 of my own...this "trend" must hurt his pilots reserve...at least that's what i hope!
User avatar
GreyJoy
Posts: 6750
Joined: Fri Mar 18, 2011 12:34 pm

RE: Fighting

Post by GreyJoy »

Indian map

Image
Attachments
Immagine.jpg
Immagine.jpg (470.1 KiB) Viewed 372 times
User avatar
GreyJoy
Posts: 6750
Joined: Fri Mar 18, 2011 12:34 pm

RE: Fighting

Post by GreyJoy »

My brits TOP pilots

Image
Attachments
Immagine.jpg
Immagine.jpg (247.97 KiB) Viewed 372 times
User avatar
GreyJoy
Posts: 6750
Joined: Fri Mar 18, 2011 12:34 pm

RE: Fighting

Post by GreyJoy »

My USAAF Top pilots

Image
Attachments
Immagine.jpg
Immagine.jpg (138 KiB) Viewed 372 times
Post Reply

Return to “After Action Reports”