Wrangling Loki - Mind_Messing (J) vs Lokasenna (A)

Post descriptions of your brilliant victories and unfortunate defeats here.

Moderators: wdolson, MOD_War-in-the-Pacific-Admirals-Edition

mind_messing
Posts: 3394
Joined: Mon Oct 28, 2013 11:59 am

RE: The Great Milne Bay Swim

Post by mind_messing »

April 17th to April 24th, 1943

North Pacific

There's a great deal of Sig Int hits on Allied bases in the Aleutians, and recon planes over Attu have spotted some light crusiers. I'm not hugely concerned, as we're pretty prepared for things in the Kuriles.

Central Pacific

The KB reaches Yokohama and the carriers start their upgrades - we need the radar on these ships.

The only real action in this theater is that the Allies have another go at bombarding Tabiteuea on April 20th, and this time, the CD guns are awake and ready for them.

TF 167 encounters mine field at Tabiteuea (137,134)

Allied Ships
DD Dunlap, Mine hits 1, on fire, heavy damage

Night Naval bombardment of Tabiteuea at 137,134 - Coastal Guns Fire Back!

175 Coastal gun shots fired in defense.

Allied Ships
DD Smith
DD Conyngham, Shell hits 2, on fire
DD Case
DD Cummings, Shell hits 2, on fire
DD Fanning
DD Stack
DD Benham

Japanese ground losses:
108 casualties reported
Squads: 0 destroyed, 3 disabled
Non Combat: 1 destroyed, 11 disabled
Engineers: 0 destroyed, 0 disabled


There's no damage to the airbase, but the Fletcher's are gone before daylight and the only losses are a couple of mini-subs that decided to take a shot at the Allied destroyers.

There's also a bombardment of Wake by three destroyers, but again there's no damage done.

These DD raids are pretty obviously probing attacks into the Marshals/Gilberts area, and Lokasenna's already got some good information from them (ie Wake CD guns on Tabiteuea) and there's regular long-range recon flights into the area, so he'll be able to get some idea of my dispositions.

So that's another area I'll need to be concerned about. Thankfully, I've a good reserve of IJN DB and TB squadrons already deployed in CentPac, and a vast bulk of fighters can be transfered in within a turn or two.

South-West Pacific

The ocean around the Torres Straits is becoming more and more dangerous for Allied shipping. Here's a selection of anti-shipping attacks against Allied task forces that occured over the past seven turns:


Allied Ships
xAKL Corrimal, Torpedo hits 2, and is sunk
xAKL Lorinna
xAKL Surigao, Torpedo hits 2, and is sunk
xAKL Corregidor, Torpedo hits 1, and is sunk
xAKL Benkalis, Torpedo hits 1, and is sunk

Allied Ships
DD Waller
DD Nicholas, Torpedo hits 1, and is sunk
DD Cony

Allied Ships
DD Cony
DD Waller, Bomb hits 2, on fire

Allied Ships Nell's sortied against these ships on the 24th, looks like a bombardment TF for Port Moresby. No hits.
CA Pensacola
CL Nashville
CL Honolulu

Allied Ships Lily dive-bombers also joined in, again no hits. I'd have loved to have sunk or damaged a few crusiers.
CA Quincy
CL Nashville
CL Honolulu
CL St. Louis


This is scarce a drop in the ocean, but I'll happily fight a war of attrition in trading airframes for ships, even if only to make Lokasenna's progress here that little bit more difficult.

I've been moving more and more IJN submarines into the region, but I've not really been having much luck. At this point in the war, Allied ASW is so good that my subs are either being sunk out-right or crippled in the event that they dare to fire off some torpedos. I'm relegating most of my subs to picket duty off the Austrailian coast or between New Caledonia and Fiji.

The Allies aren't completely passive though, as they mount their usual night bombing raids on my major airbases at 2000ft. It's the usual story: a one-sided slaughter of Japanese airframes on the ground or on night CAP, and the Allies escaping with minimal losses. I've made some grumbles about a possible HR to Lokasenna reagrding night bombing, but I don't think it's fair to insist until I've got dedicated night fighters in strength.

[center]Image
Situation in the Torres Straits as of April 17th.[/center]

DEI

Two misfortunes.

The attempt to land a Naval Guard at Gove is foiled by an Allied destroyer force on the 18th of April. The covering force of two Agano-class crusiers plus destroyers fails to intercept, leaving the Allies a free hand to wreck the troop convoy over two battles and sinks the lot of them.

Night Time Surface Combat, near Wessel Islands at 83,126, Range 11,000 Yards

Japanese Ships
CL Katori, Shell hits 3
AK Hirokawa Maru, Shell hits 6, on fire
AK Sagami Maru, Shell hits 9, heavy fires, heavy damage
AK Tosan Maru, Shell hits 5, Torpedo hits 2, and is sunk
xAP Haruna Maru, Shell hits 3
xAP Rakuyo Maru, Shell hits 5, Torpedo hits 1, and is sunk
xAP Teiritsu Maru, Shell hits 31, heavy fires, heavy damage

Allied Ships
DD Radford, Shell hits 1
DD Anderson
DD Hammann
DD Russell
DD Ellet
DD Perkins
DD Downes

Japanese ground losses:
1821 casualties reported
Squads: 42 destroyed, 47 disabled
Non Combat: 47 destroyed, 45 disabled
Engineers: 0 destroyed, 0 disabled
Guns lost 30 (28 destroyed, 2 disabled)

Day Time Surface Combat, near Wessel Islands at 82,125, Range 19,000 Yards

Japanese Ships
CL Katori, Shell hits 19, Torpedo hits 1, and is sunk
AK Hirokawa Maru, Shell hits 31, and is sunk
xAP Haruna Maru, Shell hits 39, and is sunk

Allied Ships
DD Radford, Shell hits 1
DD Anderson
DD Hammann
DD Russell
DD Ellet
DD Perkins
DD Downes

Japanese ground losses:
358 casualties reported
Squads: 7 destroyed, 12 disabled
Non Combat: 16 destroyed, 13 disabled
Engineers: 0 destroyed, 0 disabled


The following day, April 19th, the Agano's are devoid of a convoy to protect, so I send the covering force to bombard Merauke along with the heavy crusier Aoba in some small measure of revenge. However, I make the old mistake of leaving the TF on "Remain on station". The bombardments go well, but daybreak brings the Allied revenge:

Allied aircraft
B-25D1 Mitchell x 17

Allied aircraft losses
B-25D1 Mitchell: 6 damaged

Japanese Ships
CL Agano, Shell hits 14, Bomb hits 1, on fire
DD Arare
DD Yamagumo, Shell hits 1
CL Noshiro, Bomb hits 1, on fire
DD Natsugumo

Aircraft Attacking:
10 x B-25D1 Mitchell bombing and strafing from low level *
Naval Attack: 3 x 500 lb SAP Bomb
4 x B-25D1 Mitchell bombing and strafing from low level *
Naval Attack: 3 x 500 lb SAP Bomb
3 x B-25D1 Mitchell bombing and strafing from low level *
Naval Attack: 3 x 500 lb SAP Bomb

Allied aircraft
B-25D1 Mitchell x 12

No Japanese losses

Allied aircraft losses
B-25D1 Mitchell: 2 damaged

Japanese Ships
CL Agano, Bomb hits 1, on fire
DD Arare
DD Natsugumo
CL Noshiro, Bomb hits 1, and is sunk

Aircraft Attacking:
12 x B-25D1 Mitchell bombing and strafing from low level *
Naval Attack: 3 x 500 lb SAP Bomb

Magazine explodes on CL Noshiro


The magainze explosion on the Noshiro is very unfortunate, as the rest of the ships are in fairly good condition - all things considered. The Agano has SYS damage in the mid 40's, but she managed to make Bolea, and no other ships were lost, but it's a sad few days for the IJN.

In the air over Merauke, the F4U makes it's combat debut, abiet in small numbers. This new airframe has some inital success, shooting down 15 or so Helen's headed to bomb the airbase that failed to link up with their escort, but massed sweeps from Zero's and Oscar's quickly forces Lokasenna to withdraw the fighters from such an exposed position.

On the ground, I make the mistake of trusting AV values too much, thinking that my 50 AV of IJA paratroopers might be able to get a good roll against 80 AV of US paratrooper and Austrailian infantry squads. The Allies are able to conduct a massive reinforcement by air, leaving the actual AV numbers heavily stacked against the Japanese paratroopers.

Needless to say, the result is a slaughter and my paratrooper units are promptly wiped out, though fragments of both units survived and are reinforcing at Hansa Bay.

Japanese Deliberate attack

Attacking force 1448 troops, 6 guns, 0 vehicles, Assault Value = 52

Defending force 6577 troops, 84 guns, 65 vehicles, Assault Value = 174 Up from ~80 AV

Japanese adjusted assault: 12

Allied adjusted defense: 137

Japanese assault odds: 1 to 11 (fort level 0)

Combat modifiers
Defender: terrain(+), preparation(-), fatigue(-), experience(-)
Attacker: supply(-)

Japanese ground losses:
282 casualties reported
Squads: 5 destroyed, 44 disabled
Non Combat: 0 destroyed, 7 disabled
Engineers: 0 destroyed, 0 disabled

Allied ground losses:
54 casualties reported
Squads: 0 destroyed, 6 disabled
Non Combat: 0 destroyed, 0 disabled
Engineers: 0 destroyed, 2 disabled

Assaulting units:
1st Raiding Regiment
2nd Raiding Regiment

Defending units:
503rd Parachute Regiment
16th Australian Bde /2
224th USN Base Force


With 170 odd Allied AV sitting at Merauke, time is of the essence to recapture the base.

China-Burma-India

A few garrison units arrive in China, allowing me to buy out an Ind. Mixed Brigade of 210 AV. They're destined for Mili, to replace another Ind. Mixed Brigade that's due to upgrade to a division next month.

Elsewhere, all is quiet.

[center]Image
Allied attack bombers roars over a Japanese destroyer off Merauke. The nimble destroyers were able to avoid serious damage from bomb hits, the less manuverable crusiers were not so fortunate.[/center]
User avatar
Lowpe
Posts: 24582
Joined: Mon Feb 25, 2013 2:25 pm

RE: The Great Milne Bay Swim

Post by Lowpe »

It is not like we all haven't made the remain on station mistake.[8|]
User avatar
Encircled
Posts: 2097
Joined: Thu Dec 30, 2010 3:50 pm
Location: Northern England

RE: The Great Milne Bay Swim

Post by Encircled »

It is not like we all haven't made the remain on station mistake.

+1
mind_messing
Posts: 3394
Joined: Mon Oct 28, 2013 11:59 am

RE: The Great Milne Bay Swim

Post by mind_messing »

Operation Montcalm

Well, we've pulled the trigger, and here's what we're going in with.

The Order of Battle

"Mini-KB"
CV Junyo
CV Hiyo
CVL Ryuho
CVE Hosho
CVE Taiyo
CVE Unyo
CS Mizuho
CS Nisshin
7 Destroyers

"A" Force - Heavy Surface combat TF
BB Fuso
BB Ise
BB Hyugo
3 Destroyers

"B" Force - Bombardment force
BB Nagato
BB Mutsu
2 Destroyers

"C" Force - Heavy crusier force
CA Tako
CA Atago
CA Chokai
4 Destroyers

"S" Force - Invasion Screening TF
CA Furutaka
CA Kako
CL Nagara
CL Isuzu
5 Destroyers

"L" Force - Light surface combat TF
CL Natori
CL Kuma
CL Kiso
4 Destroyers

"I" Force - Invasion Task Force
CL Oi
2 Destoryers
3 E-class escorts
4 AMC ships
1 APD
2 LSD ships
15 AK/AK-t/xAP class ships
Carrying: 21st Division and 7th Engineering Regiment

"R" Force - Reserve Invasion Force
4 E-class escorts
13 AK class ships
Carrying: 14th & 15th Naval Engineer Regiments, 32nd JNAF Battalion

The Plan

All ships will gather in the hex north-west of Taberfane (Point Carillon - marked in white) to regroup before moving south as a single body. The Mini-KB will depart to 3 hexes north-west of Merauke (Point Duquesne - marked in green) and there provide carrier cover to Japanese shipping. The various surface combat forces will take up positions west of Merauke, in preparation of fighting Allied surface ships as the move west through the Torres Straits.

[center]Image[/center]

This will be the first big invasion that I've tried to run as Japan post-1942, so I'm looking forward to seeing what the outcome will be.

mind_messing
Posts: 3394
Joined: Mon Oct 28, 2013 11:59 am

Update from Admiral Ackbar

Post by mind_messing »

mind_messing
Posts: 3394
Joined: Mon Oct 28, 2013 11:59 am

Operation Mont-not-so-calm

Post by mind_messing »

Operation Mont-not-so-calm

I'm way, waay behind, so I'll try to paint the picture in as many broad strokes as possible.

April 29th

The operation swung into action on April 29th (the Allies had warning for one or possibly two days beforehand) with massed A6M5 sweeps over Horn Island. The Allies aren't home, and the sweeps find empty skies.

Some Beaufighters sortie from bases on the mainland against one of the invasion task forces, but there's a strong LRCAP of thirty A6M5's covering the ships, and the Beaufighters are severely mauled without reaching the ships. Six B-25D1's have a go at the Mini-KB, escorted by 17 Lightnings, and the break through despite the healthy CAP, so I need to endure the sight of 4 B-25D1's mounting a strafing run on the carriers Junyo and Unyo. They miss, but it's a worrysome development. A smaller strike of 6 B-25s goes after the amphib ships, and again they miss. It's disconcerting to see these small strikes get through, even if they don't do any actual damage.

A quartet of American destroyers are targeted by the Mini-KB's strike groups, which put two bombs into the destroyer Radford in the AM phase and three bombs into the Downes in the afternoon.

April 30th

The two task forces that were screening the invasion force are detached to hunt down the four American destroyers. The destroyers Ellet and Perkins manage to escape from an IJN crusier force with trival damage, but the Radford blunders into three Fuso-class battleships and is promptly sent under.

Our fighters on New Guinea go after Portland Roads, a real hornets nest of Allied fighters. We do pretty poorly against Cosairs and Spitfires, as well as older Warhawks, but the whole purpose was to apply pressure on the Torres Straits from two directions.

In the Arafura Sea, the Allied 4E's are unleashed upon the IJN. Despite the almost complete absence of escorts, the bombers are pretty easily able to fly right through the fighters on CAP over the ships and line up on target:

Japanese aircraft
A6M3a Zero x 4
A6M5 Zero x 41

Allied aircraft
B-17E Fortress x 10
B-24D Liberator x 13
B-24D1 Liberator x 4
F4F-4 Wildcat x 8
PB4Y-1 Liberator x 6

Japanese aircraft losses
A6M5 Zero: 1 destroyed

Allied aircraft losses
B-17E Fortress: 1 damaged
B-24D Liberator: 2 damaged
B-24D Liberator: 1 destroyed by flak
F4F-4 Wildcat: 2 destroyed
PB4Y-1 Liberator: 1 destroyed by flak

Japanese Ships
xAP Kongo Maru
AK Sasako Maru
AMC Asaka Maru
AMC Bankok Maru
AMC Gokoku Maru
AK Kansai Maru
LSD Shinshu Maru, Bomb hits 1
CL Oi
LSD Akitsu Maru


This was one of the bigger attacks, though there were perhaps a dozen or so smaller attacks all over the Arafura Sea. This must have left the Mini-KB's CAP scattered across hundreds of miles, because this raid came in and the Mini-KB decided that it was just too cool for CAP:

Morning Air attack on TF, near Merauke at 86,123

Weather in hex: Moderate rain

Raid detected at 33 NM, estimated altitude 6,000 feet.
Estimated time to target is 11 minutes

Japanese aircraft
E13A1 Jake x 1 - Where is the CAP? Where is it? Where?!

Allied aircraft
B-24D1 Liberator x 6

No Japanese losses

Allied aircraft losses
B-24D1 Liberator: 2 damaged

Japanese Ships
CVE Unyo, Bomb hits 1, on fire
CV Hiyo


The damage is trival, but the Mini-KB's flat-tops are in American bombsights over another four raids, leaving me very, very worried. Three of the amphib ships take a bomb each and the destroyer Fumizuki eats a bomb, but there's not any serious damage, but this turn highlights how woefully little airpower I have and how absurdly thin I have it spread.

I scrub the operation. The amphibs are a hex out from Merauke, but every ship is to turn tail and run for the saftey of the DEI.

May 1st

The crusiers Atago, Takao and Chokai find themselves in trouble. They're exeptionally exposed just north of Mornington Island, their destroyers are out of fuel, the crusiers are low on fuel and the Mini-KB is too far away to provide support. Allied ships are starting to close in, and Allied CV's have been reported around the Townsville area.

Allied bombers have a go at the exposed Japanese ships during the day, but they only manage to land a few bomb hits on the destroyers and miss the crusiers.

My solution is quite drastic: the destroyers are to be left to die. They've no fuel and aren't worth risking the crusiers over. The destroyers are ordered to try and link up with some xAK's off Wessel Island to refuel, while the crusiers are ordered to mount a full-speed run to the north-west, where they'll get some fuel from another group of xAK's that I left handy to cover an event like this.

The Mini-KB is ordered to cut back south and sit just off Wessel Island to attempt to cover the crusiers from the Allied ships right on their heels.

May 2nd

The out of fuel destroyers are wiped out by a monster Allied surface force:

Night Time Surface Combat, near Mornington Island at 85,133, Range 3,000 Yards

Japanese Ships
DD Asagiri, Shell hits 8, and is sunk
DD Yugiri, Shell hits 3, and is sunk
DD Mutsuki, Shell hits 6, and is sunk
DD Uzuki, Shell hits 12, and is sunk

Allied Ships
CA Pensacola
CA Salt Lake City
CA San Francisco
CA Quincy, Shell hits 1
CL St. Louis
CL Nashville
CL Boise
CL Honolulu
DD Cony
DD O'Bannon
DD Anderson
DD Hammann
DD Russell


Come daylight, though the Mini-KB is able to strike back, as the Allied crusiers have barreled right into range. Without air cover, the Allied ships are sitting ducks. The damage over the AM and PM phases amounts to:

CL St. Louis, Bomb hits 1
CA Pensacola, Torpedo hits 1, Bomb hits 1
CA San Francisco, Bomb hits 6, heavy fires, heavy damage
CA Quincy, Bomb hits 3, heavy fires, heavy damage
CL St. Louis, Bomb hits 2, on fire


With the Mini-KB covering their withdrawal, the Atago, Takao and Chokai refuel from the xAK's and head for Kendrai at full speed while the Mini-KB heads for Soerabaja at full speed.

May 3rd

Allied carriers at last get into the action, but find only the xAK refueling stations still in the area. The brave merchant ships are wiped out by American carrier aircraft, but their sacrafice enabled three crusiers to be saved.

All other Japanese shipping makes it safely back to port.

Conclusions

I got very, very lucky.

Lokasenna confessed via email that he messed up his upgrade settings, which forced him to delay getting his CV's into by two days. Without a doubt, this saved me. If Allied carriers had turned up on May 1st, it would have been a one-sided slaughter. Even though I had the sense to start running away, it would have still been too late for most of my ships.

I severely over-estimated the combat strength of the Mini-KB. It's handy for covering single invasion forces, but it simply isn't large enough to cover a large operation.

My planning was also pretty poor. Bar the obvious mistake (using MKB instead of KB), my frontline planning was pretty solid, but the rear-area logistics was a mess.

Operation Montcalm had the potential to be an absolute disaster, but it's somehow ended up as an awkward sort of draw. By some miracle I didn't lose anything bigger than a destroyer, and even managed to severely hurt (if not sink) some American crusiers. If all my learning experiances come at so cheap a cost, I'll be pretty pleased.
User avatar
Lowpe
Posts: 24582
Joined: Mon Feb 25, 2013 2:25 pm

RE: Operation Mont-not-so-calm

Post by Lowpe »

Japan in mid 43...go all in or go home. [:)] Even then you might be better off staying home.

I never thought that base was worth the risk, fuel or supplies.


User avatar
Lowpe
Posts: 24582
Joined: Mon Feb 25, 2013 2:25 pm

RE: Operation Mont-not-so-calm

Post by Lowpe »

duplicate post...sorry.
mind_messing
Posts: 3394
Joined: Mon Oct 28, 2013 11:59 am

RE: Operation Mont-not-so-calm

Post by mind_messing »

ORIGINAL: Lowpe

Japan in mid 43...go all in or go home. [:)] Even then you might be better off staying home.

I see that now!
I never thought that base was worth the risk, fuel or supplies.

I had too much staked upon the element of suprise and Lokasenna having his fleet carriers further away than he did.

Retaking Merauke would only have been of minor use, and then only for a short time. I'd the notion of being able to build it up a little, so that my projection of air power into the Arafura Sea was a bit better, but I see now that any building attempts would simply be evaporated by Allied 4E's flying from Mainland OZ.
What was your CAP setting over the baby carriers? Using heavy bombers versus the KB is a good reason to stick to deep waters.

50% CAP, staggered altitudes. I think I left the range too high, which led to planes bouncing all over the place trying to fight off 4E attacks. One thing is for sure - the Arafura Sea is not the ideal battleground for a carrier clash - you've almost no searoom and there's plenty of bottlenecks that you can trap your carriers in.
User avatar
Lowpe
Posts: 24582
Joined: Mon Feb 25, 2013 2:25 pm

RE: Operation Mont-not-so-calm

Post by Lowpe »

Well, you got out mostly, and that is the important thing.

I think one of the hardest things as Japan is managing the shift from butt kicking to defense with selected counter punching.
mind_messing
Posts: 3394
Joined: Mon Oct 28, 2013 11:59 am

Moresby Melee

Post by mind_messing »

May 4th to May 10th, 1943

North Pacific

Two big supply convoys offload at Onnekotan-jima and Paramushiro-jima, and the minefield at Paramushiro-jima is topped off as well.

Other than that, this theater persists in being quiet.

Central Pacific

Following the destroyer bombardment of Tabiteuea on April 20th, the Allies know where the Wake CD unit is. I'm debating moving the CD unit elsewhere, possibly to somewhere in SWPAC, though it is easy for the unit to be cut off there.

The Pacific has been very quiet these few turns, the main show has been further south.

South-West Pacific

Major Allied shipping movements along the Austrailian coast culminate in a landing at Port Moresby. The American carriers disapeared on May 9th, which had me worried that they'd slipped through the Torres Straits, but on the 10th, they appeared offshore of Port Moresby, along with much of the USN. My defences, however, were well prepared.

The Allies have stuck their hand right into the lion's jaw - there are several large airbases within easy range of Port Moresby, and the Allies pay the price for landing so close to major Japanese bases without any preparatory moves (night bombing raids on Buna or Hansa Bay, for example, would have found those bases pretty close to capacity) when daylight comes.

The Allies open the engagement with several sweeps over Port Moresby itself, which catches several leakers from the CAP over Buna and gives them a good drubbing. At this point of the war, Zero's, Oscars and Tojo's can't really cut it against Corsairs and Hellcats. Thankfully the next generation of aircraft are well on their way.

After the slaughter of the leaky CAP, the Japanese mount several successful strikes on the Allied CVE task force:

Morning Air attack on TF, near Port Moresby at 98,130

Weather in hex: Thunderstorms

Raid detected at 79 NM, estimated altitude 13,000 feet.
Estimated time to target is 33 minutes

Japanese aircraft
A6M5 Zero x 31
B5N2 Kate x 27
Ki-44-IIa Tojo x 31

Allied aircraft
F4F-4 Wildcat x 116

Japanese aircraft losses
A6M5 Zero: 6 destroyed
B5N2 Kate: 8 damaged
B5N2 Kate: 4 destroyed by flak
Ki-44-IIa Tojo: 3 destroyed

Allied aircraft losses
F4F-4 Wildcat: 1 destroyed

Allied Ships
CVE Prince William
CVE Altamaha, Torpedo hits 1, on fire
BB Idaho
CVE Long Island, Torpedo hits 3, heavy fires, heavy damage
CVE Nassau
CVE Suwannee
-------------------------------------------------------------------------------------------

Morning Air attack on TF, near Port Moresby at 98,130

Weather in hex: Thunderstorms

Raid detected at 108 NM, estimated altitude 12,000 feet.
Estimated time to target is 37 minutes

Japanese aircraft
A6M3a Zero x 23
G4M1 Betty x 20
Ki-43-IIb Oscar x 22

Allied aircraft
F4F-4 Wildcat x 91

Japanese aircraft losses
A6M3a Zero: 3 destroyed
G4M1 Betty: 3 destroyed, 11 damaged
G4M1 Betty: 1 destroyed by flak
Ki-43-IIb Oscar: 2 destroyed

Allied aircraft losses
F4F-4 Wildcat: 2 destroyed

Allied Ships
CVE Prince William
BB Idaho
CVE Suwannee, Torpedo hits 2
CVE Chenango
-------------------------------------------------------------------------------------------

Morning Air attack on TF, near Port Moresby at 98,130

Weather in hex: Thunderstorms

Raid detected at 88 NM, estimated altitude 11,000 feet.
Estimated time to target is 32 minutes

Japanese aircraft
A6M5 Zero x 30
G3M3 Nell x 29

Allied aircraft
F4F-4 Wildcat x 62

Japanese aircraft losses
A6M5 Zero: 3 destroyed
G3M3 Nell: 1 destroyed, 17 damaged
G3M3 Nell: 2 destroyed by flak

Allied aircraft losses
F4F-4 Wildcat: 2 destroyed

Allied Ships
CVE Suwannee
CVE Chenango, Torpedo hits 4, on fire, heavy damage
DD Blue
CVE Nassau
-------------------------------------------------------------------------------------------
Morning Air attack on TF, near Port Moresby at 98,130

Weather in hex: Thunderstorms

Raid detected at 80 NM, estimated altitude 9,000 feet.
Estimated time to target is 34 minutes

Japanese aircraft
A6M5 Zero x 12
B5N2 Kate x 28
Ki-44-IIb Tojo x 21

Allied aircraft
F4F-4 Wildcat x 42

Japanese aircraft losses
B5N2 Kate: 9 damaged
B5N2 Kate: 2 destroyed by flak
Ki-44-IIb Tojo: 3 destroyed

Allied aircraft losses
F4F-4 Wildcat: 3 destroyed

Allied Ships
CVE Prince William, Torpedo hits 1, heavy fires, heavy damage
CVE Suwannee, Torpedo hits 1, and is sunk
CVE Nassau
BB Idaho


There are a whole plethora of smaller strikes that fail to score any real damage. A 48-sized squadron of Val's suffers something like a 90% casualty rate after failing to break through the CAP over the American fleet carriers, though a small strike of 8 Val's manages to get the Wasp and Yorktown in their bombsights - no hits, sadly.

[center]Image
Air losses. The low number of American carrier aircraft destroyed on the ground must have meant they've diverted to bases in OZ. Three CVE's are reported as being destroyed on the Sunk Ships screen - the VP losses from which will balance out our air losses today.[/center]

Following this, the Americans come ashore. The three units landed are identified as the 73rd RAAF Wing, and the US Army's 37th and 43rd Infantry Divisions. Opposing them is the Guards Mixed Brigade, defending behind level 4 forts. The 9th Ind. Mixed Brigade and the 70th Inf. Brigade are one hex to the east and will march for Port Moresby in an effort to keep the hex contested. The 52nd Division is at Buna, giving me about 1100 AV within 3 hexes of Port Moresby. Obviously, that number doesn't communicate the fact that the Japanese are pretty deficent in artillery and heavy weapons.

I've plenty of divisions in reserve in the Pacific, the reinforcement units for the Guards Mixed Brigade and another division from China are all free to be deployed to New Guinea. For the present, the Guards Mixed Brigade (26 fatigue, 63 disruption) will hold as best it can while the 9th Ind. Mixed and the 70th Inf. Brigades march to help them hold Port Moresby. The 52nd Division will march over the Owen Stanley's as soon as I can get a care-taker garrison to replace them at Buna.

Depending on how much of the Allied force got ashore will determine what happens. Two full US Army divisions should easily overcome the disrupted Guards Mixed Brigade and take the base. If the Allies do take the base, it is a priority that I retake it as quickly as possible. The good news is that I have Buna set up to enable quick unloads of amphib task forces and five divisions sitting idle on the Marianas.

The KB is still down for upgrades in Yokohama. The bulk of the upgrades will be finished in 3 days, but the Akagi and Kaga still have 12 days to go. I'm quite content to let my land-based aircraft in the SWPAC area carry on the brunt of the fighting - they've done a great job so far. The only help the IJN is lending at sea is the host of submarines that are moving in to pick of cripples or have a go at the carriers.

Despite the heavy losses in the air, I'm cycling in my second wave of strike aircraft. Fresh groups have been moved in, and shattered groups have been sent to the rear to start reconstructing. My aircraft pools are nearly all excellent, the only shortage being in A6M5's, which should solve itself shortly with the N1K1-J entering production.

I remarked to Lokasenna that he's gave me the battle I really wanted to fight: a grinding campaign where the terrain favours the defenders and geography that limits the usefulness of the USN's superiority. We'll see how things turn out.

[center]Image
The situation around Port Moresby. More Japanese aircraft and submarines are moving in to the area. I'm really starting to like the possibility of forcing the Allies into a grinding campaign to control Port Moresby.[/center]

DEI

Following the near-disaster of Operation Montcalm, things here have been quiet. There's a single Allied task force running into Merauke, and I've a trio of older destroyers set to intercept.

Seeing as the Arafura Sea is another possible Allied axis of advance, I've started building up Kai-eilanden to give me a strong blocking position for any moves northwards from Merauke.

China-Burma-India

A few reinforcement units arrive in China, including the a brigade that forms the other half of the division destined to be the stay-behind garrison on Truk and an artillery unit. The artillery is sent to make the long walk to Burma will the brigade is bought out for shipment to Truk.

I review Burma on May 8th. As Burma has been a zone completely devoid of action for several months, I decide to strip nearly all the IJA fighter groups of their trained pilots and replace them with rookies. A veteran core of fighter groups will fly day and night CAP over Magwe and Rangoon, but the vast bulk are transfered over to training duty.

My timing is perfect. The IJA pilots are returned to the reserve pool just in time for them to be drawn back out to replace pilot losses in New Guinea.

The reshuffle of ground units also continues. The Imperial Guards Division is being sent to Java rather than Victoria Point, while the 27th Division is moving from Burma to garrison Victoria Point - I may as well use the restricted troops for garrison duty and let the unrestricted troops go where they're needed.

Some of the unrestricted artillery units are to be withdrawn as well. The China Expeditionary Army artillery park is large enough that the loss of a half-dozen or so artillery units won't make a severe difference, and the need may get pressing on other fronts soon.
mind_messing
Posts: 3394
Joined: Mon Oct 28, 2013 11:59 am

Wasp Stung

Post by mind_messing »

May 11th to May 15th, 1943

The bloodshed continues.

North Pacific

ZZZzzzZZZ

Central Pacific

The Wake CD unit is removed from Tabietuea, and I'll be replacing it shortly with a 30 AV SNLF unit with some 12 and 8cm DP guns. A poor replacement for 20cm guns, but far more suitable for an outpost that the Allies seem to no longer be interested in.

South-West Pacific

On the ground.

The Allies capture Port Moresby with ease on May 12th.
round combat at Port Moresby (98,130)

Allied Shock attack

Attacking force 24638 troops, 422 guns, 493 vehicles, Assault Value = 768

Defending force 7557 troops, 51 guns, 0 vehicles, Assault Value = 179

Allied adjusted assault: 1868 - That's an impressive adjusted AV!

Japanese adjusted defense: 103

Allied assault odds: 18 to 1 (fort level 3)

Allied forces CAPTURE Port Moresby !!!

Japanese aircraft
no flights

Japanese aircraft losses
D4Y1 Judy: 1 destroyed
E13A1 Jake: 1 destroyed

Combat modifiers
Defender: terrain(+), forts(+), disruption(-), fatigue(-)
experience(-)
Attacker: shock(+)

Japanese ground losses:
2742 casualties reported
Squads: 97 destroyed, 45 disabled
Non Combat: 78 destroyed, 29 disabled
Engineers: 8 destroyed, 0 disabled
Guns lost 25 (21 destroyed, 4 disabled)
Units retreated 2

Allied ground losses:
656 casualties reported
Squads: 2 destroyed, 67 disabled
Non Combat: 1 destroyed, 9 disabled
Engineers: 2 destroyed, 2 disabled
Vehicles lost 4 (1 destroyed, 3 disabled)

Assaulting units:
37th Infantry Division
43rd Infantry Division
2/2nd Heavy AA Regiment
I US Corps
2/3rd Light AA Regiment
73rd RAAF Wing

Defending units:
Guards Mixed Brigade
2nd JNAF AF Unit

The defeated units are marching back to Buna to regroup, and the Guards Mixed Brigade (now the 1st Guards Division) will take over garrison duties at Buna while it reinforces up to it's divisional strength. The 9th Ind. Mixed and the 70th Inf. Brigades will entrench in the hex directly east of Port Moresby, while the 52nd Division will occupy the hex North-east of Port Moresby. I need to hold these two hexes till additional reinforcements arrive.

They're not far off. One division has already left Shanghai for Truk and there's a Infantry Group waiting ten days to be reinforced to divisional strength at Nagoya. I'm pulling two more brigades from the Lower Solomons - one from the Russell Islands and another from Tassarafaronga. When in position and combined, this should give me four divisions and two brigades, as well as the trashed 1st Guards Division holding the line at Buna. I'm flying two IJA Raiding Regiments in as well, with the intention of using them on "hex-side control flipping" duty.

There's also going to be an effort to start reinforcing the area behind Buna as well. Naval Guards or SNLF units are destined for the bases around Lae to protect against paratrooper attacks, and I'll see if I can scrounge some aviation support to turn them into small fighter bases.

Umboi Island is also going to be occupied and built into an offensive airbase to deny the Allies the use of the Vitiaz and Dampier Straits. The Wake CD unit is being sent here to that effect, as are engineers from the DEI and I'll scrounge some aviation support from Okinawa or the Home Islands to turn this base into a nice thorn for any Allied advance up the New Guinea coast.

In the air.

After the sharp combat on May 10th that led to the destruction of several American CVE's, the air war over Port Moresby became quite calm - I hadn't anticipated that the Allied carriers would stick around. And stick around they did.

May 11th to May 14th saw only minor air combat, with Japanese night bombing raids on Port Moresby to keep the airbase damaged, and Allied night-time raids on Buna, Hansa Bay and Rabual and day-time raids on Milne Bay. A few Japanese fighters swept Port Moresby on the 13th and 14th and met with some Allied carrier fighters in a small-scale engagement.

That changed drastically on May 15th, when the Japanese land-based aircraft, after spending four days regrouping and resting, struck back. The CAP over the American carriers was very strong: several smaller strikes were completely wiped out before reaching the ships. Even worse, 48 dive bombers based from Buna failed to sortie, meaning that the Japanese were limited to conducting torpedo attacks only.

After a morning filled with heavy losses in the air and bitter disapointment, the Japanese struck gold when a large raid departed Buna in the afternoon to strike at the American carriers:
Afternoon Air attack on TF, near Portland Roads at 95,132

Weather in hex: Light rain

Raid detected at 80 NM, estimated altitude 10,000 feet.
Estimated time to target is 34 minutes

Japanese aircraft
A6M5 Zero x 57
B5N2 Kate x 74
Ki-44-IIb Tojo x 29

Allied aircraft
F4F-4 Wildcat x 50
F4U-1 Corsair x 5
F6F-3 Hellcat x 45

Japanese aircraft losses
A6M5 Zero: 4 destroyed
B5N2 Kate: 27 destroyed, 9 damaged
B5N2 Kate: 7 destroyed by flak
Ki-44-IIb Tojo: 2 destroyed

Allied aircraft losses
F4F-4 Wildcat: 1 destroyed
F6F-3 Hellcat: 1 destroyed

Allied Ships
CV Enterprise
CV Wasp, Torpedo hits 2, heavy fires, heavy damage
CV Hornet, Torpedo hits 2, on fire Might be in the yards for a bit
BB Washington
CV Yorktown, Torpedo hits 1
BB Indiana

Fuel storage explosion on CV Wasp - Two torpedos and the fuel alight? Bye bye Wasp I think...

126 B5N2 kates were lost, along with 23 Lily dive-bombers and around 55 Army and Navy fighters. Total Japanese losses on May 15th ammounted to 216 planes. Over the past 10 days, over 600 Japanese aircraft have been destroyed.

However, almost all the losses, both in terms of airframes and pilots, can be replaced. In exchange, the Wasp is very likely sunk, and damage has been dealt to two other American fleet carriers.

This news is even better when considering that the majority of the KB has finished upgrading and is now free to oppose any other deployment of the American fleet carriers - something I feel much more confident about doing now that the Allies are down one CV and a couple CVE's.

Most of my squadrons are very beat up following the past week or so of action, so as a result most are pulling back to Rabual and Hansa Bay to rest and take replacement planes and aircraft. A couple of completely wrecked squadrons are being sent all the way back to the Marianas to rebuild. 48 Vals are sitting at Buna to cover any Allied attempts to reinforce Port Moresby, and about 70 IJN 2E bombers are on the runways at Hansa Bay in case the Allies want to come back out to play.

I hope they do.

At sea.

The only significant naval action of the American landing at Port Moresby was the attempt to get a squadron of 4 IJN destroyers amongst the amphibious ships on May 12th. It went poorly:
Night Time Surface Combat, near Port Moresby at 97,131, Range 7,000 Yards

Japanese Ships
DD Shimakaze, Shell hits 11, heavy fires, heavy damage - Sunk later in the day
DD Harusame
DD Yamakaze, Shell hits 2
DD Kawakaze, Shell hits 1
DD Umikaze, Shell hits 1, heavy fires

Allied Ships
CA Indianapolis
CA Northampton
CA Chester, Shell hits 1, Torpedo hits 1, heavy damage - Took two torpedos later from a IJN sub: likey sunk
CA Louisville
CA Wichita, Shell hits 1
CL Cleveland, Shell hits 1
CL Columbia, Shell hits 1
CL Montpelier, Shell hits 2
DD Aulick, Shell hits 2
DD Stanly
DD Kalk, Shell hits 1
DD Carmick

--------------------------------------------------------------------------------
Night Time Surface Combat, near Port Moresby at 97,131, Range 8,000 Yards

Japanese Ships
DD Yamakaze, Shell hits 17, and is sunk
DD Kawakaze, Shell hits 1 - Was very nearly safe, until carrier SBD's put a bomb in her. Sunk.
DD Umikaze, Shell hits 22, and is sunk

Allied Ships
CA Indianapolis, Shell hits 1
CA Northampton
CA Louisville
CA Wichita
CL Cleveland
CL Columbia
CL Montpelier
DD Aulick, Shell hits 1
DD Stanly
DD Kalk
DD Carmick

The end result was the IJN trading four destroyers for an American heavy crusier. Not an ideal rate of exchange, but not poor enough for me to complain about it too much.

The IJN submarine fleet has performed quite poorly, I suspect as a result of high ASW skills on the American carrier pilots.

4 IJN submarines were lost between May 13th and May 15th, with only two torpedos in the Chester to show for it. The Ro-66 nearly made up for it all, however, when it found pretty target on May 13th:
Sub attack near Port Moresby at 96,131

Japanese Ships
SS RO-66, hits 8, and is sunk

Allied Ships
CV Saratoga
BB South Dakota
BB North Carolina
CLAA San Juan
CLAA San Diego
DD Duncan
DD Monssen
DD Selfridge
DD Meade
DD Frazier

Alas, it was not to be.

In light of the events of May 15th, I'm still keeping a few submarines on station. A large number of them are suffering from Allied ASW: a half-dozen submarines are transiting back to Manila to repair damage dealt by depth charges or 500lb bombs, but there's five or six subs still on station or in the area that stand a chance of winning the jackpot - their odds just went up seeing as there's now two American fleet carriers with extra ventilation holes in their hulls.

DEI

Since the closure of Operation Montcalm, things have turned quiet here again. I'm debating disbanding the Mini-KB: send the CV's and CVL's (and the Hosho) to join the KB and form the slow CVE's into a big ASW carrier group that goes hunting after Allied subs. Thoughts on this?

The Allies have built Tennant Creed in Austrailia up to a size 7 airbase. While I still have a few squads acting as a caretaker garrison in Austraila, it's a sign that the Allies might be ready to have a go to recapture it.

China-Burma-India

I'm shifting the Manchurian pilot training program to China. They can train just as well in Chungking and Chengtu than in Manchuria, but in China they can act as a deterent against strategic bombing from Ledo.

Allied bombers come after Mandalay, bombing the airbase and manpower. There's plenty of flak there, and the Allies lose more than they destroy, and they only destroy a few Dinah's on the ground. At present, my air defence in Burma is focused around Rangoon and Magwe - the Allies can bomb anything else to their hearts content.

Otherwise, things are quiet here.

[center]Image
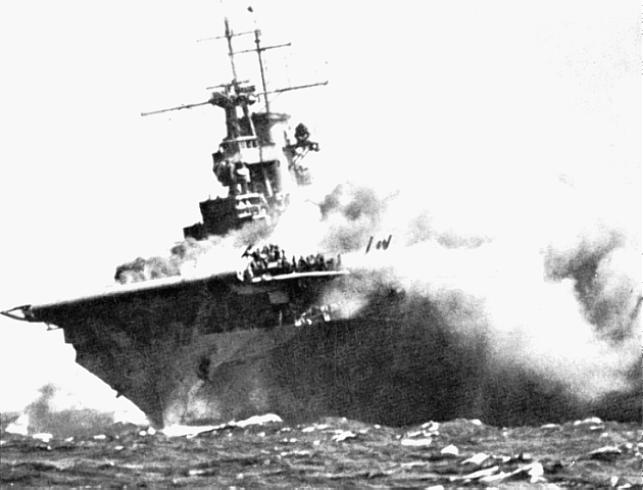
Two torpedo impacts and a fuel storage explosion. What are the chances of the Wasp making it safely to port?[/center]
User avatar
Lowpe
Posts: 24582
Joined: Mon Feb 25, 2013 2:25 pm

RE: Wasp Stung

Post by Lowpe »

Well done. Don't get victory disease! [:-]

If you have lost 600 planes, what do you estimate Allied losses at?

Wasp is pretty close to toast...watch the plane losses screen!
mind_messing
Posts: 3394
Joined: Mon Oct 28, 2013 11:59 am

RE: Wasp Stung

Post by mind_messing »

ORIGINAL: Lowpe

Well done. Don't get victory disease! [:-]

If you have lost 600 planes, what do you estimate Allied losses at?

Wasp is pretty close to toast...watch the plane losses screen!

100-150? Give or take.
mind_messing
Posts: 3394
Joined: Mon Oct 28, 2013 11:59 am

RE: Moresby Melee

Post by mind_messing »

May 16th to May 25th, 1943

The only motivation I have to update this AAR at times is to prevent Lokasenna's from being above mine.

There's a long post because there's been a great deal of map staring.

North Pacific

Off Hokkadio, there's a wolfpack of three or so USN subs that have been feasting from the local resource convoys. Subchasers and ASW air aren't doing much good in hunting them down, but there's not much else to be done - it's the toll that must be paid at this point in the war.

I also dropped some fresh mines at Paramushiro-jima. The minelayer Tsugaru takes a torpedo from one of the USN subs when she's one hex from Ominato, and everything looks hopeless with FLT damage in the 90's. Despite this, she still manages to make port, and repairs are progressing well.

Central Pacific

I've started on a gradual redeployment of troops here as more reinforcements start to arrive. A 100 AV Garrison unit is to be removed from Mili and transfered to SWPAC, leaving some 300 AV on the island behind level 6 forts.

I'm at last getting around to getting that 210 AV brigade off Tabiteuea and sent to Ponape. Moving a in 70 AV SNLF to replace it and keep the total AV on Tabiteuea around the 300 mark. In turn, I can send a Naval Guard currently on garrison duty at Ponape to SWPAC to guard against paradrops.

The first half of the 65th Division arrives at Babeldoab, and the second half is en-route. The 65th is a crappy unit, but it's there to make sure the Allies need to land on Babeldoab for real and don't kill the CD guns on the cheap. Peleliu is still in need of a garrison, however.

The bulk of the KB (minus Kaga and Akagi, who should be back within a week) are at Truk, ready to respond to the next Allied strike.

South-West Pacific

In the air

May 16th and 17th are pretty poor days for Japan. Even more so as they came right on the heels of the success of May 15th.

A massive daylight raid on Buna on the 16th, escorted by P-38's, blasted through the CAP and trashes the airbase on both days, putting it out of action for nearly two weeks and destroying numerous Japanese planes on the ground. Despite the airbase being completely blasted, the Allies come back on the 17th and trash the airbase all over again.

The net result is that there's several good airgroups without their full compliment of planes to fly, and what planes that survived are trapped until they can be repaired.

This more or less destroys the keystone of my airbase network in the SWPAC area, leaving only Lae and Kiriwina Island up and running to defend the skies, and leaving me down several good fighter groups.

Despite this massive victory, the Allies don't capitalize: from May 17th to May 25th there are no follow up raids on Buna, nor on the abundant Japanese shiping in the region. The sole exception is a B-25 raid on Milne Bay. This was a pretty big oppertunity wasted, in my book, as the Allies had the chance to systematically shut down every airbase I have close to Port Moresby.

It takes me till May 22nd to muster any sort of offensive power, with a mix of IJN and IJA fighters sweeping Port Moresby after the Allies move some fighters in. There's a mixed bag of American Airacobra's and Austrailian Kittyhawk's and Spitefires. We break even, losing about 12 aircraft each, and the following turn the Allies withdraw their fighters.

It takes till May 25th to repair the runway damage at Buna (the service damage is still at 100), so I fly in some 60 fighters in the hope of giving the engineers enough time to try to get the airbase back in operation. There's some 70 airframes damaged on the ground that I don't want to lose unless I need to.

We'll see. I'm not holding my breath.

On the ground

There's a big troop reshuffle happening, unsuprisingly.

Our reinforcement convoys have been allowed to unload without any interuption, for which I'm glad: so many loaded troop transports so close to Allied air makes me nervous.

I've about three divisions worth of units within 1 hex of Buna, but my original plan of keeping the Port Moresby hex contested isn't going to work: the IJA units are already suffering from supply shortages when they're sitting idle one hex away from Buna, so I'd hate to see how much supply they had under combat conditions.

So, suprise, suprise: my knee jerk reaction was completely unworkable and I've went back to the drawing board.

Instead, I'm going to form the crappy 64th Division and leave it defending Buna and start consolidating the bases northward with the rest of my reinforcements. The trashed 1st Guards Division will go to Hansa Bay to rebuild, the 9th Ind. Mixed Brigade will be sent to Hollandia to start shoring up the rear and I've not decided what I'm going to do with the 52nd Division.

As well as consolidation, there's also been the start of a phased withdrawal. The Solomons have more or less became irrelevent now that the Allies have Port Moresby, so I've started stripping the Guadalcanal complex of AA, artillery and most of it's aviation support. The garrison units, the 60th Divison on Guadalcanal and an SNLF on Tulagi, will remain to deny the Allies the airbases unless they come and take them.

Where is everything going to go?

Manus, Hansa Bay and the Hollandia/Aitape region. When the Allies break past New Britain, I want them to be met with tManus and Hansa Bay sitting right in their path. Once they've pushed past that, I want the Hollandia/Aitape area to be a thorny problem for them to deal with before the Allies can start considering an assault on the Marianas.

I've been ramming Buna full of engineers in an effort to get the base operational, or at the very least make it difficult to suppress. Once the damage is mostly repaired, I'll start pulling engineer units off to go building forts and airbases further up New Guinea

At sea

As part of this withdrawal, I had sent some ships loading AA and artillery from Guadalcanal . Sure enough, the USN got wind of it and sent some Fletcher's to interfere on May 21st. They had a pretty bad day, however:
--------------------------------------------------------------------------------
Night Time Surface Combat, near Lunga at 114,138, Range 11,000 Yards

Japanese Ships
CA Tone
CA Chikuma
DD Akatsuki, Shell hits 1
DD Isonami
DD Murakumo
DD Uranami, Shell hits 2

Allied Ships
DD Abbot
DD Bache
DD Conway
DD Eaton
DD Jenkins
DD LaVallette, Shell hits 2, on fire
DD Philip
DD Strong, Shell hits 1
DD Taylor

--------------------------------------------------------------------------------
TF 265 encounters mine field at Lunga (114,138)

Allied Ships
DD Taylor, Mine hits 1
DD Abbot, Mine hits 1, heavy damage


--------------------------------------------------------------------------------
Night Time Surface Combat, near Lunga at 114,138, Range 29,000 Yards

Japanese Ships
CA Tone
CA Chikuma
DD Akatsuki
DD Isonami
DD Murakumo
DD Uranami

Allied Ships
DD Abbot, heavy damage
DD Bache
DD Conway
DD Eaton
DD Jenkins
DD LaVallette
DD Philip
DD Strong
DD Taylor

Allies use radar to avoid combat.

As the withdrawal from Guadalcanal is not yet complete, I've a second convoy en-route to pick up most of the aviation support, and I've send the four Kongo's as company to see if I can't pull the same trick twice.

DEI

I've been focusing too much on the SWPAC aspect of the war, and I have to remember that the DEI is actually on the frontline as well.

A single ship TF is reported west of Sumatra on May 22nd, but it's gone on the 23rd. I've a big fear of carrier strikes from this flank, so I've sent some picket PB's from Singapore to keep a closer watch.

The Allies run a convoy into Gove. IJN Nells interfere with bombs and torpedos, but only sink a single LST.

Efforts to build up Kai-aladeen (or whatever) are being hampered by B-24 raids. We stage a CAP trap for them, but don't have much to show for it. I'd rather have them bombing an empty base under construction that bombing Buna or Hansa Bay.

I'm keeping a close eye on this area, as the Allies are starting to move close to Darwin.

China-Burma-India

China is re-opened as an active theater as Chindits take Kashgar by paratrooper! Kashgar is at the very edge of the map, so there's no real threat here, but I'll send some reinforcements to Urumchi just in case.

A bunch of engineer units arrive as reinforcements. They've promptly been bought out and sent to the Philippines to start work on the Manila line.

Quiet elsewhere.
mind_messing
Posts: 3394
Joined: Mon Oct 28, 2013 11:59 am

RE: Moresby Melee

Post by mind_messing »

Question: Is it worth sending the Wake CD, along with some ground troops, to Umboi Island?

Does trying to pass Umboi Island lead to CD gunfire?
User avatar
Encircled
Posts: 2097
Joined: Thu Dec 30, 2010 3:50 pm
Location: Northern England

RE: Moresby Melee

Post by Encircled »

Anyone know? It appears to be a key defensive Plan for number of AARs
User avatar
Lowpe
Posts: 24582
Joined: Mon Feb 25, 2013 2:25 pm

RE: Moresby Melee

Post by Lowpe »

I am pretty sure it does. Not 100% sure mind you. Just pretty sure.

6.8 COAST GUN FIRE AT PASSING TASK FORCES
Every time a TF enters an enemy base hex, enemy coastal guns in the hex may fire at the
ships in the TF. This can occur whether the TF has the enemy base hex as its destination, or is passing through the hex on its way to another location. TFs will generally try to avoid moving through enemy base hexes when selecting their movement paths so as to avoid this kind of attack, if possible. A TF ordered to move to Manila (43,52) would find that it must move through the Bataan (42,51) hex to get to Manila. This will allow the coastal guns of Bataan to shoot at these ships as they sail by.
mind_messing
Posts: 3394
Joined: Mon Oct 28, 2013 11:59 am

RE: Moresby Melee

Post by mind_messing »

May 26th to June 1st, 1943

Well, another milestone: we're half-way through 1943. On the whole, I think things aren't looking too bad. The Allies have only taken a couple of bases, and they're not that much closer to Tokyo than they were at the start of 1943. What's worrying is that the tempo is bound to increase as the Allies get stronger.

North Pacific

Allied subs are still a pain up here. There's the usual couple of ASW contacts per turn, but the tuna-boat fleet up here doesn't have the means or the ability to actually kill a USN fleet sub.

The only damage done to any Allied submarine these past few turns has been to the S-34, which got brave and decided to venture into the Paramushiro-jima hex to take a shot at a dinky 1VP CMc and sailed right into a mine.

Central Pacific

Our troop reshuffle goes off without a hitch: there's now some 12cm and 8cm DP guns on Tabiteuea, and there's 210 AV en-route to Ponape to act as a garrison. There are still more moves to be made, a 110 AV garrison unit is to be shifted to Manus Island, and a Naval Guard unit needs transfered from Tarawa to Makin.

With all the action being in SWPAC recently, this theater has been pretty thin on air assets. That's ending now, as some rather beat up squadrons are being rotated to bases in the Marshalls to get some R&R and do a little training.

South-West Pacific

New Guinea

The Allies continue to hammer Buna, but I'm able to evacuate every air-group from the trashed base thanks to a brave few xAK's loading damaged planes aboard and some even braver pilots on LRCAP over the base and ships. The Allies have another few runs at keeping the base suppressed, but they seem to be losing interest now that there's not upwards of fifty aircraft trapped there.

There's been sweeps of Milne Bay, as well as a big cruiser bombardment on May 29th:
--------------------------------------------------------------------------------
Night Naval bombardment of Milne Bay at 101,133

Japanese aircraft
no flights

Japanese aircraft losses
E13A1 Jake: 4 damaged
E13A1 Jake: 1 destroyed on ground
Ki-45 KAIa Nick: 13 damaged

Allied Ships
CA Exeter
CA Cornwall
CA Salt Lake City
CL Honolulu
CL Nashville

Japanese ground losses:
196 casualties reported
Squads: 0 destroyed, 1 disabled
Non Combat: 4 destroyed, 32 disabled
Engineers: 0 destroyed, 4 disabled
Guns lost 9 (1 destroyed, 8 disabled)
Vehicles lost 16 (1 destroyed, 15 disabled)

Airbase hits 25
Airbase supply hits 4
Runway hits 88
Port hits 10
Port supply hits 3

CA Exeter firing at Milne Bay
CA Cornwall firing at Milne Bay
CA Salt Lake City firing at Milne Bay
CL Honolulu firing at Milne Bay
CL Nashville firing at Milne Bay


--------------------------------------------------------------------------------
Night Naval bombardment of Milne Bay at 101,133

Japanese aircraft
no flights

Japanese aircraft losses
Ki-45 KAIa Nick: 5 damaged

Allied Ships
CA Wichita
CA Louisville
CA Indianapolis
CL Montpelier
CL Cleveland

Japanese ground losses:
119 casualties reported
Squads: 0 destroyed, 1 disabled
Non Combat: 1 destroyed, 11 disabled
Engineers: 0 destroyed, 4 disabled
Vehicles lost 3 (1 destroyed, 2 disabled)

Airbase hits 9
Airbase supply hits 4
Runway hits 16
Port hits 14

CA Wichita firing at 2nd Garrison Unit
CA Louisville firing at Milne Bay
SOC-1 Seagull acting as spotter for CA Indianapolis
CA Indianapolis firing at Milne Bay
CL Montpelier firing at Milne Bay
CL Cleveland firing at Milne Bay

I had spotted this force on the 28th, and tried to get some Betties to sortie from Shortlands at the crusiers, but they couldn't find the target. I've a 14 plane fragment of Nicks at the base, as well as some Jakes doing naval search, so I'm quite happy to let the Allies blast away. Hopefully the Allies will wander back into range again.

On the ground, repositioning is still on-going. The air evacuation from Kiriwina Island is about half-way complete, and the 1st Guards Division is lounging around on the shores of Hansa Bay. The 15th Division and the 9th Ind. Mixed Bd have started to march to Lae overland, joined by some aviation support and the 8th Area Army HQ. These units will start filling the gap between Lae and Hollandia. It's not the quickest method of moving, but there's not much choice when the Allies can hit transport shipping loading at Buna with ease.

Umboi Island has became a level 1 airbase, and work will continue. There's no aviation support on it yet, but that should be solved shortly.

Solomons

A nice little knife-fight ends up developing around Guadalcanal, as Lokasenna evidently clues in to my evacuation.

My little trick of sending the Kongo's to throw their weight around works wonders on May 27th.

--------------------------------------------------------------------------------
Night Time Surface Combat, near Lunga at 114,138, Range 11,000 Yards

Japanese Ships
BB Kongo
BB Haruna
BB Hiei
BB Kirishima
DD Hamakaze
DD Nowaki
DD Arashi
DD Tanikaze, Shell hits 2

Allied Ships
CL Denver
DD Fletcher
DD Chevalier
DD Ralph Talbot
DD Sterett
DD Wilson


Maximum visibility in Clear Conditions and 39% moonlight: 12,000 yards
Range closes to 27,000 yards...
CONTACT: Allies radar detects Japanese task force at 27,000 yards -
Range closes to 25,000 yards...
Range closes to 23,000 yards...
CONTACT: Allies radar detects Japanese task force at 23,000 yards
Range closes to 21,000 yards...
Range closes to 19,000 yards...
CONTACT: Allies radar detects Japanese task force at 19,000 yards
Range closes to 17,000 yards...
Range closes to 15,000 yards...
Range closes to 13,000 yards...
Range closes to 11,000 yards...
CONTACT: Japanese lookouts spot Allied task force at 11,000 yards
CONTACT: Allied lookouts spot Japanese task force at 11,000 yards
...
Task forces break off... Damned radar, the Denver sunk would have been nice.


--------------------------------------------------------------------------------
Night Time Surface Combat, near Lunga at 114,138, Range 11,000 Yards

Japanese Ships
BB Kongo, Shell hits 1
BB Haruna, Shell hits 1, Torpedo hits 1 A couple points of minor damage.
BB Hiei, Shell hits 1
BB Kirishima
DD Hamakaze
DD Nowaki
DD Arashi, Shell hits 2, on fire
DD Tanikaze, on fire

Allied Ships
DD Bache
DD Conway, Shell hits 2
DD Eaton, Shell hits 1
DD Jenkins
DD Philip
DD Strong, Shell hits 10, on fire


Maximum visibility in Clear Conditions and 39% moonlight: 12,000 yards
Range closes to 23,000 yards...
CONTACT: Allies radar detects Japanese task force at 23,000 yards
Range closes to 17,000 yards...
Range closes to 11,000 yards...
CONTACT: Japanese lookouts spot Allied task force at 11,000 yards
CONTACT: Allied lookouts spot Japanese task force at 11,000 yards
...
Task forces break off...

--------------------------------------------------------------------------------
Day Time Surface Combat, near Lunga at 115,138, Range 29,000 Yards

Japanese Ships
BB Kongo, Shell hits 2
BB Haruna, Shell hits 2
BB Hiei, Shell hits 1
BB Kirishima
DD Hamakaze, Shell hits 4
DD Nowaki, Shell hits 1

Allied Ships
DD Bache
DD Conway, Shell hits 12, and is sunk
DD Eaton, Shell hits 2, and is sunk
DD Jenkins
DD Philip, Shell hits 1
DD Strong, Shell hits 7

Maximum visibility in Clear Conditions: 30,000 yards
CONTACT: Japanese lookouts spot Allied task force at 29,000 yards
CONTACT: Allied lookouts spot Japanese task force at 29,000 yards
BB Kirishima engages DD Eaton at 29,000 yards
BB Hiei engages DD Eaton at 29,000 yards
BB Kirishima engages DD Eaton at 29,000 yards
Taylor, E.B. orders Allied TF to disengage Taylor, E.B is a clever man!
...
Task forces break off...

It's good to take out a couple of Fletcher's. The Allies may get more than they'll ever need, but I'll sink them when I can.

Somehow, on the 28th, the Denver and company manage to dodge the Kongo's with their radar and plaster the airbase at Lunga:
--------------------------------------------------------------------------------
Night Naval bombardment of Lunga at 114,138

Japanese aircraft
no flights

Japanese aircraft losses
A6M5 Zero: 25 damaged
A6M5 Zero: 1 destroyed on ground
Ki-46-III Dinah: 15 damaged
Ki-45 KAIa Nick: 46 damaged
Ki-45 KAIa Nick: 1 destroyed on ground
D3A2 Val: 12 damaged
D3A2 Val: 1 destroyed on ground
D4Y1-C Judy: 20 damaged
D4Y1-C Judy: 1 destroyed on ground

Allied Ships
CL Denver
DD Wilson
DD Sterett
DD Ralph Talbot
DD Chevalier
DD Fletcher

Japanese ground losses:
305 casualties reported
Squads: 0 destroyed, 2 disabled
Non Combat: 4 destroyed, 45 disabled
Engineers: 0 destroyed, 16 disabled
Guns lost 17 (3 destroyed, 14 disabled)

Airbase hits 14
Airbase supply hits 8
Runway hits 69
Port fuel hits 1

CL Denver firing at Lunga
DD Wilson firing at Lunga
DD Sterett firing at Lunga
DD Ralph Talbot firing at Lunga
DD Chevalier firing at Lunga
DD Fletcher firing at Lunga

The losses are the usual inflated results from FOW, but the airbase is closed, and kept closed by 4E raids from the New Hebrides. Tassafaronga and Tulagi were left alone and operational.

It's for the best that the Kongo's didn't engage on the 28th, as they'd used up all their main gun ammo the previous day, and trying to fight Fletcher's and a Cleveland with the 15cm secondary armament seems a pretty poor idea to me.

With the Kongo's headed to Truk to re-arm, I move in two crusier task forces to the Guadalcanal area: the two Tone class crusiers and a lighter force of the Natori, Kuma and Kiso. There job is to protect a convoy trying to load troops from Tulagi. Both are in position by the 30th.

May 31st finds both these forces off-shore of Guadalcanal, with an American carrier force to their east! Thanks to the weather, or sheer luck, there's no American strike on the 31st, so the IJN has a chance to react, rather than being sunk outright.

While the option to run away exists, I decide to take a gamble, and send the Natori, Kuma and Kiso to try and get a night-time intercept on the American ships and then disband at the Stewart Island dot hex to dodge the daylight strike from the carriers. The two Tone's are ordered to make their escape towards Rabaul at full speed.

June 1st is a disapointment: the plucky IJN light crusiers don't get an intercept during the night, and they don't disband into the dot hex (my fault). The American carriers get another chance to do what they missed on the 31st:
--------------------------------------------------------------------------------
Morning Air attack on TF, near Stewart Island at 116,139

Weather in hex: Severe storms

Raid spotted at 17 NM, estimated altitude 10,000 feet.
Estimated time to target is 6 minutes

Allied aircraft
F6F-3 Hellcat x 54
SB2C-1C Helldiver x 14
SBD-3 Dauntless x 36
SBD-5 Dauntless x 31

Allied aircraft losses
SBD-3 Dauntless: 1 damaged
SBD-5 Dauntless: 1 damaged

Japanese Ships
DD Asanagi, Bomb hits 2, heavy fires, heavy damage
CL Kuma, Bomb hits 7, on fire, heavy damage
CL Kiso, Bomb hits 3, on fire, heavy damage
CL Natori
DD Hatakaze
DD Matsukaze
DD Yunagi

Aircraft Attacking:
19 x SBD-5 Dauntless releasing from 4000' *
Naval Attack: 1 x 500 lb SAP Bomb
6 x SB2C-1C Helldiver releasing from 4000'
Naval Attack: 1 x 1000 lb SAP Bomb, 2 x 250 lb SAP Bomb
8 x SBD-3 Dauntless releasing from 2000'
Naval Attack: 1 x 1000 lb SAP Bomb
19 x SBD-3 Dauntless releasing from 3000'
Naval Attack: 1 x 1000 lb SAP Bomb
12 x SBD-5 Dauntless releasing from 2000' *
Naval Attack: 1 x 500 lb SAP Bomb
9 x SBD-3 Dauntless releasing from 4000'
Naval Attack: 1 x 1000 lb SAP Bomb
4 x SB2C-1C Helldiver releasing from 2000'
Naval Attack: 1 x 1000 lb SAP Bomb, 2 x 250 lb SAP Bomb
4 x SB2C-1C Helldiver releasing from 3000'
Naval Attack: 1 x 1000 lb SAP Bomb, 2 x 250 lb SAP Bomb

Heavy smoke from fires obscuring CL Kiso


--------------------------------------------------------------------------------
Morning Air attack on TF, near Stewart Island at 116,139

Weather in hex: Severe storms

Raid spotted at 17 NM, estimated altitude 14,000 feet.
Estimated time to target is 6 minutes

Allied aircraft
F6F-3 Hellcat x 18
SBD-3 Dauntless x 31

Allied aircraft losses
SBD-3 Dauntless: 1 damaged

Japanese Ships
CL Kuma, on fire, heavy damage
CL Kiso, Bomb hits 1, heavy fires, heavy damage
CL Natori
DD Hatakaze
DD Matsukaze

Aircraft Attacking:
12 x SBD-3 Dauntless releasing from 2000'
Naval Attack: 1 x 1000 lb SAP Bomb
11 x SBD-3 Dauntless releasing from 4000'
Naval Attack: 1 x 1000 lb SAP Bomb
8 x SBD-3 Dauntless releasing from 3000'
Naval Attack: 1 x 1000 lb SAP Bomb

Heavy smoke from fires obscuring CL Kuma
Heavy smoke from fires obscuring CL Kiso


--------------------------------------------------------------------------------
Afternoon Air attack on TF, near Stewart Island at 116,139

Weather in hex: Thunderstorms

Raid spotted at 9 NM, estimated altitude 4,000 feet.
Estimated time to target is 4 minutes

Allied aircraft
TBF-1 Avenger x 16

No Allied losses

Japanese Ships
CL Kuma, Torpedo hits 2, and is sunk
CL Kiso, heavy fires, heavy damage
DD Yunagi
DD Hatakaze

Aircraft Attacking:
16 x TBF-1 Avenger launching torpedoes at 200 feet
Naval Attack: 1 x 22in Mk 13 Torpedo

--------------------------------------------------------------------------------
Afternoon Air attack on TF, near Stewart Island at 116,139

Weather in hex: Thunderstorms

Raid spotted at 16 NM, estimated altitude 10,000 feet.
Estimated time to target is 6 minutes

Allied aircraft
F6F-3 Hellcat x 72
SB2C-1C Helldiver x 14
SBD-3 Dauntless x 63

Allied aircraft losses
SB2C-1C Helldiver: 2 damaged
SBD-3 Dauntless: 1 damaged

Japanese Ships
CL Natori
DD Hatakaze, Bomb hits 1, on fire
DD Yunagi
CL Kiso, and is sunk
DD Asanagi, Bomb hits 1, and is sunk
DD Matsukaze

Aircraft Attacking:
6 x SB2C-1C Helldiver releasing from 4000'
Naval Attack: 1 x 1000 lb SAP Bomb, 2 x 250 lb SAP Bomb
18 x SBD-3 Dauntless releasing from 2000'
Naval Attack: 1 x 1000 lb SAP Bomb
7 x SBD-3 Dauntless releasing from 4000'
Naval Attack: 1 x 1000 lb SAP Bomb
8 x SB2C-1C Helldiver releasing from 3000'
Naval Attack: 1 x 1000 lb SAP Bomb, 2 x 250 lb SAP Bomb
4 x SBD-3 Dauntless releasing from 3000'
Naval Attack: 1 x 1000 lb SAP Bomb
17 x SBD-3 Dauntless releasing from 2000'
Naval Attack: 1 x 1000 lb SAP Bomb
8 x SBD-3 Dauntless releasing from 4000'
Naval Attack: 1 x 1000 lb SAP Bomb
9 x SBD-3 Dauntless releasing from 3000'
Naval Attack: 1 x 1000 lb SAP Bomb

Heavy smoke from fires obscuring DD Hatakaze
Heavy smoke from fires obscuring CL Kiso
Heavy smoke from fires obscuring DD Asanagi


--------------------------------------------------------------------------------

Somehow, the Natori emerges unharmed, along with two destroyers. The destroyer Hatakaze, nursing a bomb hit, is slowed but still capable of escape. As the American fleet has moved south-west, the remaining ships have a clear run at escape northwards.

Based on the number of planes and my naval search, I'd guess there's likely five American carriers working together.

Operation Ke

Lokasenna has commited carriers in an effort to disrupt the evacuation of Guadalcanal. I've dispatched the KB from Truk, and should meet up west of Narau Island around June 6th. Once regrouped, the KB will act as a deterent to Allied efforts to interfere with the evacuation of units from Guadalcanal.

While Lunga airbase is useless (and will be for some time), Tassafaronga, Tulagi and the Russell Islands are all in working condition.

My goal is to present Lokasenna a choice: interfere with the evacuation of Guadalcanal at the risk of exposing his fleet carriers to both land-based and carrier-based air strikes or to let me withdraw my carriers in peace. Either one is fine to me.

DEI

Gove now has a level 1 port. I'll try to get some IJA bombers escorted by Oscars to interfere in the next few turns.

In a very amusing coup-de-main, the Allies take Tarakan by sub. I'd removed the AF unit from Tarakan and Miri to shore up the Lower DEI area and hadn't got around to replacing it. Thankfully the oil isn't damaged, and there's a Naval Guard en-route to re-take the base. I'm running a garrison Bn in to Miri at full speed to stop the same thing from happening twice.

China-Burma-India

The Allied paratrooper offensive in the Far-West of China continues. The Allies take Wasu, but fail to take Urumchi from the Cavarly Bde garrisoning the base. The Allies will need to fly more in to take the base, which I think they're likely to do. Lokasenna doesn't have a China to transport supply into, so he can use his transport aircraft to support this absurdly amusing operation in Western China from bases in India.

I'm sending a single tank regiment to Urumchi, but it will be a while before it arrives. Losing Urumchi is no great loss: nothing was flowing out of it anyways, and if the Allies are serious about re-opening China from the West, I'll concentrate some units around Lanchow and let the Allies run a campaign 21 hexes from their supply source.

Burma starts to heat up! Chindits drop at Prome, and despite catching a Thai regiment resting, they fail to take the base. Some tanks and a IJA paratrooper unit are quick to respond, and things don't look too good for the 111th Chindit Brigade.

In the north, the Chinese have another go at cracking the IJA 10th Division:

Ground combat at 61,41 (near Imphal)

Allied Deliberate attack

Attacking force 42697 troops, 162 guns, 0 vehicles, Assault Value = 1513

Defending force 13383 troops, 124 guns, 42 vehicles, Assault Value = 422

Allied adjusted assault: 299

Japanese adjusted defense: 772

Allied assault odds: 1 to 2

Combat modifiers
Defender: terrain(+), leaders(+), experience(-)
Attacker: leaders(-), fatigue(-)

Japanese ground losses:
524 casualties reported
Squads: 2 destroyed, 53 disabled
Non Combat: 0 destroyed, 3 disabled
Engineers: 0 destroyed, 3 disabled
Guns lost 4 (1 destroyed, 3 disabled)

Allied ground losses:
1572 casualties reported
Squads: 12 destroyed, 246 disabled
Non Combat: 0 destroyed, 19 disabled
Engineers: 0 destroyed, 10 disabled

Assaulting units:
53rd Chinese Corps
87th Chinese Corps
94th Chinese Corps

Defending units:
10th Division


Results like this are making me feel a good deal better about the Chinese mega-army forming inside India. Despite the 3-1 advantage in raw AV, the sole Japanese division can hold it's own.

However, it seems that there's 25 Chinese units marching on Myitkyina, but only 4 IJA divisions to oppose them. As a result, I'm pulling back units to concentrate on defending the railroad link to Myitkyina and trying to keep the Allied supply lines as long as possible. That's going to be difficult, seeing as there's a bunch of Allied transport aircraft with nothing to do, but I have to try...


Well, that was a long post.

[center]Image
The crusier Kuma. The crusiers of the IJN have been bearing the brunt of losses since the start of the war: 3 heavy crusiers and 11 light crusiers have been lost since the start of the war.[/center]
User avatar
Bullwinkle58
Posts: 11297
Joined: Tue Feb 24, 2009 12:47 pm

RE: Moresby Melee

Post by Bullwinkle58 »

ORIGINAL: mind_messing
I'm sending a single tank regiment to Urumchi, but it will be a while before it arrives. Losing Urumchi is no great loss: nothing was flowing out of it anyways, and if the Allies are serious about re-opening China from the West, I'll concentrate some units around Lanchow and let the Allies run a campaign 21 hexes from their supply source.

Urumchi is its own supply source.
The Moose
Post Reply

Return to “After Action Reports”