Post #13
Turn Four / 10 Dec 1940 / 0600: Day Two of Operation Compass. Now that the Italians are no longer “FIXED”, time to review the Commonwealth’s Logistics Status, Air, and Naval Gunfire status + the Disposition/Plan of Action for O'Connor’s Ground Forces.
Fuel = 239 and Ammunition = 109 (the Commonwealth Started with 120).
Have been receiving approx. 20 Ammo Points per Turn and the same for Fuel. During Turns One through Three, when I Moved or Attacked with the Commonwealth Brigades I used “Combat+” versus “Move+” or “Basic” Supply. My Reserve (4th Armored Brigade) and 7th Armored Division “Dummy Brigade” I kept in “Basic” Supply.
Air: The Commonwealth has three Blenheim Bomber Squadrons, two Hurricane Fighter Squadrons, and two Gladiator Fighter Squadron. As well as two Lysander Reconnaissance Squadrons. To ensure I always have Air Power available to Support O’Connor’s Ground Forces, I’ve elected to “Platoon” the Royal Air Force.
“1st Platoon”: Two Hurricane, one Blenheim, and one Lysander Squadron
“2nd Platoon”: One Gladiator, two Blenheim, and one Lysander Squadron
With “1st Platoon” only flying during the odd numbered Turns and “2nd Platoon” only flying during the even Turns.
The remaining Gladiator Squadron I use as a “Float” between the two Platoons, but I try to only fly it every other Turn.
On Day One of Compass, I used the Bombers to provide Close Air Support, the Fighters to Interdict the Italian’s Supply Convoys + Reduce the Command and Control (C2) Range of the Italian Headquarters, and Recce to keep an eye on the Italian Troops vicinity Sollum.
Will take a risk and do same during day two; not flying any Counter Air Missions.
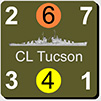
Naval Gunfire: Have been using a similar “Platooning-system” for the Royal Navy. Having two Ships each turn provide Naval Gunfire, mostly in Support of Shelby Force.


