
Andrew Spearin, Producer, On Target Simulations
Introduction
The purpose of this AAR is to showcase how playing Flashpoint Campaigns: Cold War is less about gaming the systems, and more of an exercise in thinking and acting as a commander of ground forces. We'll take an analytical approach to how we planned our operations and see how the scenario unfolded; highlighting the strong points and invite any discussion on points to improve.
We are using the Every Cat is Black at Night play through from the October 16th, 2025 gameplay livestream on the SlitherineTV Twitch channel. You can watch the full battle in real-time action here. Read on below as we break down in further detail.
This will be a multi-part AAR posted below, with this initial post providing a situational picture of the scenario. Next, we'll look at the general plan for our primary course of action. We'll chronologically follow the main events as they unfolded. Finally, we'll assess the end results.
1. Situation:
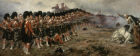
- Every-Cat-AAR.jpg (1.55 MiB) Viewed 3534 times
Every Cat is Black at Night
D+1 | 21 July 1989, 2300hrs - 0500hrs | West Germany vs Czechoslovakia @ Landau ad Isar
Scenario by Jo Lima; Mike Johnstone | Map by William van der Sterren
Player 1:
NATO: 4th PanzerGrenadier Division [4.PzGrenDiv]
Commander: Generalmajor Berthold [Andrew Spearin]
Second-in-Command: Oberst Borsack [Gary Chezem]
Player 2:
Warsaw Pact: 9th Tank Division [9. Tank Divize]
Commander: generálmajor Weiss [CPU]
As the battle in Straubing developed, the Czechoslovakian 9th Tank Division began to drift south towards Landau ad Isar. With the Czechoslovakian 2nd Motor Rifle Division locked in combat with the West German forces in Straubing, the surrounding countryside south of the city held promise for quick exploitation. Unfortunately, the day was lost in the engagements in Straubing, and it was nighttime before the 9th was in a position to exploit the temporary local advantage the Czechoslovakian forces had.
In the 9th Tank Division HQ, there was severe indecision about making a nocturnal advance in the barely reconnoitered ground. Unlike their fellow countrymen north of Straubin, the Czechoslovakian forces in this area had been plagued by indecision and stop-and-go movement. The 2nd Motor Rifle Division was in a difficult position since, even though it had succeeded in opening a gap in the 9th Tank Division, it had entangled itself with the West German forces in Straubing. This earned the Divisional Commander a stern rebuke from the Army HQ, which was still demanding continued pressure and relentless advance.
The West German 4th PzG Division had reasons to feel marginally more optimistic. Not only had they stopped two Czechoslovakian divisions, but they could now use the night to maneuver reinforcements and consolidate their defense. At a higher level, NATO had concerns over the fact that the Czechoslovakians had secured a bridgehead over the Donau and that there were no forces to make an immediate counter. They were going to have to rely on aerial and artillery attacks to eliminate and harass the bridgehead forces. There was also concern over the gap south of Straubing. It was uncertain whether the Czechoslovakians would exploit it before the 4th PzG Division could plug it. The Divisional Commander of the 4th PzG Division wanted to consolidate his defense and counter-attack at first light on 22 July. For that purpose, the commander was moving armored forces hastily toward the area. Unfortunately, the counter-attack against the bridgehead was not meant to be.
During the early evening of the 21st, the Czechoslovakian High Command, under Soviet pressure, took control of operations in this area. In a frantic affair, the forward groups of the 9th Tank Division were consolidated into a mighty armored fist with orders to make a night drive towards Landau ad Isar and beyond if possible. As they started the advance, they realized they had just moved towards a gap in NATO's defenses. Being the defender in their own land, the HQ 4th PzG Division was quickly made aware of this. The division immediately began rushing forward with whatever mobile forces they could assemble to throw against the flank of the advancing Czechoslovakians.
Annex A: Order of Battle (ORBAT) 4.PzGrenDiv
- HQ 4. PzGrenDiv
- HQ JgBtl 47
- HQ 2/JgBtl 47
- 1/2/JgBtl 47
- 2/2/JgBtl 47
- 3/2/JgBtl 47
- HQ 3/JgBtl 47
- 1/3/JgBtl 47
- 2/3/JgBtl 47
- 3/3/JgBtl 47
- HQ 4/JgBtl 47
- 1/4/JgBtl 47
- 2/4/JgBtl 47
- 3/4/JgBtl 47
- HQ 5/JgBtl 47
- 1/5/JgBtl 47
- 2/5/JgBtl 47
- HQ 2/JgBtl 47
- HQ PzAufklBtl 4
- HQ 2/PzAufklBtl 4
- 1/2/PzAufklBtl 4
- 2/2/PzAufklBtl 4
- 3/2/PzAufklBtl 4
- 4/Radarzug 4
- HQ 3/PzAufklBtl 4
- 1/3/PzAufklBtl 4
- 2/3/PzAufklBtl 4
- 3/3/PzAufklBtl 4
- 6/Radarzug 4
- HQ 4/PzAufklBtl 4
- 1/4/PzAufklBtl 4
- 2/4/PzAufklBtl 4
- 3/4/PzAufklBtl 4
- 4/4/PzAufklBtl 4
- 5/4/PzAufklBtl 4
- 6/4/PzAufklBtl 4
- 8/Radarzug 4
- HQ 5./PzAufklBtl 4
- 1/5/PzAufklBtl 4
- 3/5/PzAufklBtl 4
- 2/5/PzAufklBtl 4
- 10/Radarzug 4
- HQ 2/PzAufklBtl 4
- HQ 4/RakArtBtl 42
- 1/4/RakArtBtl 42
- 2/4/RakArtBtl 42
- HQ 5/RakArtBtl 42
- 1/5/RakArtBtl 42
- 2/5/RakArtBtl 42
- WG WLR
- HQ JgBtl 47
Annex B: Intelligence Preparation of the Battlefield (IPB)
- IR.jpg (1.27 MiB) Viewed 3534 times
Landau an der Isar, Bayern, West-Germany | 48°40'00"N 12°42'00" | 20 x 15 km area
Named Areas of Interest (NAI):
- APPLE: A high value objective along the A92 mobility corridor; anticipated as a chokepoint for the main effort
- BERRY: Left flank area with minor objective
- CHERRY: Right flank area overlapping PIR EAST
- DRAGON: Blocking position at a critical junction along the mobility corridor that leads to Landau an der Isar
- ELDER: High value objective area
- FIG: Critical objective area at western edge of the AO
- NORTH: required to monitor for a left flank maneuvre
- EAST: required to monitor a right flank maneuvre
Weather forecast is clear, with no moon 0% illumination.
Dawn is at 02:56
Enemy Forces
The 18th Tank Regiment of the 9th Czechoslovakian Tank Division is the expected opposing force.
Intel reports indicate that local enemy forces may contain 50 to 60 Recce, over 80 Tank, over 80 APC, over 80 Inf, 6 to 10 SP AT, 10 to 20 AT, over 80 HQ, 20 to 30 AD, 6 to 10 SPArty, 40 to 50 Arty, 30 to 40 Utility and 1 to 5 WLR subunits.
A typical force structure for a Czechoslovakian armoured reconnaissance element could look like this:
- Czech-Force-Recon.png (19.95 KiB) Viewed 3534 times
NOTE: Intelligence reports T-72 tanks are equipped in the forward elements of this force.
- Czech-Force.png (51.11 KiB) Viewed 3534 times
NOTE: Intelligence reports 130mm M46 are equipped with this artillery battalion. They are likely equipped with illumination rounds to enhance their night fighting capability.
- Czech-Force-Arty.png (28.34 KiB) Viewed 3534 times
Expect a high tempo as the enemy tank division is pushing towards a breakthrough.
Reconnaissance elements will be in the lead, likely taking main roadways until making contact.
Expect T-72 tanks as their primary force, followed by motor rifle companies and second echelon tanks.
Artillery with this division is limited, but still effective.
Enemy Courses of Action (ECOAs)
Most Likely ECOA:
Main effort moving fast along mobility corridor towards APPLE
Most Dangerous ECOA:
Forces split with flanking elements through BERRY and/or CHERRY
High mobility advance party moving faster than our force can arrive to DRAGON, ELDER and FIG
Intelligence Gaps
Our forces are moving into the AO from the north-west and currently do not have active information from any NAI or PIR. Rapid movement of armoured reconnaissance to monitor PIRs is imperative.
Assessment
According to enemy doctrine, the MLECOA and MDECOA are both anticipated.
2. Mission
Block further penetration by enemy forces along the A92 corridor.
Next: NATO Planning & Execution