By Larry
My Directive 21 Game - Part I
[/center]
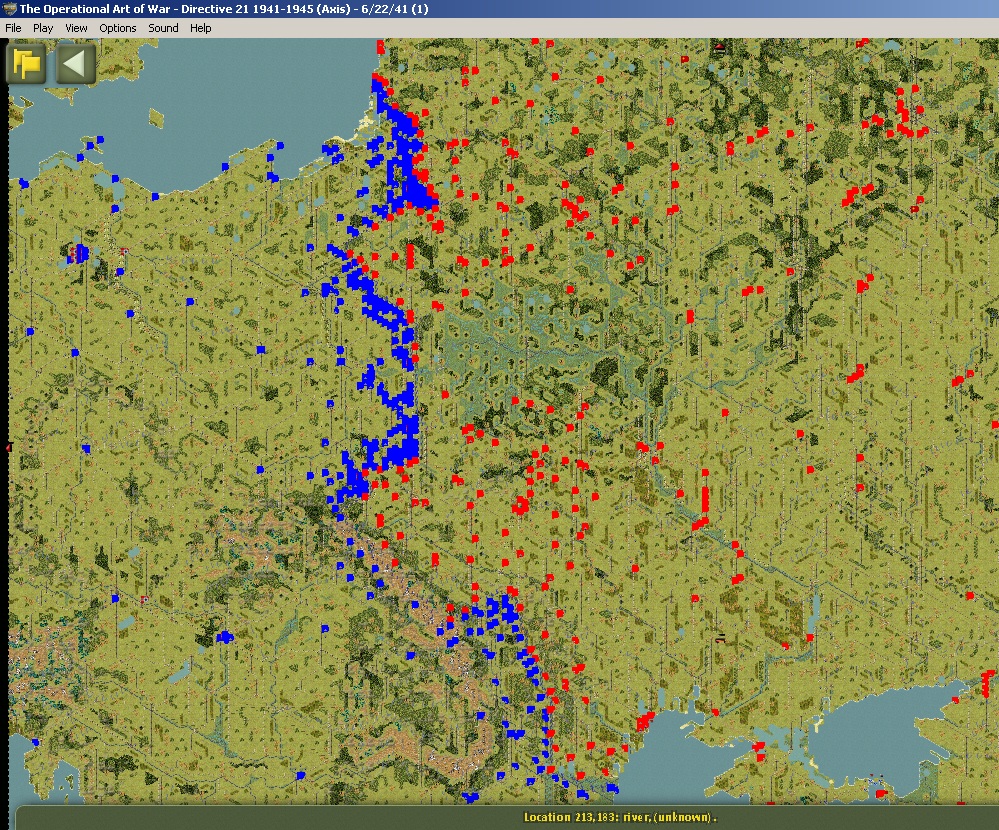
As of June 22, 1941
Here's what the map looks like zoomed all the way out at game start from the Axis point of view.
Here's the game options I'm using.
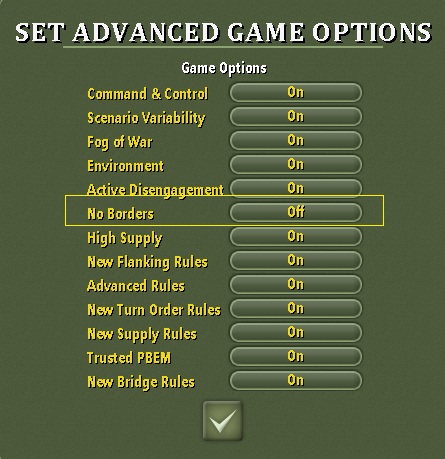
I notice that the proficiency of the German fighters is exemplory and higher than I expected. I'd like to keep track of this air unit to see if the proficiency gets any higher as the game goes on. The Axis air shock is 140 and the Soviet air shock is 28 or so and I'm thinking that the situation calls for some airfield attacks to punish the Soviet air power a bit. Cut down on the numbers I'll have to fight when the shock levels normalize.

I did a save game and then executed the airfield attacks as a sandbox exercise and I saw lot of evaporating Soviet air units and those that survived the attacks are in poor shape but I don't expect Elmer to pull them back to safety ro rest. Let's see if he does.

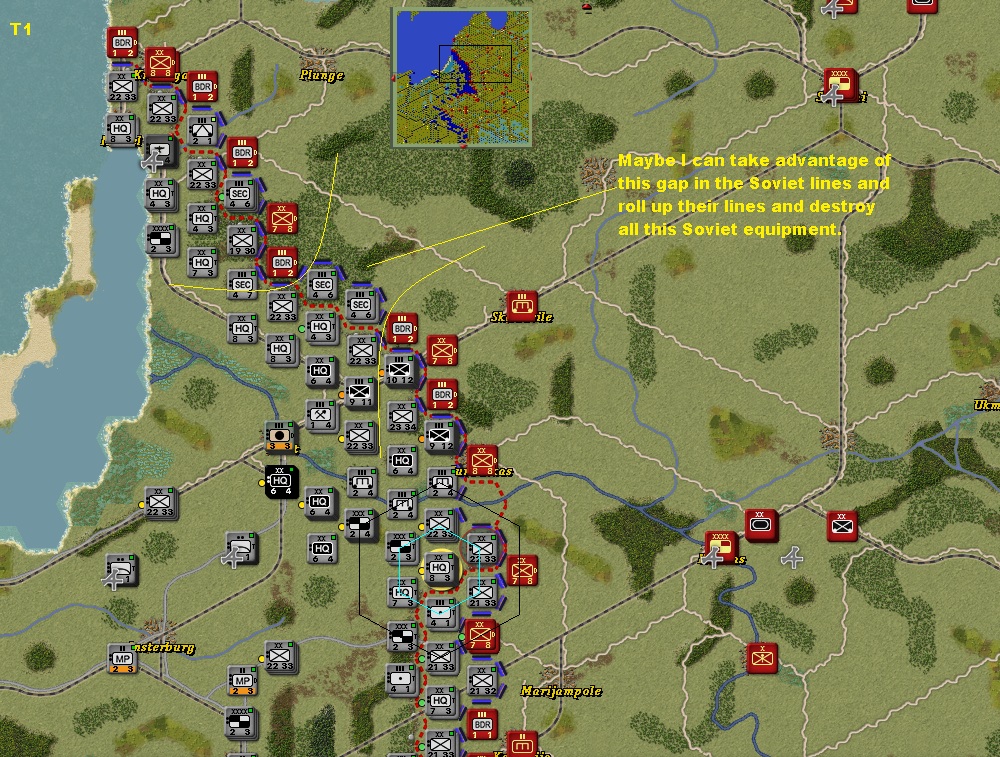
Here's what the front lines look like at game start. Nothing special in my strategy...goal is Riga and Pskov eventually.
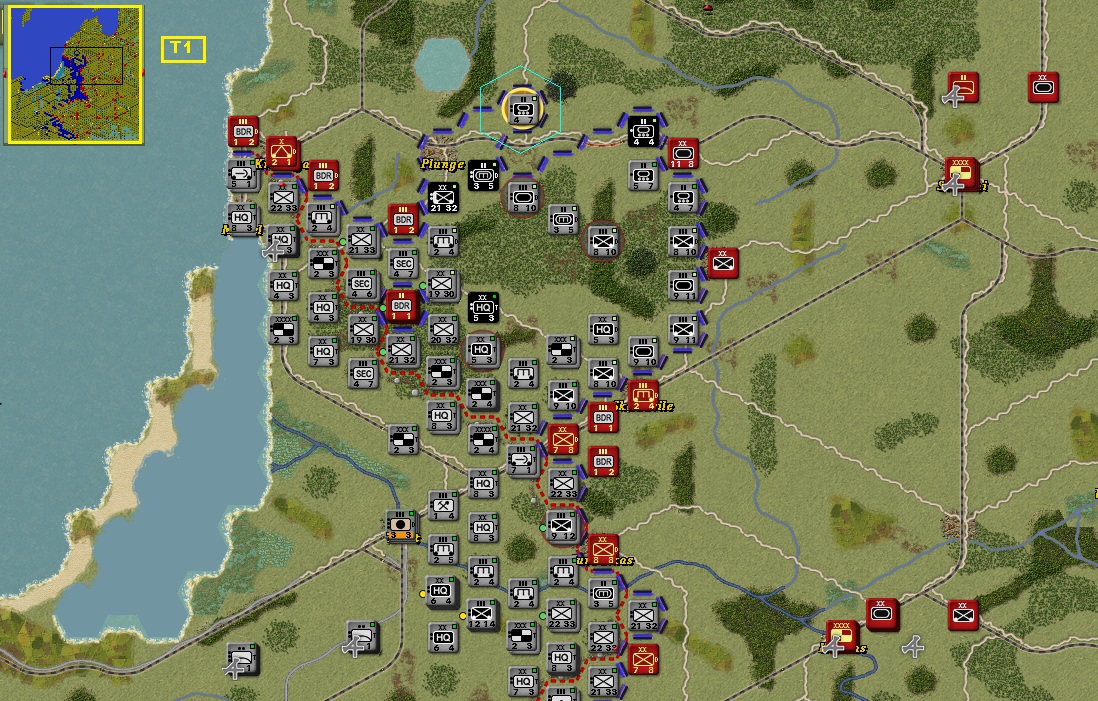
I've formed some bulges in the Soviet front line and I'm trying to push some Panzers through. They are heading out in the north but the south is still unaavoidably blocked. Maybe it's time to drop the paratroops.

This is what the bulge had developed into in the north after I've moved about 100 units. I'm moving the Panzers as far as they will go and shoring up the walls of the bulge so as to allow more troops yet to pass through there.
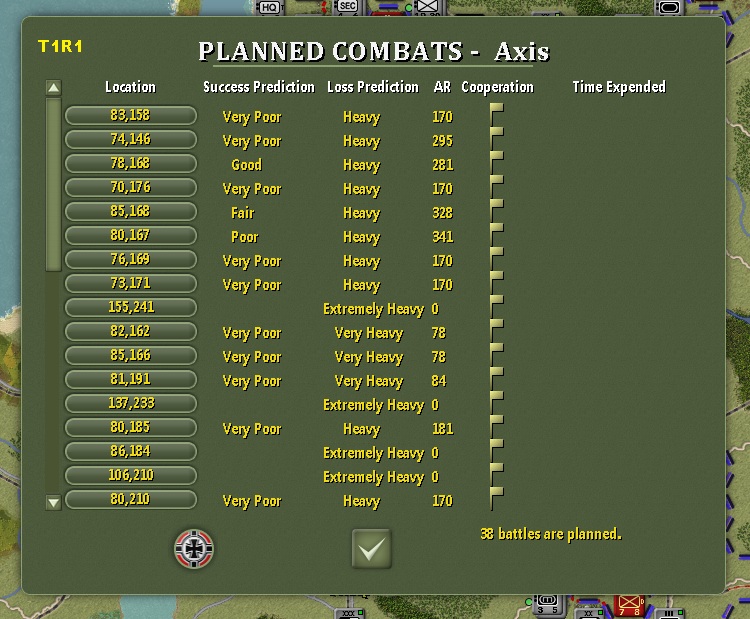
Here's some of the round one attacks pending.
Here's what's happening in the middle of the front lines. The Soviet lines have collapsed and the Axis forces are rushing in. I'm thinking of dropping the paratroopers where the Soviet forces will attempt to escape from the envelopment movement.

Here's the round 2 front lines in the north. I've developed some bulges and there's plenty of Soviet gaps. I've moved just about everybody as far as they can go.

Here's what's happening down south. I seem to have a nack for surrounding the enemy units before they get killed. More of the enemy equipment gets destroyed that way.

Here's the pending battles for T1 round 2 and there's a lot of them. I expect to eliminate a lot of Soviet equipment this time.

Here's the round 3 front lines in the north. I've surrounded and destroyed a bunch of Soviet units so now the path is clear to Riga and points north.

Here's what it looks like in the south right now. Progress is being made as Soviet units are destroyed and pushed aside.

In Round 3 the number of attacks is waining and targets are further apart. Most of the units have expended their movement points and there's only a few still active, moving or shooting.

There's only these few attacks left to do besides the last round units that are pending attack setups.

Here's what the front lines look like at the beginning of T1 round 5.

Round five has about half of the turn left and this is the round where I attack with everybody reguardless of MP's left. I'm hoping to break lose those log-jams that exist on the roads.

Now here in round 6 the attacks really are just a few.

And one more in round 7.

Here's how the air war is going. Lots of airfield strikes has caused a lot of losses to the Axis, especially the long- range bombers. I'll post a picture to show what I mean.
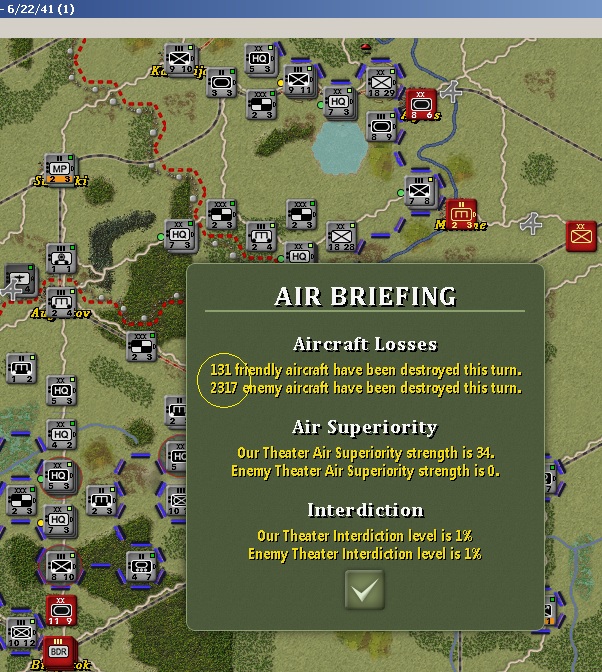
Here's what I mean about the losses of the medium bombers. You can see that losses have been moderate and not exactly light but around what's expected for the operational tempo.

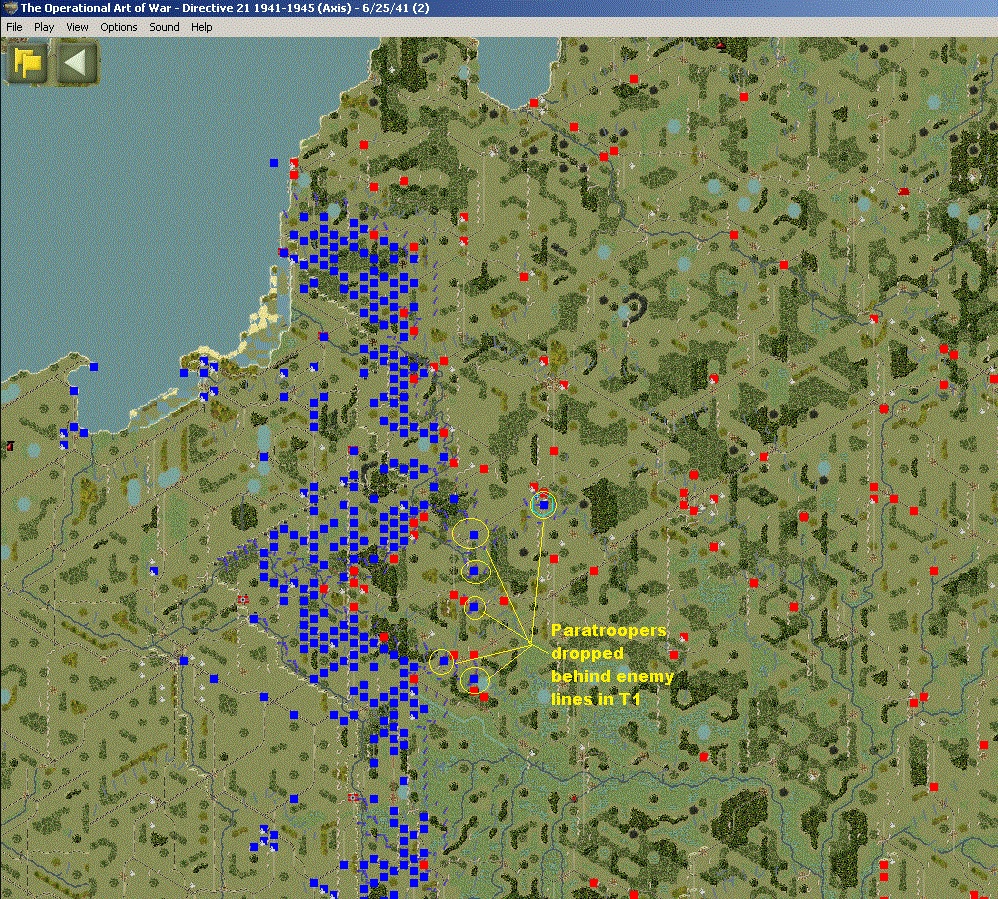
Here's the movement of the units during T1. I dropped some paratroopers to the east of the front lines in the middle of the map to prevent the Soviets from escaping my trap. I want to destroy as many of them as possible.

Here's the T2 front lines before I've moved anybody. It's panel 1 of the movement movie I'm going to make for this turn.
I've been moving units and the T2 front lines are changing. I've got my recon units out in front and everybody is moving in a gigantic tidal wave, mostly moving to the east.

[center]STAY TUNED FOR PART II![/center]